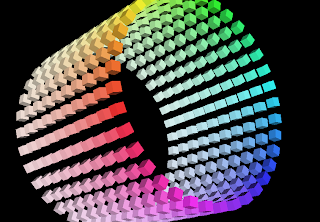
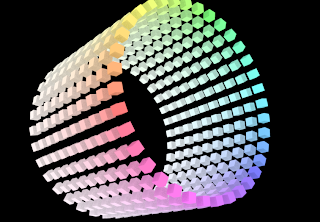
10 * { sat 0.8 y 2 } 1 * { hue -10 } 360 * { hue 10 ry 10 x 2 } box
Structure Synthでの出力画像

Sunflowでの出力画像

import java.io.*;
import javax.media.opengl.*;
import com.sun.opengl.util.*;
import com.sun.opengl.util.texture.*;

public class JoglSample30
{
    // 出力画像サイズ
    private static int width = 300;
    private static int height = 300;

    public static void main(String args[])
        throws IOException
    {
        GLDrawableFactory gldf =
            GLDrawableFactory.getFactory();
        GLCapabilities glc = new GLCapabilities();
        glc.setDoubleBuffered(false);
        GLPbuffer buf = gldf.createGLPbuffer(
           glc, null, width, height, null);

        buf.addGLEventListener(
            new GLEventListener(){
            // 初期化
            public void init(GLAutoDrawable dr)
            {
                GL gl = dr.getGL();
                // 背景色
                gl.glClearColor(
                    (float)0xf0/(float)0xff,
                    (float)0xf0/(float)0xff,
                    (float)0xf0/(float)0xff,
                    1f);

                try
                {
                Texture texture = TextureIO.newTexture(
                    new File("sf.jpg"), true);
                texture.enable();
                texture.bind();
                }
                catch(IOException ioex){}

            }

            public void display(GLAutoDrawable dr)
            {
                GL gl = dr.getGL();
                GLUT glut = new GLUT();
                gl.glViewport(0, 0, width, height);

                // 透視投影
                gl.glMatrixMode(GL.GL_PROJECTION);
                gl.glLoadIdentity();
                float ratio = (float)height/(float)width;
                gl.glFrustum(-1.0f, 1.0f, -ratio, ratio,
                    5.0f, 40.0f);

                gl.glMatrixMode(GL.GL_MODELVIEW);
                gl.glLoadIdentity();
                gl.glTranslatef(0.0f, 0.0f, -10.0f);

                gl.glEnable(GL.GL_LIGHTING);
                gl.glEnable(GL.GL_LIGHT0);
                gl.glEnable(gl.GL_COLOR_MATERIAL);
                gl.glEnable(GL.GL_NORMALIZE);
                gl.glEnable(GL.GL_DEPTH_TEST);
                gl.glEnable(GL.GL_CULL_FACE);
                gl.glClear(GL.GL_COLOR_BUFFER_BIT |GL.GL_DEPTH_BUFFER_BIT );

                gl.glPushMatrix();
                // Y軸回転
                gl.glRotatef(20.0f, 0.0f, 1.0f, 0.0f);
                // テクスチャが張られたポリゴンを描画
                gl.glBegin(GL.GL_POLYGON);
                gl.glTexCoord2f(0.0f, 1.0f);
                gl.glVertex3f(-1.5f, -1.5f,  0.0f);
                gl.glTexCoord2f(1.0f, 1.0f);
                gl.glVertex3f(1.5f, -1.5f,  0.0f);
                gl.glTexCoord2f(1.0f, 0.0f);
                gl.glVertex3f(1.5f,  1.5f,  0.0f);
                gl.glTexCoord2f(0.0f, 0.0f);
                gl.glVertex3f(-1.5f,  1.5f,  0.0f);
                gl.glEnd();

                gl.glPopMatrix();
            }

            public void reshape(
                GLAutoDrawable dr,
                int x, int y,
                int width, int height){}

            public void displayChanged(
                GLAutoDrawable dr,
                boolean modeChanged,
                boolean deviceChanged){}
          }
        );

        GLContext context =  buf.createContext(null);
        context.makeCurrent();
        buf.display();
        Screenshot.writeToFile(
            new File("sample1188a.png"), width, height, true);
        context.release();
        context.destroy();
    }
}

<!DOCTYPE html PUBLIC "-//W3C//DTD XHTML 1.0 Strict//EN"
 "http://www.w3.org/TR/xhtml1/DTD/xhtml1-strict.dtd">
<html xmlns="http://www.w3.org/1999/xhtml" lang="ja"
 xml:lang="ja" dir="ltr">
<head>
<title>sample1138(ImageMagick6.5.2)</title>
</head>
<body>
<?php
$im = new Imagick('sf.jpg');
$iw = $im->getImageWidth();
$ih = $im->getImageHeight();
$im->setImageVirtualPixelMethod(Imagick::VIRTUALPIXELMETHOD_TILE);

$points = array(
 0,0, $iw/8,$ih/8,
 $iw,0, $iw*3/4,$ih/4,
 $iw,$ih, $iw*3/4, $ih*3/4,
 0,$ih, $iw/8,$ih*7/8
 );
// PerspectiveDistortion in distort.h
$im->distortImage(4, $points, false);
$im->writeImage('sample1138a.png');
$im->destroy();
?>
<img src="sample1138a.png" /><br />

</body>
</html>


import java.io.*;
import javax.media.opengl.*;
import com.sun.opengl.util.*;

public class JoglSample29
{
    // 出力画像サイズ
    private static int width = 300;
    private static int height = 300;

    public static void main(String args[])
        throws IOException
    {
        GLDrawableFactory gldf =
            GLDrawableFactory.getFactory();
        GLCapabilities glc = new GLCapabilities();
        glc.setDoubleBuffered(false);
        GLPbuffer buf = gldf.createGLPbuffer(
           glc, null, width, height, null);

        buf.addGLEventListener(
            new GLEventListener(){
            // 初期化
            public void init(GLAutoDrawable dr)
            {
                GL gl = dr.getGL();
                // 背景色
                gl.glClearColor(
                    (float)0xf0/(float)0xff,
                    (float)0xf0/(float)0xff,
                    (float)0xf0/(float)0xff,
                    1f);
            }

            public void display(GLAutoDrawable dr)
            {
                GL gl = dr.getGL();
                GLUT glut = new GLUT();
                gl.glViewport(0, 0, width, height);

                // 透視投影
                gl.glMatrixMode(GL.GL_PROJECTION);
                gl.glLoadIdentity();
                float ratio = (float)height/(float)width;
                gl.glFrustum(-1.0f, 1.0f, -ratio, ratio,
                    5.0f, 40.0f);

                gl.glMatrixMode(GL.GL_MODELVIEW);
                gl.glLoadIdentity();
                gl.glTranslatef(0.0f, 0.0f, -10.0f);

                gl.glEnable(GL.GL_LIGHTING);
                gl.glEnable(GL.GL_LIGHT0);
                gl.glEnable(gl.GL_COLOR_MATERIAL);
                gl.glEnable(GL.GL_NORMALIZE);
                gl.glEnable(GL.GL_DEPTH_TEST);
                gl.glEnable(GL.GL_CULL_FACE);
                gl.glClear(GL.GL_COLOR_BUFFER_BIT |GL.GL_DEPTH_BUFFER_BIT );

                gl.glPushMatrix();
                // 面の色を設定
                gl.glColor3f(
                    (float)0x77/(float)0xff,
                    (float)0x99/(float)0xff,
                    (float)0xff/(float)0xff
                );
                // X軸回転
                gl.glRotatef(45.0f, 1.0f, 0.0f, 0.0f);
                // Y軸回転
                gl.glRotatef(45.0f, 0.0f, 1.0f, 0.0f);
                // 球を描画
                gl.glScalef(1f,1f,0.5f);
                glut.glutSolidSphere(1.5f, 32, 32);
                gl.glPopMatrix();
            }

            public void reshape(
                GLAutoDrawable dr,
                int x, int y,
                int width, int height){}

            public void displayChanged(
                GLAutoDrawable dr,
                boolean modeChanged,
                boolean deviceChanged){}
          }
        );

        GLContext context =  buf.createContext(null);
        context.makeCurrent();
        buf.display();
        Screenshot.writeToFile(
            new File("sample1187a.png"), width, height, true);
        context.release();
        context.destroy();
    }
}

import groovy.swing.j2d.*

def gr = new GraphicsRenderer()
gr.renderToFile("sample1144a.png", 240, 80){
 antialias("on")
 font(new java.awt.Font('Tahoma', java.awt.Font.BOLD, 64))
 text( x:0, y:0,
   text: "Groovy",
   fill: color("#4466ff"),
   borderColor: no,
 ){
   filters {
     mosaic(blockSize: 4)
   }
 }
}


import java.io.*;
import javax.media.opengl.*;
import com.sun.opengl.util.*;

public class JoglSample28
{
    // 出力画像サイズ
    private static int width = 300;
    private static int height = 300;

    public static void main(String args[])
        throws IOException
    {
        GLDrawableFactory gldf =
            GLDrawableFactory.getFactory();
        GLCapabilities glc = new GLCapabilities();
        glc.setDoubleBuffered(false);
        GLPbuffer buf = gldf.createGLPbuffer(
           glc, null, width, height, null);

        buf.addGLEventListener(
            new GLEventListener(){
            // 初期化
            public void init(GLAutoDrawable dr)
            {
                GL gl = dr.getGL();
                // 背景色
                gl.glClearColor(
                    (float)0x77/(float)0xff,
                    (float)0x99/(float)0xff,
                    (float)0xff/(float)0xff,
                    1f);
            }

            public void display(GLAutoDrawable dr)
            {
                GL gl = dr.getGL();
                GLUT glut = new GLUT();
                gl.glViewport(0, 0, width, height);

                // 透視投影
                gl.glMatrixMode(GL.GL_PROJECTION);
                gl.glLoadIdentity();
                float ratio = (float)height/(float)width;
                gl.glFrustum(-1.0f, 1.0f, -ratio, ratio,
                    5.0f, 40.0f);

                gl.glMatrixMode(GL.GL_MODELVIEW);
                gl.glLoadIdentity();
                gl.glTranslatef(-4.0f, -6.0f, -25.0f);

                gl.glEnable(GL.GL_LIGHTING);
                gl.glEnable(GL.GL_LIGHT0);
                gl.glEnable(gl.GL_COLOR_MATERIAL);
                gl.glEnable(GL.GL_NORMALIZE);
                gl.glEnable(GL.GL_DEPTH_TEST);
//                gl.glEnable(GL.GL_CULL_FACE);
                gl.glClear(GL.GL_COLOR_BUFFER_BIT |
                    GL.GL_DEPTH_BUFFER_BIT );


                gl.glPushMatrix();
                // X軸回転
                gl.glRotatef(30.0f, 1.0f, 0.0f, 0.0f);
                // Y軸回転
                gl.glRotatef(35.0f, 0.0f, 1.0f, 0.0f);

                float cs = 0.4f;
                float gs = 0.5f;
                int xs = 20;
                int ys = 20;
                for(int ly=0;ly<ys;ly++){
                    for(int lx=0;lx<xs;lx++){
                        if( (lx+ly)%2 == 0 ){
                            gl.glColor3f(
                              (float)0xff/(float)0xff,
                              (float)0xff/(float)0xff,
                              (float)0xff/(float)0xff
                            );
                        } else {
                            gl.glColor3f(
                              (float)0xe0/(float)0xff,
                              (float)0xb0/(float)0xff,
                              (float)0x40/(float)0xff
                            );
                        }
                        gl.glTranslatef(gs, 0.0f, 0.0f);
                        glut.glutSolidCube(cs);
                    }
                    gl.glTranslatef(-gs*xs, gs, 0.0f);
                }

                gl.glPopMatrix();
            }

            public void reshape(
                GLAutoDrawable dr,
                int x, int y,
                int width, int height){}

            public void displayChanged(
                GLAutoDrawable dr,
                boolean modeChanged,
                boolean deviceChanged){}
          }
        );

        GLContext context =  buf.createContext(null);
        context.makeCurrent();
        buf.display();
        Screenshot.writeToFile(
            new File("sample1186a.png"), width, height, true);
        context.release();
        context.destroy();
    }
}

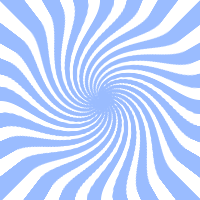
<!DOCTYPE html PUBLIC "-//W3C//DTD XHTML 1.0 Strict//EN"
  "http://www.w3.org/TR/xhtml1/DTD/xhtml1-strict.dtd">
<html xmlns="http://www.w3.org/1999/xhtml" lang="ja"
  xml:lang="ja" dir="ltr">
<head>
<title>sample1137(ImageMagick6.5.2)</title>
</head>
<body>
<?php
/* 画像サイズ */
$sx=200;
$sy=200;
/* 放射ストライプの中心 */
$cx=100;
$cy=100;
/* ストライプ数 */
$rays=24;
$sr=360/$rays;
/* 背景色 */
$bc="white";
/* ストライプ色 */
$sc="#99bbff";

$im = new Imagick();
$im->newImage($sx, $sy, $bc);
$idraw = new ImagickDraw();
$idraw->setFillColor($sc);
for($lc=0;$lc<$rays;$lc++){
  $points[] = array(
    'x' => $cx, 'y' => $cy);
  $points[] = array(
    'x' => $cx+cos(pi()*$sr*$lc/180)*$sx,
    'y' => $cy+sin(pi()*$sr*$lc/180)*$sy);
  $points[] = array(
    'x' => $cx+cos(pi()*($sr*$lc+$sr/2)/180)*$sx,
    'y' => $cy+sin(pi()*($sr*$lc+$sr/2)/180)*$sy);
  $idraw->polygon($points);
}
$im->drawImage($idraw);
$im->swirlImage(120);
$im->writeImage('sample1137a.png');
$idraw->destroy();
$im->destroy();
?>
<img src="sample1137a.png" /><br />

</body>
</html>


import java.io.*;
import javax.media.opengl.*;
import com.sun.opengl.util.*;

public class JoglSample27
{
  // 出力画像サイズ
  private static int width = 300;
  private static int height = 300;

  public static void main(String args[])
      throws IOException
  {
      GLDrawableFactory gldf =
          GLDrawableFactory.getFactory();
      GLCapabilities glc = new GLCapabilities();
      glc.setDoubleBuffered(false);
      GLPbuffer buf = gldf.createGLPbuffer(
         glc, null, width, height, null);

      buf.addGLEventListener(
          new GLEventListener(){
          // 初期化
          public void init(GLAutoDrawable dr)
          {
              GL gl = dr.getGL();
              // 背景色
              gl.glClearColor(
                  (float)0x77/(float)0xff,
                  (float)0x99/(float)0xff,
                  (float)0xff/(float)0xff,
                  1f);
          }

          public void display(GLAutoDrawable dr)
          {
              GL gl = dr.getGL();
              GLUT glut = new GLUT();
              gl.glViewport(0, 0, width, height);

              // 透視投影
              gl.glMatrixMode(GL.GL_PROJECTION);
              gl.glLoadIdentity();
              float ratio = (float)height/(float)width;
              gl.glFrustum(-1.0f, 1.0f, -ratio, ratio,
                  5.0f, 40.0f);

              gl.glMatrixMode(GL.GL_MODELVIEW);
              gl.glLoadIdentity();
              gl.glTranslatef(-2.0f, -2.0f, -12.0f);

              gl.glEnable(GL.GL_LIGHTING);
              gl.glEnable(GL.GL_LIGHT0);
              gl.glEnable(gl.GL_COLOR_MATERIAL);
              gl.glEnable(GL.GL_NORMALIZE);
              gl.glEnable(GL.GL_DEPTH_TEST);
//                gl.glEnable(GL.GL_CULL_FACE);
              gl.glClear(GL.GL_COLOR_BUFFER_BIT |
                  GL.GL_DEPTH_BUFFER_BIT );

              gl.glPushMatrix();
              // X軸回転
              gl.glRotatef(-70.0f, 1.0f, 0.0f, 0.0f);

               float tw = 0.4f;
               float th = 0.4f;
               int xs = 10;
               int ys = 10;
               for(int ly=0;ly<ys;ly++){
                   for(int lx=0;lx<xs;lx++){
                       if( (lx+ly)%2 == 0 ){
                           gl.glColor3f(
                             (float)0xf0/(float)0xff,
                             (float)0xf0/(float)0xff,
                             (float)0xf0/(float)0xff
                           );
                       } else {
                           gl.glColor3f(
                             (float)0x40/(float)0xff,
                             (float)0x40/(float)0xff,
                             (float)0x40/(float)0xff
                           );
                       }
                       gl.glRectf(lx*tw,ly*th,
                           (lx+1)*tw,(ly+1)*tw);
                   }
               }

               gl.glPopMatrix();
           }

           public void reshape(
               GLAutoDrawable dr,
               int x, int y,
               int width, int height){}

           public void displayChanged(
               GLAutoDrawable dr,
               boolean modeChanged,
               boolean deviceChanged){}
         }
       );

       GLContext context =  buf.createContext(null);
       context.makeCurrent();
       buf.display();
       Screenshot.writeToFile(
           new File("sample1185a.png"), width, height, true);
       context.release();
       context.destroy();
   }
}

import javax.imageio.*;
import groovy.swing.j2d.*

// 角のサイズ
dx = 20
dy = 20
img = ImageIO.read(new File("sf.jpg"))
def gr = new GraphicsRenderer()
gr.renderToFile("sample1143a.png",
  img.width, img.height){
  antialias("on")
  polygon(
    points: [dx,0, img.width-dx-1,0,
      img.width-1,dy,
      img.width-1,img.height-dy-1,
      img.width-dx-1, img.height-1,
      dx, img.height-1,
      0, img.height-dy-1,
      0, dy],
    borderColor: no
  ){
    texturePaint(x: 0, y: 0, image: img )
  }
}


import java.io.*;
import javax.media.opengl.*;
import com.sun.opengl.util.*;

public class JoglSample26
{
    // 出力画像サイズ
    private static int width = 300;
    private static int height = 300;

    public static void main(String args[])
        throws IOException
    {
        GLDrawableFactory gldf =
            GLDrawableFactory.getFactory();
        GLCapabilities glc = new GLCapabilities();
        glc.setDoubleBuffered(false);
        GLPbuffer buf = gldf.createGLPbuffer(
           glc, null, width, height, null);

        buf.addGLEventListener(
            new GLEventListener(){
            // 初期化
            public void init(GLAutoDrawable dr)
            {
                GL gl = dr.getGL();
                // 背景色
                gl.glClearColor(
                    (float)0x77/(float)0xff,
                    (float)0x99/(float)0xff,
                    (float)0xff/(float)0xff,
                    1f);
            }

            public void display(GLAutoDrawable dr)
            {
                GL gl = dr.getGL();
                GLUT glut = new GLUT();
                gl.glViewport(0, 0, width, height);

                // 透視投影
                gl.glMatrixMode(GL.GL_PROJECTION);
                gl.glLoadIdentity();
                float ratio = (float)height/(float)width;
                gl.glFrustum(-1.0f, 1.0f, -ratio, ratio,
                    5.0f, 40.0f);

                gl.glMatrixMode(GL.GL_MODELVIEW);
                gl.glLoadIdentity();
                gl.glTranslatef(0.0f, 0.0f, -12.0f);

                gl.glClear(GL.GL_COLOR_BUFFER_BIT);


                gl.glPushMatrix();
                // ビットマップ文字の描画
                gl.glRasterPos2f(-1f, 0.0f);

                glut.glutBitmapCharacter(GLUT.BITMAP_8_BY_13, 'A');
                glut.glutBitmapCharacter(GLUT.BITMAP_9_BY_15, 'B');
                glut.glutBitmapCharacter(GLUT.BITMAP_HELVETICA_10, 'C');
                glut.glutBitmapCharacter(GLUT.BITMAP_HELVETICA_12, 'D');
                glut.glutBitmapCharacter(GLUT.BITMAP_HELVETICA_18, 'E');
                glut.glutBitmapCharacter(GLUT.BITMAP_TIMES_ROMAN_10, 'F');
                glut.glutBitmapCharacter(GLUT.BITMAP_TIMES_ROMAN_24, 'G');
                // ビットマップ文字列の描画
                glut.glutBitmapString(GLUT.BITMAP_TIMES_ROMAN_24, "123");

                gl.glPopMatrix();
            }

            public void reshape(
                GLAutoDrawable dr,
                int x, int y,
                int width, int height){}

            public void displayChanged(
                GLAutoDrawable dr,
                boolean modeChanged,
                boolean deviceChanged){}
          }
        );

        GLContext context =  buf.createContext(null);
        context.makeCurrent();
        buf.display();
        Screenshot.writeToFile(
            new File("sample1184a.png"), width, height, true);
        context.release();
        context.destroy();
    }
}

<!DOCTYPE html PUBLIC "-//W3C//DTD XHTML 1.0 Strict//EN"
 "http://www.w3.org/TR/xhtml1/DTD/xhtml1-strict.dtd">
<html xmlns="http://www.w3.org/1999/xhtml" lang="ja"
 xml:lang="ja" dir="ltr">
<head>
<title>sample1136(ImageMagick6.5.2)</title>
</head>
<body>
<?php
/* 画像サイズ */
$sx = 200;
$sy = 50;

$im = new Imagick("tree1.jpg");

$im->blackThresholdImage('#808080');
$im->whiteThresholdImage('#808080');
$im->negateImage(true);
$im->setImageMatte(true);
$im = $im->fxImage("r", Imagick::CHANNEL_ALPHA);

$im2 = new Imagick();
$im2->newImage($im->getImageWidth(),
$im->getImageHeight(), "#303030");
$im2->sketchImage(8,0,135);

$im->compositeImage($im2, Imagick::COMPOSITE_IN,
0, 0, Imagick::CHANNEL_ALL);

$im->writeImage('sample1136a.png');

$im->destroy();
?>
<img src="sample1136a.png" /><br />

</body>
</html>


import groovy.swing.j2d.*

def gr = new GraphicsRenderer()
gr.renderToFile("sample1142a.png", 200, 200){
  antialias("on")
  rect( x: 0, y: 0, width: 200, height: 200,
    borderColor: no){
    texturePaint(x: 0, y: 0, file: 'sf.jpg' )
    filters {
      grayscale()
      // numColorsは8から256
      // see com.jhlabs.image.QuantizeFilter.
      quantize(numColors: 8)
    }
  }
}


import java.io.*;
import javax.media.opengl.*;
import com.sun.opengl.util.*;

public class JoglSample25
{
   // 出力画像サイズ
   private static int width = 300;
   private static int height = 300;

   public static void main(String args[])
       throws IOException
   {
       GLDrawableFactory gldf =
           GLDrawableFactory.getFactory();
       GLCapabilities glc = new GLCapabilities();
       glc.setDoubleBuffered(false);
       GLPbuffer buf = gldf.createGLPbuffer(
          glc, null, width, height, null);

       buf.addGLEventListener(
           new GLEventListener(){
           // 初期化
           public void init(GLAutoDrawable dr)
           {
               GL gl = dr.getGL();
               // 背景色
               gl.glClearColor(
                   (float)0x40/(float)0xff,
                   (float)0x40/(float)0xff,
                   (float)0x40/(float)0xff,
                   1f);
           }

           public void display(GLAutoDrawable dr)
           {
               GL gl = dr.getGL();
               GLUT glut = new GLUT();
               gl.glViewport(0, 0, width, height);

               // 透視投影
               gl.glMatrixMode(GL.GL_PROJECTION);
               gl.glLoadIdentity();
               float ratio = (float)height/(float)width;
               gl.glFrustum(-1.0f, 1.0f, -ratio, ratio,
                   5.0f, 40.0f);

               gl.glMatrixMode(GL.GL_MODELVIEW);
               gl.glLoadIdentity();
               gl.glTranslatef(0.0f, 0.0f, -12.0f);

               gl.glClear(GL.GL_COLOR_BUFFER_BIT);


               gl.glPushMatrix();
               // X軸回転
               gl.glRotatef(45.0f, 1.0f, 0.0f, 0.0f);
               // Y軸回転
               gl.glRotatef(35.0f, 0.0f, 1.0f, 0.0f);
               // 1つ目の立方体
               gl.glColor3f(0.3f,0.5f,1.0f);
               gl.glLineWidth(6f);
               glut.glutWireCube(2.0f);
               // 2つ目の立方体
               gl.glColor3f(1f,1f,1f);
               gl.glLineWidth(2f);
               glut.glutWireCube(2.0f);
               gl.glPopMatrix();
           }

           public void reshape(
               GLAutoDrawable dr,
               int x, int y,
               int width, int height){}

           public void displayChanged(
               GLAutoDrawable dr,
               boolean modeChanged,
               boolean deviceChanged){}
         }
       );

       GLContext context =  buf.createContext(null);
       context.makeCurrent();
       buf.display();
       Screenshot.writeToFile(
           new File("sample1183a.png"), width, height, true);
       context.release();
       context.destroy();
   }
}

<!DOCTYPE html PUBLIC "-//W3C//DTD XHTML 1.0 Strict//EN"
  "http://www.w3.org/TR/xhtml1/DTD/xhtml1-strict.dtd">
<html xmlns="http://www.w3.org/1999/xhtml" lang="ja"
  xml:lang="ja" dir="ltr">
<head>
<title>sample1135(ImageMagick6.5.2)</title>
</head>
<body>
<?php
/* グリッドサイズ */
$xs = 20;
$ys = 20;

$im = new Imagick("sf.jpg");
$iw = $im->getImageWidth();
$ih = $im->getImageWidth();

$idraw = new ImagickDraw();
/* 線の色 */
$idraw->setStrokeColor('#ffffff');
/* 塗りつぶし色 */
$idraw->setFillColor('none');
/* 点線のスタイル */
$idraw->setStrokeDashArray(array(2,2));
for($ly=0;$ly<$ih;$ly+=$ys){
  $idraw->line(0,$ly, $iw,$ly);
}
for($lx=0;$lx<$iw;$lx+=$xs){
  $idraw->line($lx,0, $lx,$ih);
}
$im->drawImage($idraw);
$im->writeImage('sample1135a.png');

$im->destroy();
?>
<img src="sample1135a.png" /><br />

</body>
</html>

