{ color #e0e0e0 } pattern1
rule pattern1 {
{ s 2 1 1 } box
{ s 1.02 ry 15 x 0.3 } pattern1
}
// 白色の地面
{ y -0.5 s 200 0.1 200 color white } box
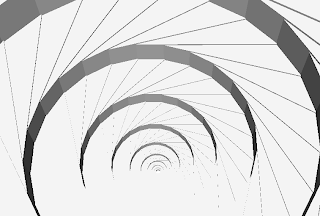
Structure Synthでの出力画像
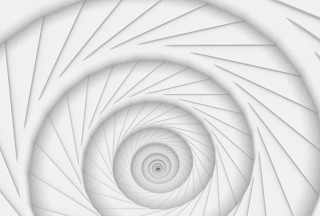
Sunflowでの出力画像
import java.io.*;
import javax.media.opengl.*;
import com.sun.opengl.util.*;

public class JoglSample24
{
    // 出力画像サイズ
    private static int width = 300;
    private static int height = 300;

    public static void main(String args[])
        throws IOException
    {
        GLDrawableFactory gldf =
            GLDrawableFactory.getFactory();
        GLCapabilities glc = new GLCapabilities();
        glc.setDoubleBuffered(false);
        GLPbuffer buf = gldf.createGLPbuffer(
           glc, null, width, height, null);

        buf.addGLEventListener(
            new GLEventListener(){
            // 初期化
            public void init(GLAutoDrawable dr)
            {
                GL gl = dr.getGL();
                // 背景色
                gl.glClearColor(
                    (float)0xf0/(float)0xff,
                    (float)0xf0/(float)0xff,
                    (float)0xf0/(float)0xff,
                    1f);
            }

            public void display(GLAutoDrawable dr)
            {
                GL gl = dr.getGL();
                GLUT glut = new GLUT();
                gl.glViewport(0, 0, width, height);

                // 透視投影
                gl.glMatrixMode(GL.GL_PROJECTION);
                gl.glLoadIdentity();
                float ratio = (float)height/(float)width;
                gl.glFrustum(-1.0f, 1.0f, -ratio, ratio,
                    5.0f, 40.0f);

                gl.glMatrixMode(GL.GL_MODELVIEW);
                gl.glLoadIdentity();
                gl.glTranslatef(-0.5f, -1.0f, -10.0f);

                gl.glEnable(GL.GL_LIGHTING);
                gl.glEnable(GL.GL_LIGHT0);
                gl.glEnable(gl.GL_COLOR_MATERIAL);
                gl.glEnable(GL.GL_NORMALIZE);
                gl.glEnable(GL.GL_DEPTH_TEST);
//                gl.glEnable(GL.GL_CULL_FACE);
                gl.glClear(GL.GL_COLOR_BUFFER_BIT |GL.GL_DEPTH_BUFFER_BIT );

                gl.glPushMatrix();

                // 面の色を設定
                gl.glColor3f(
                    (float)0x77/(float)0xff,
                    (float)0x99/(float)0xff,
                    (float)0xff/(float)0xff
                );

                // X軸回転
                gl.glRotatef(-70.0f, 1.0f, 0.0f, 0.0f);
                // Y軸回転
                gl.glRotatef(15.0f, 0.0f, 1.0f, 0.0f);
                // ティーポットを描画
                glut.glutSolidTeapot(1.0f,false);
                gl.glPopMatrix();
            }

            public void reshape(
                GLAutoDrawable dr,
                int x, int y,
                int width, int height){}

            public void displayChanged(
                GLAutoDrawable dr,
                boolean modeChanged,
                boolean deviceChanged){}
          }
        );

        GLContext context =  buf.createContext(null);
        context.makeCurrent();
        buf.display();
        Screenshot.writeToFile(
            new File("sample1182a.png"), width, height, true);
        context.release();
        context.destroy();
    }
}

import groovy.swing.j2d.*

def gr = new GraphicsRenderer()
gr.renderToFile("sample1141a.png", 200, 200){
antialias("on")
background(color: color("white"))
  rays(cx:90, cy:110, radius:200, rays:32,
    borderColor:no){
    radialGradient( cx: 90, cy: 110, radius:150){
      stop(offset: 0, color: "#7799ff")
      stop(offset: 1, color: "orange")
    }
  }
}


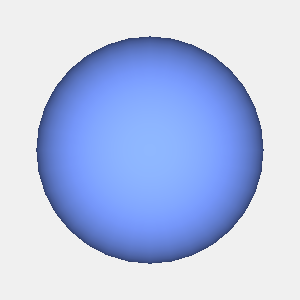
import java.io.*;
import javax.media.opengl.*;
import com.sun.opengl.util.*;

public class JoglSample23
{
   // 出力画像サイズ
   private static int width = 300;
   private static int height = 300;

   public static void main(String args[])
       throws IOException
   {
       GLDrawableFactory gldf =
           GLDrawableFactory.getFactory();
       GLCapabilities glc = new GLCapabilities();
       glc.setDoubleBuffered(false);
       GLPbuffer buf = gldf.createGLPbuffer(
          glc, null, width, height, null);

       buf.addGLEventListener(
           new GLEventListener(){
           // 初期化
           public void init(GLAutoDrawable dr)
           {
               GL gl = dr.getGL();
               // 背景色
               gl.glClearColor(
                   (float)0xf0/(float)0xff,
                   (float)0xf0/(float)0xff,
                   (float)0xf0/(float)0xff,
                   1f);
           }

           public void display(GLAutoDrawable dr)
           {
               GL gl = dr.getGL();
               GLUT glut = new GLUT();
               gl.glViewport(0, 0, width, height);

               // 透視投影
               gl.glMatrixMode(GL.GL_PROJECTION);
               gl.glLoadIdentity();
               float ratio = (float)height/(float)width;
               gl.glFrustum(-1.0f, 1.0f, -ratio, ratio,
                   5.0f, 40.0f);

               gl.glMatrixMode(GL.GL_MODELVIEW);
               gl.glLoadIdentity();
               gl.glTranslatef(0.0f, 0.0f, -10.0f);

               gl.glEnable(GL.GL_LIGHTING);
               gl.glEnable(GL.GL_LIGHT0);
               gl.glEnable(gl.GL_COLOR_MATERIAL);
               gl.glEnable(GL.GL_NORMALIZE);
               gl.glEnable(GL.GL_DEPTH_TEST);
               gl.glEnable(GL.GL_CULL_FACE);
               gl.glClear(GL.GL_COLOR_BUFFER_BIT |GL.GL_DEPTH_BUFFER_BIT );

               gl.glPushMatrix();
               // 面の色を設定
               gl.glColor3f(
                   (float)0x77/(float)0xff,
                   (float)0x99/(float)0xff,
                   (float)0xff/(float)0xff
               );
               // 球を描画
               glut.glutSolidSphere(1.5f, 32, 32);
               gl.glPopMatrix();
           }

           public void reshape(
               GLAutoDrawable dr,
               int x, int y,
               int width, int height){}

           public void displayChanged(
               GLAutoDrawable dr,
               boolean modeChanged,
               boolean deviceChanged){}
         }
       );

       GLContext context =  buf.createContext(null);
       context.makeCurrent();
       buf.display();
       Screenshot.writeToFile(
           new File("sample1181a.png"), width, height, true);
       context.release();
       context.destroy();
   }
}
<!DOCTYPE html PUBLIC "-//W3C//DTD XHTML 1.0 Strict//EN"
  "http://www.w3.org/TR/xhtml1/DTD/xhtml1-strict.dtd">
<html xmlns="http://www.w3.org/1999/xhtml" lang="ja"
  xml:lang="ja" dir="ltr">
<head>
<title>sample1134(ImageMagick6.5.2)</title>
</head>
<body>
<?php
$im = new Imagick("sf2.jpg");
$im->medianFilterImage(2);
$im->quantizeImage(8, Imagick::COLORSPACE_GRAY, 0, FALSE , false);
$im->edgeImage(1);
$im->negateImage(true);
$im->writeImage('sample1134a.png');

$im->destroy();
?>
<img src="sample1134a.png" /><br />

</body>
</html>


import java.io.*;
import javax.media.opengl.*;
import com.sun.opengl.util.*;

public class JoglSample22
{
   // 出力画像サイズ
   private static int width = 300;
   private static int height = 300;

   public static void main(String args[])
       throws IOException
   {
       GLDrawableFactory gldf =
           GLDrawableFactory.getFactory();
       GLCapabilities glc = new GLCapabilities();
       glc.setDoubleBuffered(false);
       GLPbuffer buf = gldf.createGLPbuffer(
          glc, null, width, height, null);

       buf.addGLEventListener(
           new GLEventListener(){
           // 初期化
           public void init(GLAutoDrawable dr)
           {
               GL gl = dr.getGL();
               // 背景色
               gl.glClearColor(
                   (float)0xf0/(float)0xff,
                   (float)0xf0/(float)0xff,
                   (float)0xf0/(float)0xff,
                   1f);
           }

           public void display(GLAutoDrawable dr)
           {
               GL gl = dr.getGL();
               GLUT glut = new GLUT();
               gl.glViewport(0, 0, width, height);

               // 透視投影
               gl.glMatrixMode(GL.GL_PROJECTION);
               gl.glLoadIdentity();
               float ratio = (float)height/(float)width;
               gl.glFrustum(-1.0f, 1.0f, -ratio, ratio,
                   5.0f, 40.0f);

               gl.glMatrixMode(GL.GL_MODELVIEW);
               gl.glLoadIdentity();
               gl.glTranslatef(0.0f, 0.0f, -7.0f);

               gl.glEnable(GL.GL_LIGHTING);
               gl.glEnable(GL.GL_LIGHT0);
               gl.glEnable(gl.GL_COLOR_MATERIAL);
               gl.glEnable(GL.GL_NORMALIZE);
               gl.glEnable(GL.GL_DEPTH_TEST);
               gl.glEnable(GL.GL_CULL_FACE);
               gl.glClear(GL.GL_COLOR_BUFFER_BIT |GL.GL_DEPTH_BUFFER_BIT );

               gl.glPushMatrix();
               // 面の色を設定
               gl.glColor3f(
                   (float)0x77/(float)0xff,
                   (float)0x99/(float)0xff,
                   (float)0xff/(float)0xff
               );
               // X軸回転
               gl.glRotatef(20.0f, 1.0f, 0.0f, 0.0f);
               // Y軸回転
               gl.glRotatef(30.0f, 0.0f, 1.0f, 0.0f);
               // ひし形12面体を描画
               glut.glutSolidRhombicDodecahedron();
               gl.glPopMatrix();
           }

           public void reshape(
               GLAutoDrawable dr,
               int x, int y,
               int width, int height){}

           public void displayChanged(
               GLAutoDrawable dr,
               boolean modeChanged,
               boolean deviceChanged){}
         }
       );

       GLContext context =  buf.createContext(null);
       context.makeCurrent();
       buf.display();
       Screenshot.writeToFile(
           new File("sample1180a.png"), width, height, true);
       context.release();
       context.destroy();
   }
}


import java.io.*;
import javax.media.opengl.*;
import com.sun.opengl.util.*;

public class JoglSample21
{
   // 出力画像サイズ
   private static int width = 300;
   private static int height = 300;

   public static void main(String args[])
       throws IOException
   {
       GLDrawableFactory gldf =
           GLDrawableFactory.getFactory();
       GLCapabilities glc = new GLCapabilities();
       glc.setDoubleBuffered(false);
       GLPbuffer buf = gldf.createGLPbuffer(
          glc, null, width, height, null);

       buf.addGLEventListener(
           new GLEventListener(){
           // 初期化
           public void init(GLAutoDrawable dr)
           {
               GL gl = dr.getGL();
               // 背景色
               gl.glClearColor(
                   (float)0xf0/(float)0xff,
                   (float)0xf0/(float)0xff,
                   (float)0xf0/(float)0xff,
                   1f);
           }

           public void display(GLAutoDrawable dr)
           {
               GL gl = dr.getGL();
               GLUT glut = new GLUT();
               gl.glViewport(0, 0, width, height);

               // 透視投影
               gl.glMatrixMode(GL.GL_PROJECTION);
               gl.glLoadIdentity();
               float ratio = (float)height/(float)width;
               gl.glFrustum(-1.0f, 1.0f, -ratio, ratio,
                   5.0f, 40.0f);

               gl.glMatrixMode(GL.GL_MODELVIEW);
               gl.glLoadIdentity();
               gl.glTranslatef(0.0f, 0.0f, -7.0f);

               gl.glEnable(GL.GL_LIGHTING);
               gl.glEnable(GL.GL_LIGHT0);
               gl.glEnable(gl.GL_COLOR_MATERIAL);
               gl.glEnable(GL.GL_NORMALIZE);
               gl.glEnable(GL.GL_DEPTH_TEST);
               gl.glEnable(GL.GL_CULL_FACE);
               gl.glClear(GL.GL_COLOR_BUFFER_BIT |GL.GL_DEPTH_BUFFER_BIT );

               gl.glPushMatrix();
               // 面の色を設定
               gl.glColor3f(
                   (float)0x77/(float)0xff,
                   (float)0x99/(float)0xff,
                   (float)0xff/(float)0xff
               );
               // X軸回転
               gl.glRotatef(10.0f, 1.0f, 0.0f, 0.0f);
               // Y軸回転
               gl.glRotatef(20.0f, 0.0f, 1.0f, 0.0f);
               // 8面体を描画
               glut.glutSolidOctahedron();
               gl.glPopMatrix();
           }

           public void reshape(
               GLAutoDrawable dr,
               int x, int y,
               int width, int height){}

           public void displayChanged(
               GLAutoDrawable dr,
               boolean modeChanged,
               boolean deviceChanged){}
         }
       );

       GLContext context =  buf.createContext(null);
       context.makeCurrent();
       buf.display();
       Screenshot.writeToFile(
           new File("sample1179a.png"), width, height, true);
       context.release();
       context.destroy();
   }
}

<!DOCTYPE html PUBLIC "-//W3C//DTD XHTML 1.0 Strict//EN"
  "http://www.w3.org/TR/xhtml1/DTD/xhtml1-strict.dtd">
<html xmlns="http://www.w3.org/1999/xhtml" lang="ja"
  xml:lang="ja" dir="ltr">
<head>
<title>sample1133(ImageMagick6.5.2)</title>
</head>
<body>
<?php
$im = new Imagick("sf.jpg");
//$im->setImageColorspace(Imagick::COLORSPACE_GRAY);
$im->medianFilterImage(1.5);
$im->quantizeImage(8, Imagick::COLORSPACE_GRAY, 0, FALSE , false);
$im2 = new Imagick();
$im2->newPseudoImage(1, 2, 'gradient:#803010ff-#ffffffff');
/* 任意の2色に変換 */
$im->addImage($im2);
$im->setImageIndex(0);
$im3 = $im->fxImage("v.p{0,(r+g+b)/3}");
$im3->writeImage('sample1133a.png');

$im3->destroy();
$im2->destroy();
$im->destroy();
?>
<img src="sample1133a.png" /><br />

</body>
</html>



import java.io.*;
import javax.media.opengl.*;
import com.sun.opengl.util.*;

public class JoglSample20
{
   // 出力画像サイズ
   private static int width = 300;
   private static int height = 300;

   public static void main(String args[])
       throws IOException
   {
       GLDrawableFactory gldf =
           GLDrawableFactory.getFactory();
       GLCapabilities glc = new GLCapabilities();
       glc.setDoubleBuffered(false);
       GLPbuffer buf = gldf.createGLPbuffer(
          glc, null, width, height, null);

       buf.addGLEventListener(
           new GLEventListener(){
           // 初期化
           public void init(GLAutoDrawable dr)
           {
               GL gl = dr.getGL();
               // 背景色
               gl.glClearColor(
                   (float)0xf0/(float)0xff,
                   (float)0xf0/(float)0xff,
                   (float)0xf0/(float)0xff,
                   1f);
           }

           public void display(GLAutoDrawable dr)
           {
               GL gl = dr.getGL();
               GLUT glut = new GLUT();
               gl.glViewport(0, 0, width, height);

               // 透視投影
               gl.glMatrixMode(GL.GL_PROJECTION);
               gl.glLoadIdentity();
               float ratio = (float)height/(float)width;
               gl.glFrustum(-1.0f, 1.0f, -ratio, ratio,
                   5.0f, 40.0f);

               gl.glMatrixMode(GL.GL_MODELVIEW);
               gl.glLoadIdentity();
               gl.glTranslatef(0.0f, 0.0f, -7.0f);

               gl.glEnable(GL.GL_LIGHTING);
               gl.glEnable(GL.GL_LIGHT0);
               gl.glEnable(gl.GL_COLOR_MATERIAL);
               gl.glEnable(GL.GL_NORMALIZE);
               gl.glEnable(GL.GL_DEPTH_TEST);
               gl.glEnable(GL.GL_CULL_FACE);
               gl.glClear(GL.GL_COLOR_BUFFER_BIT |GL.GL_DEPTH_BUFFER_BIT );

               gl.glPushMatrix();
               // 面の色を設定
               gl.glColor3f(
                   (float)0x77/(float)0xff,
                   (float)0x99/(float)0xff,
                   (float)0xff/(float)0xff
               );
               // X軸回転
               gl.glRotatef(10.0f, 1.0f, 0.0f, 0.0f);
               // Y軸回転
               gl.glRotatef(20.0f, 0.0f, 1.0f, 0.0f);
               // 20面体を描画
               glut.glutSolidIcosahedron();
               gl.glPopMatrix();
           }

           public void reshape(
               GLAutoDrawable dr,
               int x, int y,
               int width, int height){}

           public void displayChanged(
               GLAutoDrawable dr,
               boolean modeChanged,
               boolean deviceChanged){}
         }
       );

       GLContext context =  buf.createContext(null);
       context.makeCurrent();
       buf.display();
       Screenshot.writeToFile(
           new File("sample1178a.png"), width, height, true);
       context.release();
       context.destroy();
   }
}

import groovy.swing.j2d.*

sw = 220
sh = 70
gr = new GraphicsRenderer()
img = gr.render(sw, sh){
  background(color: color("#ffffff"))
  rect(x:0, y:0, width: sw, height: sh){
    filters {
      scratch(angle:10, angleVariation:0.8,
        color: color("#000000"), density:0.7,
        length:0.5, width:0.5, seed:2009)
    }
  }
}
gr.renderToFile("sample1130a.png", sw, sh){
  antialias("on")
  background(color: color("#000000"))
  font(new java.awt.Font('Tahoma', java.awt.Font.BOLD, 60))
  text( x:0, y:0, text: "Groovy", borderColor:no){
   texturePaint(x: 0, y: 0, image: img )
  }
}


import java.io.*;
import javax.media.opengl.*;
import com.sun.opengl.util.*;

public class JoglSample19
{
    // 出力画像サイズ
    private static int width = 300;
    private static int height = 300;

    public static void main(String args[])
        throws IOException
    {
        GLDrawableFactory gldf =
            GLDrawableFactory.getFactory();
        GLCapabilities glc = new GLCapabilities();
        glc.setDoubleBuffered(false);
        GLPbuffer buf = gldf.createGLPbuffer(
           glc, null, width, height, null);

        buf.addGLEventListener(
            new GLEventListener(){
            // 初期化
            public void init(GLAutoDrawable dr)
            {
                GL gl = dr.getGL();
                // 背景色
                gl.glClearColor(
                    (float)0xf0/(float)0xff,
                    (float)0xf0/(float)0xff,
                    (float)0xf0/(float)0xff,
                    1f);
            }

            public void display(GLAutoDrawable dr)
            {
                GL gl = dr.getGL();
                GLUT glut = new GLUT();
                gl.glViewport(0, 0, width, height);

                // 透視投影
                gl.glMatrixMode(GL.GL_PROJECTION);
                gl.glLoadIdentity();
                float ratio = (float)height/(float)width;
                gl.glFrustum(-1.0f, 1.0f, -ratio, ratio,
                    5.0f, 40.0f);

                gl.glMatrixMode(GL.GL_MODELVIEW);
                gl.glLoadIdentity();
                gl.glTranslatef(0.0f, 0.0f, -12.0f);

                gl.glEnable(GL.GL_LIGHTING);
                gl.glEnable(GL.GL_LIGHT0);
                gl.glEnable(gl.GL_COLOR_MATERIAL);
                gl.glEnable(GL.GL_NORMALIZE);
                gl.glEnable(GL.GL_DEPTH_TEST);
                gl.glEnable(GL.GL_CULL_FACE);
                gl.glClear(GL.GL_COLOR_BUFFER_BIT |GL.GL_DEPTH_BUFFER_BIT );

                gl.glPushMatrix();
                // 面の色を設定
                gl.glColor3f(
                    (float)0x77/(float)0xff,
                    (float)0x99/(float)0xff,
                    (float)0xff/(float)0xff
                );
                // X軸回転
                gl.glRotatef(30.0f, 1.0f, 0.0f, 0.0f);
                // Y軸回転
                gl.glRotatef(20.0f, 0.0f, 1.0f, 0.0f);
                // 12面体を描画
                glut.glutSolidDodecahedron();
                gl.glPopMatrix();
            }

            public void reshape(
                GLAutoDrawable dr,
                int x, int y,
                int width, int height){}

            public void displayChanged(
                GLAutoDrawable dr,
                boolean modeChanged,
                boolean deviceChanged){}
          }
        );

        GLContext context =  buf.createContext(null);
        context.makeCurrent();
        buf.display();
        Screenshot.writeToFile(
            new File("sample1177a.png"), width, height, true);
        context.release();
        context.destroy();
    }
}

<!DOCTYPE html PUBLIC "-//W3C//DTD XHTML 1.0 Strict//EN"
  "http://www.w3.org/TR/xhtml1/DTD/xhtml1-strict.dtd">
<html xmlns="http://www.w3.org/1999/xhtml" lang="ja"
  xml:lang="ja" dir="ltr">
<head>
<title>sample1132(ImageMagick6.5.2)</title>
</head>
<body>
<?php
$hpad = 20;
$im = new Imagick("sf.jpg");
$iw = $im->getImageWidth();
$ih = $im->getImageWidth();
$im2 = $im->clone();
$im2->cropImage($iw-$hpad*2, $ih, $hpad, 0);
$im2->blurImage(0, 5);
$im3 = new Imagick();
$im3->newPseudoImage($iw-$hpad*2, $ih,
  "gradient:#00000010-#00000070");
$im2->compositeImage($im3, Imagick::COMPOSITE_OVER,
  0, 0, Imagick::CHANNEL_ALL);

$im->compositeImage($im2, Imagick::COMPOSITE_OVER,
  $hpad, 0, Imagick::CHANNEL_ALL);
$im->writeImage('sample1132a.png');

$im->destroy();
?>
<img src="sample1132a.png" /><br />

</body>
</html>


import java.io.*;
import javax.media.opengl.*;
import com.sun.opengl.util.*;

public class JoglSample18
{
   // 出力画像サイズ
   private static int width = 300;
   private static int height = 300;

   public static void main(String args[])
       throws IOException
   {
       GLDrawableFactory gldf =
           GLDrawableFactory.getFactory();
       GLCapabilities glc = new GLCapabilities();
       glc.setDoubleBuffered(false);
       GLPbuffer buf = gldf.createGLPbuffer(
          glc, null, width, height, null);

       buf.addGLEventListener(
           new GLEventListener(){
           // 初期化
           public void init(GLAutoDrawable dr)
           {
               GL gl = dr.getGL();
               // 背景色
               gl.glClearColor(
                   (float)0xf0/(float)0xff,
                   (float)0xf0/(float)0xff,
                   (float)0xf0/(float)0xff,
                   1f);
           }

           public void display(GLAutoDrawable dr)
           {
               GL gl = dr.getGL();
               GLUT glut = new GLUT();
               gl.glViewport(0, 0, width, height);

               // 透視投影
               gl.glMatrixMode(GL.GL_PROJECTION);
               gl.glLoadIdentity();
               float ratio = (float)height/(float)width;
               gl.glFrustum(-1.0f, 1.0f, -ratio, ratio,
                   5.0f, 40.0f);

               gl.glMatrixMode(GL.GL_MODELVIEW);
               gl.glLoadIdentity();
               gl.glTranslatef(0.0f, -1.0f, -15.0f);

               gl.glEnable(GL.GL_LIGHTING);
               gl.glEnable(GL.GL_LIGHT0);
               gl.glEnable(gl.GL_COLOR_MATERIAL);
               gl.glEnable(GL.GL_NORMALIZE);
               gl.glEnable(GL.GL_DEPTH_TEST);
               gl.glEnable(GL.GL_CULL_FACE);
               gl.glClear(GL.GL_COLOR_BUFFER_BIT |GL.GL_DEPTH_BUFFER_BIT );

               gl.glPushMatrix();
               // 面の色を設定
               gl.glColor3f(
                   (float)0x77/(float)0xff,
                   (float)0x99/(float)0xff,
                   (float)0xff/(float)0xff
               );
               // X軸回転
               gl.glRotatef(-60.0f, 1.0f, 0.0f, 0.0f);
               // 円柱を描画
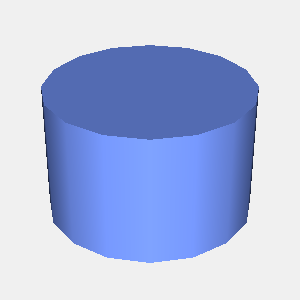
               glut.glutSolidCylinder(2.0f, 2.5f, 16, 4);
               gl.glPopMatrix();
           }

           public void reshape(
               GLAutoDrawable dr,
               int x, int y,
               int width, int height){}

           public void displayChanged(
               GLAutoDrawable dr,
               boolean modeChanged,
               boolean deviceChanged){}
         }
       );

       GLContext context =  buf.createContext(null);
       context.makeCurrent();
       buf.display();
       Screenshot.writeToFile(
           new File("sample1176a.png"), width, height, true);
       context.release();
       context.destroy();
   }
}
import java.awt.*
import groovy.swing.j2d.swf.*

def gr = new SWFRenderer()
gr.renderToFile("sample1058a.swf", 200, 200){
 image(file: "sf.jpg")
 font(new java.awt.Font('Tahoma', java.awt.Font.BOLD, 26))
 text( x:10, y:100,
   text: "San Francisco",
   fill: new Color(0xbb, 0xdd, 0xff, 0xff),
   borderColor: new Color(0x11, 0x33, 0x77, 0xff) )
}
