Saturday, May 09, 2009

RMagickで画像を立体的なタイル風に変換する

RMagickで画像を立体的なタイル風に変換するには、以下のコードを実行します。


require 'RMagick'
include Magick

images = ImageList.new("sf2.jpg")
images.alpha = ActivateAlphaChannel

# 角丸四角を描画
images2 = ImageList.new
images2.new_image(40, 40){
self.background_color = "none"
}
dr = Draw.new
dr.fill = "white"
dr.roundrectangle(2,2, 37,37, 4,4)
dr.draw(images2)

# タイル上に配置
images3 = ImageList.new
images3.new_image(images.columns, images.rows,
TextureFill.new(images2))
images3.alpha = ActivateAlphaChannel

# 切り取り
img = images.composite(images3, 0, 0,
DstInCompositeOp).modulate(1.4)
img.colorspace = GRAYColorspace
img = img.colorize(0.5, 0.5, 0.5, "#fad759")

# 立体的にする
img2 = images3.shade(true, 135, 23).
blur_channel(0,2,AllChannels).normalize()

img4 = img2.composite(img, 0, 0,
OverlayCompositeOp)
img4.write("sample997a.png")

exit


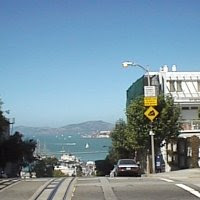
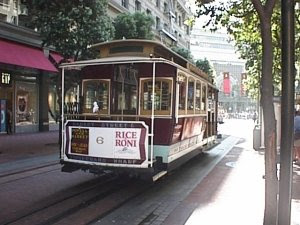
元画像(sf2.jpg)

出力画像(sample997a.png)
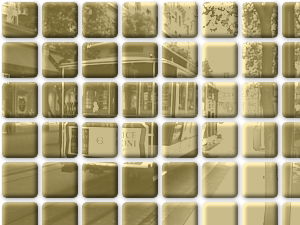
RMagickで立体的なタイル風に変換した画像

動作環境
ruby1.8.6, rmagick2.9.0

関連項目
ImageMagickで画像から立体的なタイル画像に変換する (convertコマンドによる同様の処理)
RMagickで画像を角丸四角に切り取って立体的にする

ScriptomとImageMagickで画像を回転させる

ScriptomとImageMagickで画像を回転させるには、以下のコードを実行します。


import org.codehaus.groovy.scriptom.*

Scriptom.inApartment
{
im = new ActiveXObject("ImageMagickObject.MagickImage.1")
// 回転した余白の色は-backgroundで指定します。
im.convert("sf.jpg", "-background", "#bbddff", "-rotate", "10",
"sample1078a.png")
// 回転した余白の色を透明にしたい場合は、noneを指定します。
im.convert("sf.jpg", "-background", "none", "-rotate", "10",
"sample1078b.png")
}


元画像(sf.jpg)


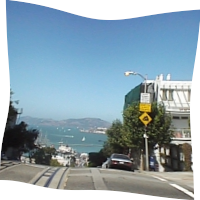
出力画像1(sample1078a.png)


出力画像2(sample1078b.png)
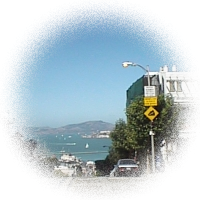
ScriptomとImageMagickで回転させた画像

動作環境
Groovy1.6.0, JDK1.6 Update12, ImageMagick6.5.0, Microsoft VC++ 2008 Redistributable
※ImageMagickインストール時にCOMインターフェイスも入れておくこと。

Friday, May 08, 2009

im4javaで画像に半透明グラデーションをかけて重ね合わせる

im4javaで画像に半透明グラデーションをかけて重ね合わせるには、以下のコードを実行します。


import java.util.*;
import org.im4java.core.*;
import org.im4java.process.*;

// im4java-0.97.0-bin.tar.bz2を解凍してim4java-0.97.0.jarはclasspathに通す
public class Im4java14
{
public static void main(String args[])
throws Exception
{
try
{
// ConvertCmd convert = new ConvertCmd();
ImageCommand convert = new WindowsConvertCmd();

IMOperation op = new IMOperation();
op.addImage("sample3b.png");
// op.alpha("activate");
// op.channel("rgba");
IMOperation so1 = op.openOperation();
so1.size(100, 100);
so1.addImage("gradient:#ffffffff-#00000000");
op.closeOperation();
op.compose("copy-opacity");
op.composite();

IMOperation so2 = op.openOperation();
so2.size(200, 200);
so2.addImage("sf.png");
op.closeOperation();
op.p_swap();
op.geometry(100, 100, 20, 20);
op.compose("src-over");
op.composite();
op.addImage("sample1076a.png");
convert.run(op);
}
catch(CommandException cex)
{
System.out.println(cex.getErrorText());
cex.printStackTrace();
}
}

// im4java 0.97
static class WindowsConvertCmd extends ImageCommand
{
public WindowsConvertCmd()
{
setCommand("cmd");
setCommand("/c");
setCommand("convert");
/* another way
setCommand("C:\\Program Files\\ImageMagick-6.4.9-Q16\\convert");
*/
}
}
}


元画像1(sf.png)


元画像2(sample3b.png)


出力画像(sample1076a.png)
im4javaで半透明グラデーションをかけて重ね合わせた画像

関連情報
im4javaのまとめ

ImageMagickで画像に半透明グラデーションをかける (convertコマンドによる同様の処理)

groovyで画像をビデオ風に加工する

groovyで画像をビデオ風に加工するには、以下のコードを実行します。


import java.awt.image.*;
import javax.imageio.*;

img = ImageIO.read(new File("sf.jpg"))
WritableRaster wr = img.getRaster()
buf = new int[wr.getNumDataElements()];

for(ly in (0..wr.height-1).step(2)){
for(lx in 0..wr.width-1){
wr.getPixel(lx, ly, buf)
buf[0] = buf[0]/2;
buf[1] = buf[1]/2;
buf[2] = buf[2]/2;
wr.setPixel(lx, ly, buf)
}
}

ImageIO.write(img, "png", new File("sample953a.png"));


元画像(sf.jpg)


出力画像(sample953a.png)
groovyでビデオ風に加工した画像

動作環境
Groovy1.6.0, JDK1.6 Update12

関連項目
Java2Dで画像をビデオ風にする

Thursday, May 07, 2009

ImageMagickでちぎったような紙を描画する

ImageMagickでちぎったような紙を描画するには、以下のバッチファイルを実行します。

rem 環境によって変えてね
set im=C:\Progra~1\ImageMagick-6.5.0-Q16

%im%\convert.exe -size 200x200 xc:none -fill #fffee0 -draw "rectangle 20,20 179,179" -spread 6 -median 3 ( +clone -edge 1 -blur 0x1 -alpha activate -channel a -fx "r" -channel rgb -fx "#D0C0C0" ) -composite sample1090a.png


出力画像(sample1090a.png)

RMagickで透明な文字列を描画する

RMagickで透明な文字列を描画するには、以下のコードを実行します。


require 'RMagick'
include Magick

images = ImageList.new("sf.jpg")
images2 = ImageList.new
images2.new_image(images.columns-50, images.rows-50){
self.background_color = "white"
}
dr = Draw.new
dr.fill = "black"
# フォント
dr.font = "Tahoma"
# ポイントサイズ
dr.pointsize = 120
dr.gravity = CenterGravity
dr.text(0, 0, "SF")
dr.draw(images2)
images2[0] = images2.fx("r*0.5", AlphaChannel)
images2[0] = images2.fx("#000000", DefaultChannels)
images.composite(images2, CenterGravity, 0, 0,
OverCompositeOp).write("sample996a.png")

exit


(sf.jpg)


出力画像(sample996a.png)
RMagickで透明な文字列を描画した画像

動作環境
ruby1.8.6, rmagick2.9.0

Wednesday, May 06, 2009

ImageMagickとPHPで画像をランダムな円の画像に変換する

ImageMagickとPHPで画像をランダムな円の画像に変換するには、以下のコードを実行します。


<!DOCTYPE html PUBLIC "-//W3C//DTD XHTML 1.0 Strict//EN"
"http://www.w3.org/TR/xhtml1/DTD/xhtml1-strict.dtd">
<html xmlns="http://www.w3.org/1999/xhtml" lang="ja"
xml:lang="ja" dir="ltr">
<head>
<title>sample1114(ImageMagick6.5.2)</title>
</head>
<body>
<?php
/* 分割数 */
$divx = 10;
$divy = 10;
/* 分割された領域あたりの円の数 */
$noc = 30;
/* 円の最小半径サイズと最大半径サイズ */
$minr = 1;
$maxr = 5;

$im = new Imagick("sf.jpg");
$iw=$im->getImageWidth();
$ih=$im->getImageHeight();
$dx = ceil($iw/$divx);
$dy = ceil($ih/$divy);
$im2 = new Imagick();
$im2->newImage($iw, $ih, "none");
$idraw = new ImagickDraw();
for($ly=0;$ly<$ih;$ly+=$dy){
for($lx=0;$lx<$iw;$lx+=$dx){
for($rc=0;$rc<$noc;$rc++){
$px = $lx+rand(0,$dx);
$py = $ly+rand(0,$dy);
$pixel = $im->getImagePixelColor(
$px, $py);
$rad = rand($minr,$maxr);
$idraw->setFillColor($pixel);
$idraw->ellipse($px,$py,$rad,$rad,0,360);
}
}
}
$im2->drawImage($idraw);

$im2->writeImage('sample1114a.png');
$idraw->destroy();
$im2->destroy();
$im->destroy();
?>
<img src="sample1114a.png" /><br />

</body>
</html>


元画像(sf.jpg)


出力画像(sample1114a.png)
ImageMagickとPHPでランダムな円に変換した画像

ScriptomとImageMagickで画像にモーションブラーをかける

ScriptomとImageMagickで画像にモーションブラーをかけるには、以下のコードを実行します。

import org.codehaus.groovy.scriptom.*

Scriptom.inApartment
{
im = new ActiveXObject("ImageMagickObject.MagickImage.1")
im.convert("sf2.jpg", "-motion-blur", "0x8+160", "sample1077a.png")
}

元画像(sf2.jpg)


出力画像(sample1077a.png)
ScriptomとImageMagickでモーションブラーをかけた画像

動作環境
Groovy1.6.0, JDK1.6 Update12, ImageMagick6.5.0, Microsoft VC++ 2008 Redistributable
※ImageMagickインストール時にCOMインターフェイスも入れておくこと。

groovyで画像を2色グラデーションの画像に変換する

groovyで画像を2色グラデーションの画像に変換するには、以下のコードを実行します。


import javax.imageio.*;
import groovy.swing.j2d.*
import com.jhlabs.image.*;

img = ImageIO.read(new File("sf.jpg"))
gr = new GraphicsRenderer()
gr.renderToFile("sample952a.png", img.width,
img.height){
image(image: img)
rect(x:0, y:0, width: img.width,
height: img.height, borderColor:no){
texturePaint(x: 0, y: 0, image:img )
filters {
lc = new LinearColormap((int)0xFFFFFF10, (int)0xFF3070A0)
lookup(colormap:lc)
}
}
}


元画像(sf.jpg)


出力画像(sample952a.png)
groovyで2色グラデーションに色を変えた画像

動作環境
Groovy1.6.0, JDK1.6 Update12

関連項目
groovyで炎のような画像を生成する (ArrayColormapの使用例)

Tuesday, May 05, 2009

ImageMagickとPHPで画像に3D枠をつける

ImageMagickとPHPで画像に3D枠をつけるには、以下のコードを実行します。


<!DOCTYPE html PUBLIC "-//W3C//DTD XHTML 1.0 Strict//EN"
"http://www.w3.org/TR/xhtml1/DTD/xhtml1-strict.dtd">
<html xmlns="http://www.w3.org/1999/xhtml" lang="ja"
xml:lang="ja" dir="ltr">
<head>
<title>sample1103(ImageMagick6.5.2)</title>
</head>
<body>
<?php
$im = new Imagick("sf.jpg");
$im->raiseImage(10,10,10,0,true);
$im->writeImage('sample1103a.png');

$im->destroy();
?>
<img src="sample1103a.png" /><br />

</body>
</html>


元画像(sf.jpg)


出力画像(sample1103a.png)
Imagickで3D枠をつけた画像

関連項目
WindowsでImageMagickをPHPから使用するための設定

im4javaで文字列をクレヨン風に描画する

im4javaで文字列をクレヨン風に描画するには、以下のコードを実行します。


import java.util.*;
import org.im4java.core.*;
import org.im4java.process.*;

// im4java-0.97.0-bin.tar.bz2を解凍してim4java-0.97.0.jarはclasspathに通す
public class Im4java13
{
public static void main(String args[])
throws Exception
{
try
{
// ConvertCmd convert = new ConvertCmd();
ImageCommand convert = new WindowsConvertCmd();

IMOperation op = new IMOperation();
op.size(120, 40);
op.addImage("xc:white");
op.stroke("#fad759");
op.fill("#f6b739");
op.font("Tahoma");
op.draw("font-size 30 text 2,30 'Sample'");
op.spread(1);
op.addImage("sample1075a.png");
convert.run(op);
}
catch(CommandException cex)
{
System.out.println(cex.getErrorText());
cex.printStackTrace();
}
}

// im4java 0.97
static class WindowsConvertCmd extends ImageCommand
{
public WindowsConvertCmd()
{
setCommand("cmd");
setCommand("/c");
setCommand("convert");
/* another way
setCommand("C:\\Program Files\\ImageMagick-6.4.9-Q16\\convert");
*/
}
}

}


出力画像(sample1075a.png)
im4javaでクレヨン風に描画した文字列

関連情報
im4javaのまとめ

im4javaのホームページ
im4java

RMagickで画像を円形に切り取って周囲を磨りガラスのようにする

RMagickで画像を円形に切り取って周囲を磨りガラスのようにするには、以下のコードを実行します。


require 'RMagick'
include Magick

images = ImageList.new("sf.jpg")
images.alpha = ActivateAlphaChannel
images.new_image(images.columns, images.rows){
self.background_color = "none"
}
dr = Draw.new
dr.fill = "white"
dr.ellipse(images.columns/2, images.rows/2,
images.columns*0.8/2, images.rows*0.8/2,
0, 360)
dr.draw(images);
images[images.size-1] = images.negate_channel(
grayscale=false,AllChannels).
blur_channel(0,10,AllChannels).spread(3)
images.first.composite(images.last, 0, 0,
OverCompositeOp).write("sample995a.png")

exit


元画像(sf.jpg)


出力画像(sample995a.png)
RMagickで円形に切り取って周囲を磨りガラスのようにした画像

動作環境
ruby1.8.6, rmagick2.9.0

関連項目
ImageMagickで画像を磨りガラスのように切り取る (convertコマンドによる同様の処理)

Monday, May 04, 2009

ImageMagickとPHPで画像を扇形に変形させる

ImageMagickとPHPで画像を扇形に変形させるには、以下のコードを実行します。

<!DOCTYPE html PUBLIC "-//W3C//DTD XHTML 1.0 Strict//EN" "http://www.w3.org/TR/xhtml1/DTD/xhtml1-strict.dtd">
<html xmlns="http://www.w3.org/1999/xhtml" lang="ja" xml:lang="ja" dir="ltr">
<head>
<title>sample1093(ImageMagick6.5.2)</title>
</head>
<body>
<?php
$im = new Imagick('sf2.jpg');
$im->setImageVirtualPixelMethod(
Imagick::VIRTUALPIXELMETHOD_TRANSPARENT);
$im->setImageMatte(true);
$points = array(100,0,200,50);
//$im->distortImage(Imagick::DISTORTION_ARC,
//$points, false);
// ArcDistortion in distort.h
$im->distortImage(9, $points, true);
$im->writeImage('sample1093a.png');
$im->destroy();
?>
<img src="sample1093a.png" />
</body>
</html>

元画像(sf2.jpg)


出力画像(sample1093a.png)
ImageMagickとPHPで扇形に変形させた画像

関連項目
ImageMagickで画像を扇形に変形させる (convertコマンドでの同様の処理)
ImageMagickとPHPで画像を変形させる

groovyで青色っぽい所以外をグレースケールにする

groovyで青色っぽい所以外をグレースケールにするには、以下のコードを実行します。


import javax.imageio.*;
import groovy.swing.j2d.*

img = ImageIO.read(new File("sf.jpg"))
gr = new GraphicsRenderer()
gr.renderToFile("sample952a.png", img.width,
img.height){
image(image: img)
rect(x:0, y:0, width: img.width,
height: img.height, borderColor:no){
texturePaint(x: 0, y: 0, image:img )
filters {
chromaKey(color: color("blue"),
hTolerance:0.15, sTolerance:0.8,
bTolerance:1)
grayscale()
}
}
}


元画像(sf.jpg)


出力画像(sample952a.png)
groovyで青色っぽい所以外をグレースケールにした画像

動作環境
Groovy1.6.0, JDK1.6 Update12

関連項目
groovyでクロマキー処理をする

ScriptomとImageMagickで画像と半透明グラデーションを重ねる

ScriptomとImageMagickで画像と半透明グラデーションを重ねるには、以下のコードを実行します。

import org.codehaus.groovy.scriptom.*

Scriptom.inApartment
{
im = new ActiveXObject("ImageMagickObject.MagickImage.1")
width = im.identify("-format", "%w", "sf2.jpg")
height = im.identify("-format", "%h", "sf2.jpg")
im.convert("sf2.jpg", "-size", "${width}x${height}",
"gradient:#ffffffff-#00000000",
"-composite", "sample1074a.png")
}

元画像(sf2.jpg)


出力画像(sample1074a.png)


動作環境
Groovy1.6.0, JDK1.6 Update12, ImageMagick6.5.0, Microsoft VC++ 2008 Redistributable
※ImageMagickインストール時にCOMインターフェイスも入れておくこと。

関連項目
ImageMagickで霧がかかったような効果

Sunday, May 03, 2009

ImageMagickで画像を変形させる

ImageMagickで画像を変形させるには、以下のバッチファイルを実行します。制御点は変形前x,yと変形後x,yで制御します。

rem 環境によって変えてね
set im=C:\Progra~1\ImageMagick-6.4.8-Q16

%im%\convert.exe sf.jpg -alpha activate -virtual-pixel transparent -distort shepards "100,0 110,20 200,100 190,110 100,200 90,190 0,100 10,90 0,200 0,180" sample940a.png

元画像(sf.jpg)


出力画像(sample940a.png)
ImageMagickで変形させた画像

関連項目
ImageMagickで画像を扇形に変形させる
ImageMagickで台形変形を行う
ImageMagickとPHPで画像を変形させる (Imagickでの同様の処理)

im4javaで画像を反転させる

im4javaで画像を反転させるには、以下のコードを実行します。


import java.util.*;
import org.im4java.core.*;
import org.im4java.process.*;

// im4java-0.97.0-bin.tar.bz2を解凍してim4java-0.97.0.jarはclasspathに通す
public class Im4java12
{
public static void main(String args[])
throws Exception
{
try
{
// ConvertCmd convert = new ConvertCmd();
ImageCommand convert = new WindowsConvertCmd();

IMOperation op = new IMOperation();
op.addImage("sf.jpg");
// -negate
op.negate();
op.addImage("sample1059a.png");
convert.run(op);

}
catch(CommandException cex)
{
System.out.println(cex.getErrorText());
cex.printStackTrace();
}
}

// im4java 0.97
static class WindowsConvertCmd extends ImageCommand
{
public WindowsConvertCmd()
{
setCommand("cmd");
setCommand("/c");
setCommand("convert");
/* another way
setCommand("C:\\Program Files\\ImageMagick-6.4.9-Q16\\convert");
*/
}
}

}


出力画像(sample1059a.png)
im4javaで反転させた画像

関連情報
im4javaのまとめ

ScriptomとImageMagickで日本語を描画する

ScriptomとImageMagickで日本語の文字列を描画するには、以下のコードを実行します。

import org.codehaus.groovy.scriptom.*

Scriptom.inApartment
{
im = new ActiveXObject("ImageMagickObject.MagickImage.1")
im.convert("-size", "200x200", "xc:none", "-stroke", "#113377",
"-fill", "#bbddff", "-font", "c:\\windows\\fonts\\msmincho.ttc",
"-pointsize", "60", "-gravity", "center",
"-draw", "text 0,0 '日本語'",
"sample1073a.png")
}

出力画像(sample1073a.png)


動作環境
Groovy1.6.0, JDK1.6 Update12, ImageMagick6.5.0, Microsoft VC++ 2008 Redistributable
※ImageMagickインストール時にCOMインターフェイスも入れておくこと。

関連項目
groovyで日本語を描画する