Saturday, October 03, 2009

PyWin32とImageMagickで角丸四角を描画する

PyWin32とImageMagickで角丸四角を描画するには、以下のコードを実行します。


# coding=UTF-8
import win32com.client

im = win32com.client.Dispatch("ImageMagickObject.MagickImage.1")
im.convert("-size", "200x200", "xc:white",
"-stroke", "#113377", "-fill", "#7799ff",
"-draw", "roundrectangle 10,10,189,189,20,20", "sample1337a.png")


出力画像(sample1337a.png)
PyWin32とImageMagickで描画した角丸四角

動作環境
Python3.1.1, Python for Windows Extensions (Build 214), ImageMagick6.5.5

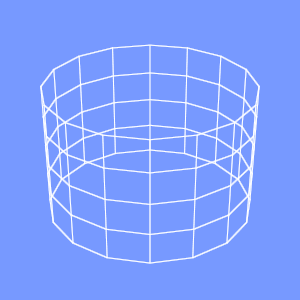
groovyとJOGLでワイヤフレームにアンチエイリアスをかける

groovyとJOGLでワイヤフレームにアンチエイリアスをかけるには、以下のコードを実行します。


import static javax.media.opengl.GL.*;
import java.io.*;
import javax.media.opengl.*;
import com.sun.opengl.util.*;

// 出力画像サイズ
width = 300
height = 300

GLDrawableFactory gldf =
GLDrawableFactory.getFactory()
GLCapabilities glc = new GLCapabilities()
glc.setDoubleBuffered(false)
GLPbuffer buf = gldf.createGLPbuffer(
glc, null, width, height, null)
GL gl = buf.getGL()

buf.addGLEventListener(
[ init: {
// 背景色
gl.glClearColor(
0x77/0xff as Float,
0x99/0xff as Float,
0xff/0xff as Float,
1f)
},

display: {
GLUT glut = new GLUT()
gl.glViewport(0, 0, width, height)

// 透視投影
gl.glMatrixMode(GL_PROJECTION)
gl.glLoadIdentity()
float ratio = height/width as Float
gl.glFrustum(-1.0f, 1.0f, -ratio, ratio,
5.0f, 40.0f)

gl.glMatrixMode(GL_MODELVIEW)
gl.glLoadIdentity()
gl.glTranslatef(0.0f, -1.0f, -15.0f)

// ワイヤーフレームにアンチエイリアスをかける
gl.glBlendFunc(GL_SRC_ALPHA, GL_ONE_MINUS_SRC_ALPHA)
gl.glEnable(GL_BLEND)
gl.glEnable(GL_LINE_SMOOTH)

gl.glClear(GL_COLOR_BUFFER_BIT)

gl.glPushMatrix()
// X軸回転
gl.glRotatef(-60.0f, 1.0f, 0.0f, 0.0f)
// 線の色を設定
gl.glColor3f(
0xff/0xff as Float,
0xff/0xff as Float,
0xff/0xff as Float
)
// ワイヤーフレームの円柱を描画
glut.glutWireCylinder(2.0f, 2.5f, 16, 4)
gl.glPopMatrix()
},

reshape: {},
displayChanged: {}
] as GLEventListener
)
GLContext context =
buf.createContext(null)
context.makeCurrent()
buf.display()
Screenshot.writeToFile(
new File("sample1297a.png"),
width, height, true)
context.release()
context.destroy()


出力画像()
groovyとJOGLで描画したアンチエイリアスをかけたワイヤーフレームの画像

動作環境
JDK1.6 Update14, Groovy 1.6.3, JOGL 1.1.1a

関連情報
groovyとJOGLのまとめ

Friday, October 02, 2009

groovyとJOGLで光源を設定する

groovyとJOGLで光源を設定するには、以下のコードを実行します。


import static javax.media.opengl.GL.*;
import java.io.*;
import javax.media.opengl.*;
import com.sun.opengl.util.*;

// 出力画像サイズ
width = 300
height = 300

GLDrawableFactory gldf =
GLDrawableFactory.getFactory()
GLCapabilities glc = new GLCapabilities()
glc.setDoubleBuffered(false)
GLPbuffer buf = gldf.createGLPbuffer(
glc, null, width, height, null)
GL gl = buf.getGL()

buf.addGLEventListener(
[ init: {
// 背景色
gl.glClearColor(
0xf0/0xff as Float,
0xf0/0xff as Float,
0xf0/0xff as Float,
1f)
},

display: {
GLUT glut = new GLUT()
gl.glViewport(0, 0, width, height)

// 透視投影
gl.glMatrixMode(GL_PROJECTION)
gl.glLoadIdentity()
float ratio = height/width as Float
gl.glFrustum(-1.0f, 1.0f, -ratio, ratio,
5.0f, 40.0f)

gl.glMatrixMode(GL_MODELVIEW)
gl.glLoadIdentity()
gl.glTranslatef(0.0f, 0.0f, -10.0f)

// 光源の位置
l1pos = [-5.0f, 5.0f, 0.0f, 1.0f]
gl.glLightfv(GL_LIGHT0, GL_POSITION, l1pos as float[], 0)
// 環境光
l1amb = [0.2f, 0.2f, 0.1f, 1.0f]
gl.glLightfv(GL_LIGHT0, GL_AMBIENT, l1amb as float[], 0)
// 拡散光
l1dif = [0.9f, 0.9f, 0.9f, 1.0f]
gl.glLightfv(GL_LIGHT0, GL_DIFFUSE, l1dif as float[], 0)
// 鏡面光
l1spe = [0.9f, 0.9f, 0.9f, 1.0f]
gl.glLightfv(GL_LIGHT0, GL_SPECULAR, l1spe as float[], 0)


gl.glEnable(GL_LIGHTING)
gl.glEnable(GL_LIGHT0)
gl.glEnable(GL_COLOR_MATERIAL)
gl.glEnable(GL_NORMALIZE)
gl.glEnable(GL_DEPTH_TEST)
gl.glEnable(GL_CULL_FACE)

gl.glClear(GL_COLOR_BUFFER_BIT
| GL_DEPTH_BUFFER_BIT )

gl.glPushMatrix()
// X軸回転
gl.glRotatef(30.0f, 1.0f, 0.0f, 0.0f)
// Y軸回転
gl.glRotatef(35.0f, 0.0f, 1.0f, 0.0f)
// 面の色を設定
gl.glColor3f(
0x77/0xff as Float,
0x99/0xff as Float,
0xff/0xff as Float
)
// 球を描画
glut.glutSolidSphere(1.5f, 32, 32)
gl.glPopMatrix()
},

reshape: {},
displayChanged: {}
] as GLEventListener
)
GLContext context =
buf.createContext(null)
context.makeCurrent()
buf.display()
Screenshot.writeToFile(
new File("sample1296a.png"),
width, height, true)
context.release()
context.destroy()


出力画像()
groovyとJOGLで光源を設定して描画した球

動作環境
JDK1.6 Update14, Groovy 1.6.3, JOGL 1.1.1a

関連情報
groovyとJOGLのまとめ

Thursday, October 01, 2009

PyWin32とImageMagickで四角を描画する

PyWin32とImageMagickで四角を描画するには、以下のコードを実行します。


# coding=UTF-8
import win32com.client

im = win32com.client.Dispatch("ImageMagickObject.MagickImage.1")
im.convert("-size", "200x200", "xc:white",
"-stroke", "#113377", "-fill", "#7799ff",
"-draw", "rectangle 10,10,189,189", "sample1336a.png")


出力画像(sample1336a.png)
PyWin32とImageMagickで描画した四角

動作環境
Python3.1.1, Python for Windows Extensions (Build 214), ImageMagick6.5.5

JOGLとJOGLでワイヤーフレームとポリゴンの球を描画する

JOGLとJOGLでワイヤーフレームとポリゴンの球を描画するには、以下のコードを実行します。


import static javax.media.opengl.GL.*;
import java.io.*;
import javax.media.opengl.*;
import com.sun.opengl.util.*;

// 出力画像サイズ
width = 300
height = 300

GLDrawableFactory gldf =
GLDrawableFactory.getFactory()
GLCapabilities glc = new GLCapabilities()
glc.setDoubleBuffered(false)
GLPbuffer buf = gldf.createGLPbuffer(
glc, null, width, height, null)
GL gl = buf.getGL()

buf.addGLEventListener(
[ init: {
// 背景色
gl.glClearColor(
0xf0/0xff as Float,
0xf0/0xff as Float,
0xf0/0xff as Float,
1f)
},

display: {
GLUT glut = new GLUT()
gl.glViewport(0, 0, width, height)

// 透視投影
gl.glMatrixMode(GL_PROJECTION)
gl.glLoadIdentity()
float ratio = height/width as Float
gl.glFrustum(-1.0f, 1.0f, -ratio, ratio,
5.0f, 40.0f)

gl.glMatrixMode(GL_MODELVIEW)
gl.glLoadIdentity()
gl.glTranslatef(0.0f, 0.0f, -10.0f)

gl.glEnable(GL_LIGHTING)
gl.glEnable(GL_LIGHT0)
gl.glEnable(GL_COLOR_MATERIAL)
gl.glEnable(GL_NORMALIZE)
gl.glEnable(GL_DEPTH_TEST)
gl.glEnable(GL_CULL_FACE)
// フラットシェーディングモデル
gl.glShadeModel(GL_FLAT)
// ポリゴンオフセットを設定
gl.glEnable(GL_POLYGON_OFFSET_FILL)
gl.glPolygonOffset(1f, 1f)

gl.glClear(GL_COLOR_BUFFER_BIT
| GL_DEPTH_BUFFER_BIT )

gl.glPushMatrix()
// X軸回転
gl.glRotatef(30.0f, 1.0f, 0.0f, 0.0f)
// Y軸回転
gl.glRotatef(35.0f, 0.0f, 1.0f, 0.0f)
// 球を描画
// 線の色を設定
gl.glColor3f(
0xff/0xff as Float,
0xff/0xff as Float,
0xff/0xff as Float
)
glut.glutWireSphere(1.5f, 16, 16)
// 面の色を設定
gl.glColor3f(
0x77/0xff as Float,
0x99/0xff as Float,
0xff/0xff as Float
)
glut.glutSolidSphere(1.5f, 16, 16)
gl.glPopMatrix()
},

reshape: {},
displayChanged: {}
] as GLEventListener
)
GLContext context =
buf.createContext(null)
context.makeCurrent()
buf.display()
Screenshot.writeToFile(
new File("sample1295a.png"),
width, height, true)
context.release()
context.destroy()


出力画像()
groovyとJOGLで描画したワイヤーフレームとポリゴンの球

動作環境
JDK1.6 Update14, Groovy 1.6.3, JOGL 1.1.1a

関連情報
groovyとJOGLのまとめ

Wednesday, September 30, 2009

groovyとJOGLでフラットシェーディングの球を描画する

groovyとJOGLでフラットシェーディングの球を描画するには、以下のコードを実行します。


import static javax.media.opengl.GL.*;
import java.io.*;
import javax.media.opengl.*;
import com.sun.opengl.util.*;

// 出力画像サイズ
width = 300
height = 300

GLDrawableFactory gldf =
GLDrawableFactory.getFactory()
GLCapabilities glc = new GLCapabilities()
glc.setDoubleBuffered(false)
GLPbuffer buf = gldf.createGLPbuffer(
glc, null, width, height, null)
GL gl = buf.getGL()

buf.addGLEventListener(
[ init: {
// 背景色
gl.glClearColor(
0xf0/0xff as Float,
0xf0/0xff as Float,
0xf0/0xff as Float,
1f)
},

display: {
GLUT glut = new GLUT()
gl.glViewport(0, 0, width, height)

// 透視投影
gl.glMatrixMode(GL_PROJECTION)
gl.glLoadIdentity()
float ratio = height/width as Float
gl.glFrustum(-1.0f, 1.0f, -ratio, ratio,
5.0f, 40.0f)

gl.glMatrixMode(GL_MODELVIEW)
gl.glLoadIdentity()
gl.glTranslatef(0.0f, 0.0f, -10.0f)

gl.glEnable(GL_LIGHTING)
gl.glEnable(GL_LIGHT0)
gl.glEnable(GL_COLOR_MATERIAL)
gl.glEnable(GL_NORMALIZE)
gl.glEnable(GL_DEPTH_TEST)
gl.glEnable(GL_CULL_FACE)
// フラットシェーディングモデル
gl.glShadeModel(GL_FLAT)

gl.glClear(GL_COLOR_BUFFER_BIT
| GL_DEPTH_BUFFER_BIT )

gl.glPushMatrix()
// 面の色を設定
gl.glColor3f(
0x77/0xff as Float,
0x99/0xff as Float,
0xff/0xff as Float
)
// X軸回転
gl.glRotatef(30.0f, 1.0f, 0.0f, 0.0f)
// Y軸回転
gl.glRotatef(35.0f, 0.0f, 1.0f, 0.0f)
// 球を描画
glut.glutSolidSphere(1.5f, 16, 16)
gl.glPopMatrix()
},

reshape: {},
displayChanged: {}
] as GLEventListener
)
GLContext context =
buf.createContext(null)
context.makeCurrent()
buf.display()
Screenshot.writeToFile(
new File("sample1294a.png"),
width, height, true)
context.release()
context.destroy()


出力画像(sample1294a.png)
groovyとJOGLで描画したフラットシェーディングの球

動作環境
JDK1.6 Update14, Groovy 1.6.3, JOGL 1.1.1a

関連情報
groovyとJOGLのまとめ

Tuesday, September 29, 2009

groovyとJOGLでフォグをつけてレンダリングする

JOGLでフォグをつけてレンダリングするには、以下のコードを実行します。


import static javax.media.opengl.GL.*;
import java.io.*;
import javax.media.opengl.*;
import com.sun.opengl.util.*;

// 出力画像サイズ
width = 300
height = 300

GLDrawableFactory gldf =
GLDrawableFactory.getFactory()
GLCapabilities glc = new GLCapabilities()
glc.setDoubleBuffered(false)
GLPbuffer buf = gldf.createGLPbuffer(
glc, null, width, height, null)
GL gl = buf.getGL()

buf.addGLEventListener(
[ init: {
// 背景色
gl.glClearColor(
0xf0/0xff as Float,
0xf0/0xff as Float,
0xf0/0xff as Float,
1f)
},

display: {
GLUT glut = new GLUT()
gl.glViewport(0, 0, width, height)

// 透視投影
gl.glMatrixMode(GL_PROJECTION)
gl.glLoadIdentity()
float ratio = height/width as Float
gl.glFrustum(-1.0f, 1.0f, -ratio, ratio,
5.0f, 40.0f)

gl.glMatrixMode(GL_MODELVIEW)
gl.glLoadIdentity()
gl.glTranslatef(-3.0f, -1.5f, -7.0f)

gl.glEnable(GL_LIGHTING)
gl.glEnable(GL_LIGHT0)
gl.glEnable(GL_COLOR_MATERIAL)
gl.glEnable(GL_NORMALIZE)
gl.glEnable(GL_DEPTH_TEST)
gl.glEnable(GL_CULL_FACE)

fog=[1.0f,1.0f,1.0f,1.0f]
gl.glFogfv(GL_FOG_COLOR,fog as float[],0)
gl.glFogi(GL_FOG_MODE,GL.GL_EXP)
gl.glFogf(GL_FOG_DENSITY, 0.08f)
gl.glFogf(GL_FOG_START, 0.0f)
gl.glFogf(GL_FOG_END,10.0f)
gl.glEnable(GL_FOG)

gl.glClear(GL_COLOR_BUFFER_BIT
| GL_DEPTH_BUFFER_BIT )

gl.glPushMatrix()
// X軸回転
gl.glRotatef(15.0f, 1.0f, 0.0f, 0.0f)
// Y軸回転
gl.glRotatef(30.0f, 0.0f, 1.0f, 0.0f)

cs = 0.3f
gs = 0.6f
xs = 30
zs = 30
for(lz in 0..zs-1){
for(lx in 0..xs-1){
if( (lx+lz)%2 == 0 ){
gl.glColor3f(
0xff/0xff as Float,
0xff/0xff as Float,
0xff/0xff as Float
)
} else {
gl.glColor3f(
0x77/0xff as Float,
0x99/0xff as Float,
0xff/0xff as Float
)
}
gl.glPushMatrix()
gl.glTranslatef(
lx*gs as Float, 0.0f, -1*lz*gs as Float)
glut.glutSolidCube(cs)
gl.glPopMatrix()
}
}

gl.glPopMatrix()
},

reshape: {},
displayChanged: {}
] as GLEventListener
)
GLContext context =
buf.createContext(null)
context.makeCurrent()
buf.display()
Screenshot.writeToFile(
new File("sample1293a.png"),
width, height, true)
context.release()
context.destroy()


出力画像(sample1293a.png)
groovyとJOGLでフォグをつけてレンダリングした画像

動作環境
JDK1.6 Update14, Groovy 1.6.3, JOGL 1.1.1a

関連情報
groovyとJOGLのまとめ

Monday, September 28, 2009

PyWin32とImageMagickで楕円を描画する

PyWin32とImageMagickで楕円を描画するには、以下のコードを実行します。


# coding=UTF-8
import win32com.client

im = win32com.client.Dispatch("ImageMagickObject.MagickImage.1")
im.convert("-size", "200x200", "xc:white",
"-stroke", "#113377", "-fill", "#7799ff",
"-draw", "ellipse 100,100,80,50,0,360", "sample1335a.png")


出力画像(sample1335a.png)
PyWin32とImageMagickで描画した楕円

動作環境
Python3.1.1, Python for Windows Extensions (Build 214), ImageMagick6.5.5

groovyとJOGLで球にテクスチャをマッピングする

groovyとJOGLで球にテクスチャをマッピングするには、以下のコードを実行します。


import static javax.media.opengl.GL.*;
import java.io.*;
import javax.media.opengl.*;
import com.sun.opengl.util.*;
import com.sun.opengl.util.texture.*;

// 出力画像サイズ
width = 300
height = 300

GLDrawableFactory gldf =
GLDrawableFactory.getFactory()
GLCapabilities glc = new GLCapabilities()
glc.setDoubleBuffered(false)
GLPbuffer buf = gldf.createGLPbuffer(
glc, null, width, height, null)
GL gl = buf.getGL()

buf.addGLEventListener(
[ init: {
// 背景色
gl.glClearColor(
0xf0/0xff as Float,
0xf0/0xff as Float,
0xf0/0xff as Float,
1f)
Texture texture = TextureIO.newTexture(
new File("sf_r.jpg"), true)
texture.enable()
texture.bind()
},

display: {
GLUT glut = new GLUT()
gl.glViewport(0, 0, width, height)

// 透視投影
gl.glMatrixMode(GL_PROJECTION)
gl.glLoadIdentity()
float ratio = height/width as Float
gl.glFrustum(-1.0f, 1.0f, -ratio, ratio,
5.0f, 40.0f)

gl.glMatrixMode(GL_MODELVIEW)
gl.glLoadIdentity()
gl.glTranslatef(0.0f, 0.0f, -10.0f)

gl.glEnable(GL_LIGHTING)
gl.glEnable(GL_LIGHT0)
gl.glEnable(GL_COLOR_MATERIAL)
gl.glEnable(GL_NORMALIZE)
gl.glEnable(GL_DEPTH_TEST)
gl.glEnable(GL_CULL_FACE)
gl.glEnable(GL_TEXTURE_2D)
gl.glEnable(GL_TEXTURE_GEN_S)
gl.glEnable(GL_TEXTURE_GEN_T)
gl.glClear(GL_COLOR_BUFFER_BIT
| GL_DEPTH_BUFFER_BIT )

gl.glPushMatrix()

gl.glTexGeni(GL_S, GL_TEXTURE_GEN_MODE,
GL_SPHERE_MAP);
gl.glTexGeni(GL_T, GL_TEXTURE_GEN_MODE,
GL_SPHERE_MAP);

// 球を描画
glut.glutSolidSphere(1.5f, 32, 32)
gl.glPopMatrix()
},

reshape: {},
displayChanged: {}
] as GLEventListener
)
GLContext context =
buf.createContext(null)
context.makeCurrent()
buf.display()
Screenshot.writeToFile(
new File("sample1292a.png"),
width, height, true)
context.release()
context.destroy()


テクスチャ用画像(sf_r.jpg)


出力画像(sample1292a.png)
groovyとJOGLで描画したテクスチャマッピングした球

動作環境
JDK1.6 Update14, Groovy 1.6.3, JOGL 1.1.1a

関連情報
groovyとJOGLのまとめ

Sunday, September 27, 2009

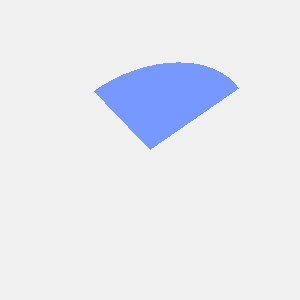
groovyとJOGLで円弧を描画する

groovyとJOGLで円弧を描画するには、以下のコードを実行します。


import static javax.media.opengl.GL.*;
import java.io.*;
import javax.media.opengl.*;
import javax.media.opengl.glu.*;
import com.sun.opengl.util.*;

// 出力画像サイズ
width = 300
height = 300

GLDrawableFactory gldf =
GLDrawableFactory.getFactory()
GLCapabilities glc = new GLCapabilities()
glc.setDoubleBuffered(false)
GLPbuffer buf = gldf.createGLPbuffer(
glc, null, width, height, null)
GL gl = buf.getGL()

buf.addGLEventListener(
[ init: {
// 背景色
gl.glClearColor(
0xf0/0xff as Float,
0xf0/0xff as Float,
0xf0/0xff as Float,
1f)
},

display: {
GLU glu = new GLU()
gl.glViewport(0, 0, width, height)

// 透視投影
gl.glMatrixMode(GL_PROJECTION)
gl.glLoadIdentity()
float ratio = height/width as Float
gl.glFrustum(-1.0f, 1.0f, -ratio, ratio,
5.0f, 40.0f)

gl.glMatrixMode(GL_MODELVIEW)
gl.glLoadIdentity()
gl.glTranslatef(0.0f, 0.0f, -7.0f)

gl.glClear(GL_COLOR_BUFFER_BIT);

// 面の色を設定
gl.glColor3f(
0x77/0xff as Float,
0x99/0xff as Float,
0xff/0xff as Float
)
gl.glPushMatrix()
// X軸回転
gl.glRotatef(45.0f, 1.0f, 0.0f, 0.0f)
// Y軸回転
gl.glRotatef(20.0f, 0.0f, 1.0f, 0.0f)
// 円弧を描画する
GLUquadric gluq = glu.gluNewQuadric()
glu.gluPartialDisk(gluq, 0.0, 1.0, 16, 4, -30, 90)
gl.glPopMatrix()
},

reshape: {},
displayChanged: {}
] as GLEventListener
)
GLContext context =
buf.createContext(null)
context.makeCurrent()
buf.display()
Screenshot.writeToFile(
new File("sample1291a.png"),
width, height, true)
context.release()
context.destroy()


出力画像(sample1291a.png)
groovyとJOGLで描画した円弧

動作環境
JDK1.6 Update14, Groovy 1.6.3, JOGL 1.1.1a

関連情報
groovyとJOGLのまとめ

Saturday, September 26, 2009

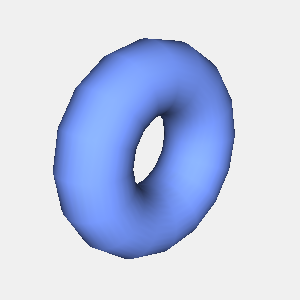
groovyとJOGLでドーナツ型を描画する

groovyとJOGLでドーナツ型を描画するには、以下のコードを実行します。


import static javax.media.opengl.GL.*;
import java.io.*;
import javax.media.opengl.*;
import com.sun.opengl.util.*;

// 出力画像サイズ
width = 300
height = 300

GLDrawableFactory gldf =
GLDrawableFactory.getFactory()
GLCapabilities glc = new GLCapabilities()
glc.setDoubleBuffered(false)
GLPbuffer buf = gldf.createGLPbuffer(
glc, null, width, height, null)
GL gl = buf.getGL()

buf.addGLEventListener(
[ init: {
// 背景色
gl.glClearColor(
0xf0/0xff as Float,
0xf0/0xff as Float,
0xf0/0xff as Float,
1f)
},

display: {
GLUT glut = new GLUT()
gl.glViewport(0, 0, width, height)

// 透視投影
gl.glMatrixMode(GL_PROJECTION)
gl.glLoadIdentity()
float ratio = height/width as Float
gl.glFrustum(-1.0f, 1.0f, -ratio, ratio,
5.0f, 40.0f)

gl.glMatrixMode(GL_MODELVIEW)
gl.glLoadIdentity()
gl.glTranslatef(0.0f, 0.0f, -10.0f)

gl.glEnable(GL_LIGHTING);
gl.glEnable(GL_LIGHT0);
gl.glEnable(GL_COLOR_MATERIAL);
gl.glEnable(GL_NORMALIZE);
gl.glEnable(GL_DEPTH_TEST);
gl.glEnable(GL_CULL_FACE);
gl.glClear(GL_COLOR_BUFFER_BIT | GL_DEPTH_BUFFER_BIT );

gl.glPushMatrix()
// 面の色を設定
gl.glColor3f(
0x77/0xff as Float,
0x99/0xff as Float,
0xff/0xff as Float
)
// X軸回転
gl.glRotatef(20.0f, 1.0f, 0.0f, 0.0f)
// Y軸回転
gl.glRotatef(45.0f, 0.0f, 1.0f, 0.0f)
// ドーナツを描画する
glut.glutSolidTorus(0.5f, 1f, 32, 16)
gl.glPopMatrix()
},

reshape: {},
displayChanged: {}
] as GLEventListener
)
GLContext context =
buf.createContext(null)
context.makeCurrent()
buf.display()
Screenshot.writeToFile(
new File("sample1290a.png"),
width, height, true)
context.release()
context.destroy()


出力画像(sample1290a.png)
groovyとJOGLで描画したドーナツ型

動作環境
JDK1.6 Update14, Groovy 1.6.3, JOGL 1.1.1a

関連情報
groovyとJOGLのまとめ

Friday, September 25, 2009

groovyとJOGLで円盤を描画する

groovyとJOGLで円盤を描画するには、以下のコードを実行します。


import static javax.media.opengl.GL.*;
import java.io.*;
import javax.media.opengl.*;
import javax.media.opengl.glu.*;
import com.sun.opengl.util.*;

// 出力画像サイズ
width = 300
height = 300

GLDrawableFactory gldf =
GLDrawableFactory.getFactory()
GLCapabilities glc = new GLCapabilities()
glc.setDoubleBuffered(false)
GLPbuffer buf = gldf.createGLPbuffer(
glc, null, width, height, null)
GL gl = buf.getGL()

buf.addGLEventListener(
[ init: {
// 背景色
gl.glClearColor(
0xf0/0xff as Float,
0xf0/0xff as Float,
0xf0/0xff as Float,
1f)
},

display: {
GLU glu = new GLU()
gl.glViewport(0, 0, width, height)

// 透視投影
gl.glMatrixMode(GL_PROJECTION)
gl.glLoadIdentity()
float ratio = height/width as Float
gl.glFrustum(-1.0f, 1.0f, -ratio, ratio,
5.0f, 40.0f)

gl.glMatrixMode(GL_MODELVIEW)
gl.glLoadIdentity()
gl.glTranslatef(0.0f, 0.0f, -10.0f)

gl.glClear(GL_COLOR_BUFFER_BIT);

// 面の色を設定
gl.glColor3f(
0x77/0xff as Float,
0x99/0xff as Float,
0xff/0xff as Float
)
gl.glPushMatrix()
// X軸回転
gl.glRotatef(45.0f, 1.0f, 0.0f, 0.0f)
// Y軸回転
gl.glRotatef(20.0f, 0.0f, 1.0f, 0.0f)
// 円盤を描画する
GLUquadric gluq = glu.gluNewQuadric()
glu.gluDisk(gluq, 0.0, 1.0, 16, 4)
gl.glPopMatrix()
},

reshape: {},
displayChanged: {}
] as GLEventListener
)
GLContext context =
buf.createContext(null)
context.makeCurrent()
buf.display()
Screenshot.writeToFile(
new File("sample1289a.png"),
width, height, true)
context.release()
context.destroy()


実行結果(sample1289a.png)
groovyとJOGLで描画した円盤

動作環境
JDK1.6 Update14, Groovy 1.6.3, JOGL 1.1.1a

関連情報
groovyとJOGLのまとめ

Thursday, September 24, 2009

PyWin32とImageMagickで円を描画する

PyWin32とImageMagickで円を描画するには、以下のコードを実行します。


# coding=UTF-8
import win32com.client

im = win32com.client.Dispatch("ImageMagickObject.MagickImage.1")
im.convert("-size", "200x200", "xc:white",
"-stroke", "#113377", "-fill", "#7799ff",
"-draw", "circle 100,100,190,100", "sample1334a.png")


出力画像(sample1334a.png)
PyWin32とImageMagickで描画した円

動作環境
Python3.1.1, Python for Windows Extensions (Build 214), ImageMagick6.5.5

groovyとJOGLで樽の形を描画する

groovyとJOGLで樽の形を描画するには、以下のコードを実行します。


import static javax.media.opengl.GL.*;
import java.io.*;
import javax.media.opengl.*;
import com.sun.opengl.util.*;

// 出力画像サイズ
width = 300
height = 300

def drawQuads(GL gl,
double p1x, double p1y, double p1z,
double p2x, double p2y, double p2z,
double p3x, double p3y, double p3z,
double p4x, double p4y, double p4z)
{
gl.glBegin(GL_QUADS)
gl.glNormal3d(p1x, p1y, p1z)
gl.glVertex3d(p1x, p1y, p1z)
gl.glNormal3d(p2x, p2y, p2z)
gl.glVertex3d(p2x, p2y, p2z)
gl.glNormal3d(p3x, p3y, p3z)
gl.glVertex3d(p3x, p3y, p3z)
gl.glNormal3d(p4x, p4y, p4z)
gl.glVertex3d(p4x, p4y, p4z)
gl.glEnd()
}

GLDrawableFactory gldf =
GLDrawableFactory.getFactory()
GLCapabilities glc = new GLCapabilities()
glc.setDoubleBuffered(false)
GLPbuffer buf = gldf.createGLPbuffer(
glc, null, width, height, null)
GL gl = buf.getGL()

buf.addGLEventListener(
[ init: {
// 背景色
gl.glClearColor(
0xf0/0xff as Float,
0xf0/0xff as Float,
0xf0/0xff as Float,
1f)
},

display: {
GLUT glut = new GLUT()
gl.glViewport(0, 0, width, height)

// 透視投影
gl.glMatrixMode(GL_PROJECTION)
gl.glLoadIdentity()
float ratio = height/width as Float
gl.glFrustum(-1.0f, 1.0f, -ratio, ratio,
5.0f, 40.0f)

gl.glMatrixMode(GL_MODELVIEW)
gl.glLoadIdentity()
gl.glTranslatef(0.0f, 0.0f, -10.0f)

gl.glEnable(GL_LIGHTING);
gl.glEnable(GL_LIGHT0);
gl.glEnable(GL_COLOR_MATERIAL);
gl.glEnable(GL_NORMALIZE);
gl.glEnable(GL_DEPTH_TEST);
// gl.glEnable(GL_CULL_FACE);
gl.glClear(GL_COLOR_BUFFER_BIT | GL_DEPTH_BUFFER_BIT );

gl.glPushMatrix()
// 面の色を設定
gl.glColor3f(
0x77/0xff as Float,
0x99/0xff as Float,
0xff/0xff as Float
)
// X軸回転
gl.glRotatef(30.0f, 1.0f, 0.0f, 0.0f)
// Y軸回転
gl.glRotatef(50.0f, 0.0f, 1.0f, 0.0f)

minr = 0.7
maxr = 1.0
slices = 16
lr=2*Math.PI/slices
dh = 0.5
th = 2.5

cx = new double[slices]
cy = new double[slices]

for(li in 0..slices-1){
x1 = minr*Math.cos(lr*(li+1))
y1 = minr*Math.sin(lr*(li+1))
x2 = maxr*Math.cos(lr*(li+1))
y2 = maxr*Math.sin(lr*(li+1))
x3 = maxr*Math.cos(lr*li)
y3 = maxr*Math.sin(lr*li)
x4 = minr*Math.cos(lr*li)
y4 = minr*Math.sin(lr*li)
cx[li] = x4
cy[li] = y4

drawQuads(gl,
x4, y4, -th/2,
x3, y3, -th/2+dh,
x2, y2, -th/2+dh,
x1, y1, -th/2)

drawQuads(gl,
x2, y2, -th/2+dh,
x3, y3, -th/2+dh,
x3, y3, th/2-dh,
x2, y2, th/2-dh)

drawQuads(gl,
x1, y1, th/2,
x2, y2, th/2-dh,
x3, y3, th/2-dh,
x4, y4, th/2)
}

gl.glBegin(GL_POLYGON)
gl.glNormal3d(0,0,-1)
for(li in 0..slices-1){
gl.glVertex3d(cx[li], cy[li], -th/2)
}
gl.glEnd()

gl.glBegin(GL_POLYGON)
gl.glNormal3d(0,0,1)
for(li in 0..slices-1){
gl.glVertex3d(cx[li], cy[li], th/2)
}
gl.glEnd()
gl.glPopMatrix()
},

reshape: {},
displayChanged: {}
] as GLEventListener
)
GLContext context =
buf.createContext(null)
context.makeCurrent()
buf.display()
Screenshot.writeToFile(
new File("sample1288a.png"),
width, height, true)
context.release()
context.destroy()


出力画像(sample1288a.png)
groovyとJOGLで描画した樽の形

動作環境
JDK1.6 Update14, Groovy 1.6.3, JOGL 1.1.1a

関連情報
groovyとJOGLのまとめ

Wednesday, September 23, 2009

groovyとJOGLでテクスチャの張られたポリゴンを描画する

groovyとJOGLでテクスチャの張られたポリゴンを描画するには、以下のコードを実行します。


import static javax.media.opengl.GL.*;
import java.io.*;
import javax.media.opengl.*;
import com.sun.opengl.util.*;
import com.sun.opengl.util.texture.*;

// 出力画像サイズ
width = 300
height = 300

GLDrawableFactory gldf =
GLDrawableFactory.getFactory()
GLCapabilities glc = new GLCapabilities()
glc.setDoubleBuffered(false)
GLPbuffer buf = gldf.createGLPbuffer(
glc, null, width, height, null)
GL gl = buf.getGL()

buf.addGLEventListener(
[ init: {
// 背景色
gl.glClearColor(
0xf0/0xff as Float,
0xf0/0xff as Float,
0xf0/0xff as Float,
1f)
Texture texture = TextureIO.newTexture(
new File("sf.jpg"), true)
texture.enable()
texture.bind()
},

display: {
GLUT glut = new GLUT()
gl.glViewport(0, 0, width, height)

// 透視投影
gl.glMatrixMode(GL_PROJECTION)
gl.glLoadIdentity()
float ratio = height/width as Float
gl.glFrustum(-1.0f, 1.0f, -ratio, ratio,
5.0f, 40.0f)

gl.glMatrixMode(GL_MODELVIEW)
gl.glLoadIdentity()
gl.glTranslatef(0.0f, 0.0f, -10.0f)

gl.glEnable(GL_LIGHTING);
gl.glEnable(GL_LIGHT0);
gl.glEnable(GL_COLOR_MATERIAL);
gl.glEnable(GL_NORMALIZE);
gl.glEnable(GL_DEPTH_TEST);
gl.glEnable(GL_CULL_FACE);
gl.glClear(GL_COLOR_BUFFER_BIT | GL_DEPTH_BUFFER_BIT );

gl.glPushMatrix()
// Y軸回転
gl.glRotatef(20.0f, 0.0f, 1.0f, 0.0f)
// テクスチャが張られたポリゴンを描画
gl.glBegin(GL_POLYGON)
gl.glTexCoord2f(0.0f, 1.0f)
gl.glVertex3f(-1.5f, -1.5f, 0.0f)
gl.glTexCoord2f(1.0f, 1.0f)
gl.glVertex3f(1.5f, -1.5f, 0.0f)
gl.glTexCoord2f(1.0f, 0.0f)
gl.glVertex3f(1.5f, 1.5f, 0.0f)
gl.glTexCoord2f(0.0f, 0.0f)
gl.glVertex3f(-1.5f, 1.5f, 0.0f)
gl.glEnd()
gl.glPopMatrix()
},

reshape: {},
displayChanged: {}
] as GLEventListener
)
GLContext context =
buf.createContext(null)
context.makeCurrent()
buf.display()
Screenshot.writeToFile(
new File("sample1287a.png"),
width, height, true)
context.release()
context.destroy()


出力画像(sample1287a.png)
groovyとJOGLで描画したテクスチャの張られたポリゴン

動作環境
JDK1.6 Update14, Groovy 1.6.3, JOGL 1.1.1a

関連情報
groovyとJOGLのまとめ
Tuesday, September 22, 2009

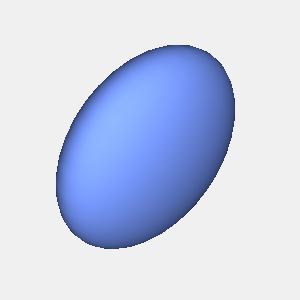
groovyとJOGLでつぶれた球を描画する

groovyとJOGLでつぶれた球を描画するには、以下のコードを実行します。


import static javax.media.opengl.GL.*;
import java.io.*;
import javax.media.opengl.*;
import com.sun.opengl.util.*;

// 出力画像サイズ
width = 300
height = 300

GLDrawableFactory gldf =
GLDrawableFactory.getFactory()
GLCapabilities glc = new GLCapabilities()
glc.setDoubleBuffered(false)
GLPbuffer buf = gldf.createGLPbuffer(
glc, null, width, height, null)
GL gl = buf.getGL()

buf.addGLEventListener(
[ init: {
// 背景色
gl.glClearColor(
0xf0/0xff as Float,
0xf0/0xff as Float,
0xf0/0xff as Float,
1f)
},

display: {
GLUT glut = new GLUT()
gl.glViewport(0, 0, width, height)

// 透視投影
gl.glMatrixMode(GL_PROJECTION)
gl.glLoadIdentity()
float ratio = height/width as Float
gl.glFrustum(-1.0f, 1.0f, -ratio, ratio,
5.0f, 40.0f)

gl.glMatrixMode(GL_MODELVIEW)
gl.glLoadIdentity()
gl.glTranslatef(0.0f, 0.0f, -10.0f)

gl.glEnable(GL_LIGHTING);
gl.glEnable(GL_LIGHT0);
gl.glEnable(GL_COLOR_MATERIAL);
gl.glEnable(GL_NORMALIZE);
gl.glEnable(GL_DEPTH_TEST);
gl.glEnable(GL_CULL_FACE);
gl.glClear(GL_COLOR_BUFFER_BIT | GL_DEPTH_BUFFER_BIT );

gl.glPushMatrix()
// 面の色を設定
gl.glColor3f(
0x77/0xff as Float,
0x99/0xff as Float,
0xff/0xff as Float
)
// X軸回転
gl.glRotatef(45.0f, 1.0f, 0.0f, 0.0f)
// Y軸回転
gl.glRotatef(45.0f, 0.0f, 1.0f, 0.0f)
// 球を描画
gl.glScalef(1f,1f,0.5f)
glut.glutSolidSphere(1.5f, 32, 32)
gl.glPopMatrix()
},

reshape: {},
displayChanged: {}
] as GLEventListener
)
GLContext context =
buf.createContext(null)
context.makeCurrent()
buf.display()
Screenshot.writeToFile(
new File("sample1286a.png"),
width, height, true)
context.release()
context.destroy()


出力画像(sample1286a.png)
groovyとJOGLで描画したつぶれた球

動作環境
JDK1.6 Update14, Groovy 1.6.3, JOGL 1.1.1a

関連情報
groovyとJOGLのまとめ

Monday, September 21, 2009

groovyとJOGLで立方体の市松模様を描画する

groovyとJOGLで立方体の市松模様を描画するには、以下のコードを実行します。


import static javax.media.opengl.GL.*;
import java.io.*;
import javax.media.opengl.*;
import com.sun.opengl.util.*;

// 出力画像サイズ
width = 300
height = 300

GLDrawableFactory gldf =
GLDrawableFactory.getFactory()
GLCapabilities glc = new GLCapabilities()
glc.setDoubleBuffered(false)
GLPbuffer buf = gldf.createGLPbuffer(
glc, null, width, height, null)
GL gl = buf.getGL()

buf.addGLEventListener(
[ init: {
// 背景色
gl.glClearColor(
0x77/0xff as Float,
0x99/0xff as Float,
0xff/0xff as Float,
1f)
},

display: {
GLUT glut = new GLUT()
gl.glViewport(0, 0, width, height)

// 透視投影
gl.glMatrixMode(GL_PROJECTION)
gl.glLoadIdentity()
float ratio = height/width as Float
gl.glFrustum(-1.0f, 1.0f, -ratio, ratio,
5.0f, 40.0f)

gl.glMatrixMode(GL_MODELVIEW)
gl.glLoadIdentity()
gl.glTranslatef(-4.0f, -6.0f, -25.0f)

gl.glEnable(GL_LIGHTING);
gl.glEnable(GL_LIGHT0);
gl.glEnable(GL_COLOR_MATERIAL);
gl.glEnable(GL_NORMALIZE);
gl.glEnable(GL_DEPTH_TEST);
// gl.glEnable(GL_CULL_FACE);
gl.glClear(GL_COLOR_BUFFER_BIT | GL_DEPTH_BUFFER_BIT );

gl.glPushMatrix()
// X軸回転
gl.glRotatef(30.0f, 1.0f, 0.0f, 0.0f)
// Y軸回転
gl.glRotatef(35.0f, 0.0f, 1.0f, 0.0f)

cs = 0.4f
gs = 0.5f
xs = 20
ys = 20
for(ly in 0..ys-1){
for(lx in 0..xs-1){
if( (lx+ly)%2 == 0 ){
gl.glColor3f(
0xff/0xff as Float,
0xff/0xff as Float,
0xff/0xff as Float
)
} else {
gl.glColor3f(
0xe0/0xff as Float,
0xb0/0xff as Float,
0x40/0xff as Float
)
}
gl.glTranslatef(gs, 0.0f, 0.0f)
glut.glutSolidCube(cs)
}
gl.glTranslatef(-gs*xs as Float, gs, 0.0f)
}
gl.glPopMatrix()
},

reshape: {},
displayChanged: {}
] as GLEventListener
)
GLContext context =
buf.createContext(null)
context.makeCurrent()
buf.display()
Screenshot.writeToFile(
new File("sample1285a.png"),
width, height, true)
context.release()
context.destroy()


出力画像(sample1285a.png)
groovyとJOGLで描画した立方体の市松模様

動作環境
JDK1.6 Update14, Groovy 1.6.3, JOGL 1.1.1a

関連情報
groovyとJOGLのまとめ

Sunday, September 20, 2009

groovyとJOGLで市松模様の面を描画する

groovyとJOGLで市松模様の面を描画するには、以下のコードを実行します。


import static javax.media.opengl.GL.*;
import java.io.*;
import javax.media.opengl.*;
import com.sun.opengl.util.*;

// 出力画像サイズ
width = 300
height = 300

GLDrawableFactory gldf =
GLDrawableFactory.getFactory()
GLCapabilities glc = new GLCapabilities()
glc.setDoubleBuffered(false)
GLPbuffer buf = gldf.createGLPbuffer(
glc, null, width, height, null)
GL gl = buf.getGL()

buf.addGLEventListener(
[ init: {
// 背景色
gl.glClearColor(
0x77/0xff as Float,
0x99/0xff as Float,
0xff/0xff as Float,
1f)
},

display: {
GLUT glut = new GLUT()
gl.glViewport(0, 0, width, height)

// 透視投影
gl.glMatrixMode(GL_PROJECTION)
gl.glLoadIdentity()
float ratio = height/width as Float
gl.glFrustum(-1.0f, 1.0f, -ratio, ratio,
5.0f, 40.0f)

gl.glMatrixMode(GL_MODELVIEW)
gl.glLoadIdentity()
gl.glTranslatef(-2.0f, -2.0f, -12.0f)

gl.glEnable(GL_LIGHTING);
gl.glEnable(GL_LIGHT0);
gl.glEnable(GL_COLOR_MATERIAL);
gl.glEnable(GL_NORMALIZE);
gl.glEnable(GL_DEPTH_TEST);
// gl.glEnable(GL_CULL_FACE);
gl.glClear(GL_COLOR_BUFFER_BIT | GL_DEPTH_BUFFER_BIT );

gl.glPushMatrix()
// X軸回転
gl.glRotatef(-70.0f, 1.0f, 0.0f, 0.0f)

tw = 0.4f
th = 0.4f
xs = 10
ys = 10
for(ly in 0..ys-1){
for(lx in 0..xs-1){
if( (lx+ly)%2 == 0 ){
gl.glColor3f(
0xf0/0xff as Float,
0xf0/0xff as Float,
0xf0/0xff as Float
)
} else {
gl.glColor3f(
0x40/0xff as Float,
0x40/0xff as Float,
0x40/0xff as Float
)
}
gl.glRectf(lx*tw as Float,
ly*th as Float,
(lx+1)*tw as Float,
(ly+1)*tw as Float)
}
}
gl.glPopMatrix()
},

reshape: {},
displayChanged: {}
] as GLEventListener
)
GLContext context =
buf.createContext(null)
context.makeCurrent()
buf.display()
Screenshot.writeToFile(
new File("sample1284a.png"),
width, height, true)
context.release()
context.destroy()


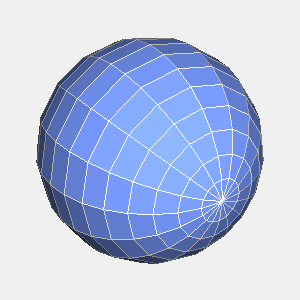
出力画像(sample1284a.png)


動作環境
JDK1.6 Update14, Groovy 1.6.3, JOGL 1.1.1a

関連情報
groovyとJOGLのまとめ
PyWin32とImageMagickで直線を描画する

PyWin32とImageMagickで直線を描画するには、以下のコードを実行します。


# coding=UTF-8
import win32com.client

im = win32com.client.Dispatch("ImageMagickObject.MagickImage.1")
im.convert("-size", "200x200", "xc:white",
"-stroke", "#7799ff",
"-draw", "stroke-width 4 line 0,0,199,199", "sample1333a.png")


出力画像(sample1333a.png)
PyWin32とImageMagickで描画した直線

動作環境
Python3.1.1, Python for Windows Extensions (Build 214), ImageMagick6.5.5

Saturday, September 19, 2009

groovyとJOGLでビットマップ文字列を描画する

groovyとJOGLでビットマップ文字列を描画するには、以下のコードを実行します。


import static javax.media.opengl.GL.*;
import java.io.*;
import javax.media.opengl.*;
import com.sun.opengl.util.*;

// 出力画像サイズ
width = 300
height = 300

GLDrawableFactory gldf =
GLDrawableFactory.getFactory()
GLCapabilities glc = new GLCapabilities()
glc.setDoubleBuffered(false)
GLPbuffer buf = gldf.createGLPbuffer(
glc, null, width, height, null)
GL gl = buf.getGL()

buf.addGLEventListener(
[ init: {
// 背景色
gl.glClearColor(
0x77/0xff as Float,
0x99/0xff as Float,
0xff/0xff as Float,
1f)
},

display: {
GLUT glut = new GLUT()
gl.glViewport(0, 0, width, height)

// 透視投影
gl.glMatrixMode(GL_PROJECTION)
gl.glLoadIdentity()
float ratio = height/width as Float
gl.glFrustum(-1.0f, 1.0f, -ratio, ratio,
5.0f, 40.0f)

gl.glMatrixMode(GL_MODELVIEW)
gl.glLoadIdentity()
gl.glTranslatef(0.0f, 0.0f, -12.0f)

gl.glClear(GL_COLOR_BUFFER_BIT)

gl.glPushMatrix()
// ビットマップ文字の描画
gl.glRasterPos2f(-1f, 0.0f)

glut.glutBitmapCharacter(GLUT.BITMAP_8_BY_13, 'A' as char)
glut.glutBitmapCharacter(GLUT.BITMAP_9_BY_15, 'B' as char)
glut.glutBitmapCharacter(GLUT.BITMAP_HELVETICA_10, 'C' as char)
glut.glutBitmapCharacter(GLUT.BITMAP_HELVETICA_12, 'D' as char)
glut.glutBitmapCharacter(GLUT.BITMAP_HELVETICA_18, 'E' as char)
glut.glutBitmapCharacter(GLUT.BITMAP_TIMES_ROMAN_10, 'F' as char)
glut.glutBitmapCharacter(GLUT.BITMAP_TIMES_ROMAN_24, 'G' as char)
// ビットマップ文字列の描画
glut.glutBitmapString(GLUT.BITMAP_TIMES_ROMAN_24, "123");
gl.glPopMatrix()
},

reshape: {},
displayChanged: {}
] as GLEventListener
)
GLContext context =
buf.createContext(null)
context.makeCurrent()
buf.display()
Screenshot.writeToFile(
new File("sample1283a.png"),
width, height, true)
context.release()
context.destroy()


出力画像(sample1283a.png)
groovyとJOGLで描画したビットマップ文字列

動作環境
JDK1.6 Update14, Groovy 1.6.3, JOGL 1.1.1a

関連情報
groovyとJOGLのまとめ