Saturday, August 01, 2009

Structure Synthでランプが並ぶ風景を描画する

Structure Synthでランプが並ぶ風景を描画するには、以下のスクリプトを実行します。

// 白色の立方体でタイルの地面を描画
1 * { x -100 z -100 } 200 * { x 1 } 200 * { z 1 } 1 * { s 0.95 color #f0f0f0 } box

1 * { y 1 x -3 z -100 } 66 * { z 3 } lamp
1 * { y 1 x 3 z -100 } 66 * { z 3 } lamp

rule lamp {
{ color #f0f0f0 } box
{ y 1 } sphere::light
}


Structure Synthでの出力画像


以前の記事で使用したテンプレート(Structure SynthとSunflowで街頭の明かりがついた町並みを描画する)を使用してSunflowでレンダリングすると、以下のような画像になります。

JOGLで球をフラットシェーディングで描画する

JOGLで球をフラットシェーディングで描画するには、以下のコードを実行します。


import java.io.*;
import javax.media.opengl.*;
import javax.media.opengl.glu.*;
import com.sun.opengl.util.*;

public class JoglSample37
{
// 出力画像サイズ
private static int width = 300;
private static int height = 300;

public static void main(String args[])
throws IOException
{
GLDrawableFactory gldf =
GLDrawableFactory.getFactory();
GLCapabilities glc = new GLCapabilities();
glc.setDoubleBuffered(false);
GLPbuffer buf = gldf.createGLPbuffer(
glc, null, width, height, null);

buf.addGLEventListener(
new GLEventListener(){
// 初期化
public void init(GLAutoDrawable dr)
{
GL gl = dr.getGL();
// 背景色
gl.glClearColor(
(float)0xf0/(float)0xff,
1f);
}

public void display(GLAutoDrawable dr)
{
GL gl = dr.getGL();
GLUT glut = new GLUT();
gl.glViewport(0, 0, width, height);

// 透視投影
gl.glMatrixMode(GL.GL_PROJECTION);
gl.glLoadIdentity();
float ratio = (float)height/(float)width;
gl.glFrustum(-1.0f, 1.0f, -ratio, ratio,
5.0f, 40.0f);

gl.glMatrixMode(GL.GL_MODELVIEW);
gl.glLoadIdentity();
gl.glTranslatef(0.0f, 0.0f, -10.0f);

gl.glEnable(GL.GL_LIGHTING);
gl.glEnable(GL.GL_LIGHT0);
gl.glEnable(gl.GL_COLOR_MATERIAL);
gl.glEnable(GL.GL_NORMALIZE);
gl.glEnable(GL.GL_DEPTH_TEST);
gl.glEnable(GL.GL_CULL_FACE);
// フラットシェーディングモデル
gl.glShadeModel(GL.GL_FLAT);
gl.glClear(GL.GL_COLOR_BUFFER_BIT |GL.GL_DEPTH_BUFFER_BIT );
gl.glPushMatrix();
// 面の色を設定
gl.glColor3f(
(float)0x77/(float)0xff,
(float)0x99/(float)0xff,
(float)0xff/(float)0xff
);
// X軸回転
gl.glRotatef(30.0f, 1.0f, 0.0f, 0.0f);
// Y軸回転
gl.glRotatef(35.0f, 0.0f, 1.0f, 0.0f);
// 球を描画
glut.glutSolidSphere(1.5f, 16, 16);
gl.glPopMatrix();
}

public void reshape(
GLAutoDrawable dr,
int x, int y,
int width, int height){}

public void displayChanged(
GLAutoDrawable dr,
boolean modeChanged,
boolean deviceChanged){}
}
);

GLContext context = buf.createContext(null);
context.makeCurrent();
buf.display();
Screenshot.writeToFile(
new File("sample1195a.png"), width, height, true);
context.release();
context.destroy();
}
}


出力画像(sample1195a.png)
JOGLを使用してフラットシェーディングで描画した球

動作環境
JDK6 Upadate13, JOGL 1.1.1

Friday, July 31, 2009

Structure Synthでピラミッドを描画する

Structure Synthでピラミッドを描画するには、以下のスクリプトを実行します。

set maxobjects 1000000
// 白色の立方体
{ y 6.5 color #e0e0e0 } pyramid
rule pyramid maxdepth 8 {
{ s 0.95 } box
{ y -1 x -0.5 z -0.5 } pyramid
{ y -1 x -0.5 z 0.5 } pyramid
{ y -1 x 0.5 z -0.5 } pyramid
{ y -1 x 0.5 z 0.5 } pyramid
}
// 明るい灰色の地面
{ y -1 s 200 0.1 200 color lightgray } box

Structure Synthでの出力画像


Sunflowでの出力画像

JOGLでフォグをつけてレンダリングする

JOGLでフォグをつけてレンダリングするには、以下のコードを実行します。


import java.io.*;
import javax.media.opengl.*;
import com.sun.opengl.util.*;

public class JoglSample36
{
// 出力画像サイズ
private static int width = 300;
private static int height = 300;

public static void main(String args[])
throws IOException
{
GLDrawableFactory gldf =
GLDrawableFactory.getFactory();
GLCapabilities glc = new GLCapabilities();
glc.setDoubleBuffered(false);
GLPbuffer buf = gldf.createGLPbuffer(
glc, null, width, height, null);

buf.addGLEventListener(
new GLEventListener(){
// 初期化
public void init(GLAutoDrawable dr)
{
GL gl = dr.getGL();
// 背景色
gl.glClearColor(
(float)0x88/(float)0xff,
1f);
}

public void display(GLAutoDrawable dr)
{
GL gl = dr.getGL();
GLUT glut = new GLUT();
gl.glViewport(0, 0, width, height);

// 透視投影
gl.glMatrixMode(GL.GL_PROJECTION);
gl.glLoadIdentity();
float ratio = (float)height/(float)width;
gl.glFrustum(-1.0f, 1.0f, -ratio, ratio,
5.0f, 40.0f);

gl.glMatrixMode(GL.GL_MODELVIEW);
gl.glLoadIdentity();
gl.glTranslatef(-3.0f, -1.5f, -7.0f);

gl.glEnable(GL.GL_LIGHTING);
gl.glEnable(GL.GL_LIGHT0);
gl.glEnable(gl.GL_COLOR_MATERIAL);
gl.glEnable(GL.GL_NORMALIZE);
gl.glEnable(GL.GL_DEPTH_TEST);
// gl.glEnable(GL.GL_CULL_FACE);

float fog[]={1.0f,1.0f,1.0f,1.0f};
gl.glFogfv(GL.GL_FOG_COLOR,fog,0);
gl.glFogi(GL.GL_FOG_MODE,GL.GL_EXP);
gl.glFogf(GL.GL_FOG_DENSITY, 0.08f);
gl.glFogf(GL.GL_FOG_START, 0.0f);
gl.glFogf(GL.GL_FOG_END,10.0f);
gl.glEnable(GL.GL_FOG);

gl.glClear(GL.GL_COLOR_BUFFER_BIT |
GL.GL_DEPTH_BUFFER_BIT );

gl.glPushMatrix();
// X軸回転
gl.glRotatef(15.0f, 1.0f, 0.0f, 0.0f);
// Y軸回転
gl.glRotatef(30.0f, 0.0f, 1.0f, 0.0f);

float cs = 0.3f;
float gs = 0.6f;
int xs = 30;
int zs = 30;
for(int lz=0;lz<zs;lz++){
for(int lx=0;lx<xs;lx++){
if( (lx+lz)%2 == 0 ){
gl.glColor3f(
(float)0xff/(float)0xff,
(float)0xff/(float)0xff
);
} else {
gl.glColor3f(
(float)0x77/(float)0xff,
(float)0x99/(float)0xff,
(float)0xff/(float)0xff
);
}
gl.glPushMatrix();
gl.glTranslatef(lx*gs, 0.0f, -1*lz*gs);
glut.glutSolidCube(cs);
gl.glPopMatrix();
}
}

gl.glPopMatrix();
}

public void reshape(
GLAutoDrawable dr,
int x, int y,
int width, int height){}

public void displayChanged(
GLAutoDrawable dr,
boolean modeChanged,
boolean deviceChanged){}
}
);

GLContext context = buf.createContext(null);
context.makeCurrent();
buf.display();
Screenshot.writeToFile(
new File("sample1194a.png"), width, height, true);
context.release();
context.destroy();
}
}


出力画像(sample1194a.png)
JOGLでフォグをつけてレンダリングした画像

ImageMagickとPHPで画像の四隅にネジを描画する

Imagickで画像の四隅にネジを描画するには、以下のコードを実行します。


<!DOCTYPE html PUBLIC "-//W3C//DTD XHTML 1.0 Strict//EN"
"http://www.w3.org/TR/xhtml1/DTD/xhtml1-strict.dtd">
<html xmlns="http://www.w3.org/1999/xhtml" lang="ja"
xml:lang="ja" dir="ltr">
<head>
<title>sample1151(ImageMagick6.5.2)</title>
</head>
<body>
<?php
/* スクリューの半径 */
$sr = 10;
/* 余白 */
$pad = 5;
/* 塗りつぶし色 */
$fc = "#eeeeee";

/* 円を描画 */
$im = new Imagick();
$im->newImage($sr*2+$pad*2, $sr*2+$pad*2, "none");
$im->setImageMatte(true);
$idraw = new ImagickDraw();
$idraw->setFillColor($fc);
$idraw->ellipse($sr+$pad,$sr+$pad,$sr,$sr,0,360);
$im->drawImage($idraw);

/* 直線部分を透明にする */
$im2 = new Imagick();
$im2->newImage($sr*2+$pad*2, $sr*2+$pad*2, "none");
$im2->setImageMatte(true);
$idraw2 = new ImagickDraw();
$idraw2->setStrokeColor($fc);
$idraw2->setStrokeWidth(3);
$idraw2->line(0,$im2->getImageHeight()/2,
$im2->getImageWidth(), $im2->getImageHeight()/2);
$im2->drawImage($idraw2);
$im2->negateImage(false);

$im2->compositeImage($im,
Imagick::COMPOSITE_SRCIN, 0, 0, Imagick::CHANNEL_ALL);

/* 左上ねじ */
$im3 = $im2->clone();
$im3->rotateImage('none', rand(0,360));
$im3->cropImage($im2->getImageWidth(),
$im2->getImageHeight(),
($im3->getImageWidth() - $im2->getImageWidth())/2,
($im3->getImageHeight() - $im2->getImageHeight())/2
);

/* 右上ねじ */
$im4 = $im2->clone();
$im4->rotateImage('none', rand(0,360));
$im4->cropImage($im2->getImageWidth(),
$im2->getImageHeight(),
($im4->getImageWidth() - $im2->getImageWidth())/2,
($im4->getImageHeight() - $im2->getImageHeight())/2
);

/* 左下ねじ */
$im5 = $im2->clone();
$im5->rotateImage('none', rand(0,360));
$im5->cropImage($im2->getImageWidth(),
$im2->getImageHeight(),
($im5->getImageWidth() - $im2->getImageWidth())/2,
($im5->getImageHeight() - $im2->getImageHeight())/2
);

/* 右下ねじ */
$im6 = $im2->clone();
$im6->rotateImage('none', rand(0,360));
$im6->cropImage($im2->getImageWidth(),
$im2->getImageHeight(),
($im6->getImageWidth() - $im2->getImageWidth())/2,
($im6->getImageHeight() - $im2->getImageHeight())/2
);

/* ねじ画像を重ねあわせ */
$im7 = new Imagick("sf.jpg");
$im7->compositeImage($im3, Imagick::COMPOSITE_OVER,
0, 0, Imagick::CHANNEL_ALL);
$im7->compositeImage($im4, Imagick::COMPOSITE_OVER,
$im7->getImageWidth()-$im4->getImageWidth(), 0,
Imagick::CHANNEL_ALL);
$im7->compositeImage($im5, Imagick::COMPOSITE_OVER,
0, $im7->getImageHeight()-$im5->getImageHeight(),
Imagick::CHANNEL_ALL);
$im7->compositeImage($im6, Imagick::COMPOSITE_OVER,
$im7->getImageWidth()-$im6->getImageWidth(),
$im7->getImageHeight()-$im6->getImageHeight(),
Imagick::CHANNEL_ALL);

$im7->writeImage('sample1151a.png');

$idraw2->destroy();
$idraw->destroy();
$im7->destroy();
$im6->destroy();
$im5->destroy();
$im4->destroy();
$im3->destroy();
$im2->destroy();
$im->destroy();
?>
<img src="sample1151a.png" /><br />

</body>
</html>


元画像(sf.jpg)


出力画像(sample1151a.png)
Imagickで画像の四隅にネジを描画した画像

Thursday, July 30, 2009

Structure SynthとSunflowでミラーの立方体を描画する

Structure SynthとSunflowでミラーの立方体を描画するには、以下のスクリプトを実行します。

// 黄色っぽい立方体
{ z 3 y 1 s 2 color #d0c040 } box
// 水色っぽい立方体
{ x -3 y 1 s 2 color #7799ff } box
//ミラーの立方体
{ y 1 s 2 } box::mirror
// 白色の立方体
{ x 3 y 1 s 2 color #ffffff } box
// 明るい灰色の地面
{ y -1 s 200 0.1 200 color lightgray } box

次に、Structure SynthでSunflowにエクスポートする時に以下のテンプレートファイルを使用します。


<template defaultExtension="Sunflow scene file (*.sc)" name="Sunflow" runAfter="%SUNFLOW%\sunflow.bat "$FILE" -o "$FILE.png"" >
<description>
glass template.

Original template by Syntopia.
The Sunflow coloring was added by Tom Beddard ('subblue')
</description>
<primitive name="begin" ><![CDATA[
%photons {
% caustics 10000000 kd 64 0.5
%}
%% common settings
image {
resolution {width} {height}
aa 0 2
}

gi {
type ambocc
bright { "sRGB nonlinear" 1 1 1 }
dark { "sRGB nonlinear" 0 0 0 }
samples 64
maxdist 3.0
}

accel bih
filter mitchell
bucket 32 spiral

%% camera
camera {
type pinhole
eye {CamPosX} {CamPosY} {CamPosZ}
target {CamTargetX} {CamTargetY} {CamTargetZ}
up {CamUpX} {CamUpY} {CamUpZ}
fov {fov}
aspect {aspect}
}


%% scene background - comment out if not needed
background {
% color { "sRGB nonlinear" {BR} {BG} {BB} }
color { "sRGB nonlinear" 0.5 0.6 0.8 }
}


%% geometry
object {
shader none
transform col 0.001 0 0 0 0 0.001 0 0 0 0 0.001 0 0 0 0 1
type generic-mesh
name "Box"
points 8
1 1 1
1 0 1
0 0 1
0 1 1
0 1 0
0 0 0
1 0 0
1 1 0

triangles 12
0 3 2
0 2 1
2 3 4
2 4 5
3 0 7
3 7 4
0 1 6
0 6 7
1 2 5
1 5 6
5 4 7
5 7 6
normals none
uvs none
}
]]></primitive>
<primitive name="end" ><![CDATA[

]]></primitive>
<primitive name="box" ><![CDATA[
shader {
name "shader{uid}"
type diffuse
diff { "sRGB nonlinear" {r} {g} {b} }
}

instance {
name "{uid}"
geometry "Box"
transform col {matrix}
shader "shader{uid}"
}
]]></primitive>
<primitive name="box" type="mirror">
<![CDATA[
shader {
name "shader{uid}"
type mirror
refl { "sRGB nonlinear" 0.800 0.800 0.800 }
}
instance {
name "{uid}"
geometry "Box"
transform col {matrix}
shader "shader{uid}"
}
]]>
</primitive>
<primitive name="sphere" ><![CDATA[
shader {
name "shader{uid}"
type diffuse
diff { "sRGB nonlinear" {r} {g} {b} }
}

object {
shader "shader{uid}"
type sphere
c {cx} {cy} {cz}
r {rad}
}
]]></primitive>

</template>


Sunflowでの出力画像

JOGLで球にテクスチャをマッピングする

JOGLで球にテクスチャをマッピングするには、以下のコードを実行します。


import java.io.*;
import javax.media.opengl.*;
import com.sun.opengl.util.*;
import com.sun.opengl.util.texture.*;

public class JoglSample35
{
// 出力画像サイズ
private static int width = 300;
private static int height = 300;

public static void main(String args[])
throws IOException
{
GLDrawableFactory gldf =
GLDrawableFactory.getFactory();
GLCapabilities glc = new GLCapabilities();
glc.setDoubleBuffered(false);
GLPbuffer buf = gldf.createGLPbuffer(
glc, null, width, height, null);

buf.addGLEventListener(
new GLEventListener(){
// 初期化
public void init(GLAutoDrawable dr)
{
GL gl = dr.getGL();
// 背景色
gl.glClearColor(
(float)0xf0/(float)0xff,
1f);

try
{
Texture texture = TextureIO.newTexture(
new File("sf_r.jpg"), true);
texture.enable();
texture.bind();
}
catch(IOException ioex){}

}

public void display(GLAutoDrawable dr)
{
GL gl = dr.getGL();
GLUT glut = new GLUT();
gl.glViewport(0, 0, width, height);

// 透視投影
gl.glMatrixMode(GL.GL_PROJECTION);
gl.glLoadIdentity();
float ratio = (float)height/(float)width;
gl.glFrustum(-1.0f, 1.0f, -ratio, ratio,
5.0f, 40.0f);

gl.glMatrixMode(GL.GL_MODELVIEW);
gl.glLoadIdentity();
gl.glTranslatef(0.0f, 0.0f, -10.0f);

gl.glEnable(GL.GL_LIGHTING);
gl.glEnable(GL.GL_LIGHT0);
gl.glEnable(gl.GL_COLOR_MATERIAL);
gl.glEnable(GL.GL_NORMALIZE);
gl.glEnable(GL.GL_DEPTH_TEST);
gl.glEnable(GL.GL_CULL_FACE);
gl.glEnable(GL.GL_TEXTURE_2D);
gl.glEnable(GL.GL_TEXTURE_GEN_S);
gl.glEnable(GL.GL_TEXTURE_GEN_T);
gl.glClear(GL.GL_COLOR_BUFFER_BIT
|GL.GL_DEPTH_BUFFER_BIT );

gl.glPushMatrix();

gl.glTexGeni(GL.GL_S, GL.GL_TEXTURE_GEN_MODE,
GL.GL_SPHERE_MAP);
gl.glTexGeni(GL.GL_T, GL.GL_TEXTURE_GEN_MODE,
GL.GL_SPHERE_MAP);

// 球を描画
glut.glutSolidSphere(1.5f, 32, 32);

gl.glPopMatrix();
}

public void reshape(
GLAutoDrawable dr,
int x, int y,
int width, int height){}

public void displayChanged(
GLAutoDrawable dr,
boolean modeChanged,
boolean deviceChanged){}
}
);

GLContext context = buf.createContext(null);
context.makeCurrent();
buf.display();
Screenshot.writeToFile(
new File("sample1193a.png"), width, height, true);
context.release();
context.destroy();
}
}


出力画像(sample1193a.png)
JOGLで描画したテクスチャをマッピングした球

動作環境
JDK6 Upadate13, JOGL 1.1.1

RMagickで画像を絵画調に変換する - その2

RMagickで画像を絵画調に変換するには、以下のコードを実行します。


require 'RMagick'
include Magick

images = ImageList.new("sf2.jpg")
images[0] = images.fx("0.6*p")
images.modulate(1,1.8,1).
sketch(0,10,135).spread(2).
oil_paint(2).
write("sample1157a.png")
exit


元画像(sf2.jpg)


出力画像(sample1157a.png)


動作環境
ruby1.8.6, rmagick2.9.0

関連項目
RMagickで画像を絵画調に変換する

Wednesday, July 29, 2009

Structure SynthとSunflowで街頭の明かりがついた町並みを描画する

Structure SynthとSunflowで街頭の明かりがついた町並みを描画するには、以下のスクリプトを実行します。


1 * { x -100 z 100 } 3 * { x 40 color #e0e0e0 } 3 * { z -40 } block

rule block {
{ x -30 z -30 } streetlamp
{ x -30 z -20 } streetlampz
{ x -20 z -30 } streetlampx
{ x -10 z -30 } streetlampx
{ x 0 z -30 } streetlampx
{ x -20 z -20 } building
{ x -10 z -20 } building
{ x -0 z -20 } building
{ x -30 z -10 } streetlampz
{ x -20 z -10 } building
{ x -10 z -10 } building
{ x -0 z -10 } building
{ x -30 z -0 } streetlampz
{ x -15 z 0 } building1x2
{ x -0 z 0 } building
}

rule block {
{ x -30 z -30 } streetlamp
{ x -20 z -30 } streetlampx
{ x -10 z -30 } streetlampx
{ x 0 z -30 } streetlampx
{ x -30 z -20 } streetlampz
{ x -20 z -20 } building
{ x -10 z -20 } building
{ x -0 z -20 } building
{ x -30 z -10 } streetlampz
{ x -20 z -10 } building
{ x -10 z -10 ry 90 } building
{ x -0 z -10 } building
{ x -30 z 0 } streetlampz
{ x -20 z 0 } building
{ x -10 z 0 ry 90 } building
{ x -0 z 0 } building
}


rule building {
1 * { x -4 z -6 y 10.5 s 1 21 1 } 5 * { z 2 } box
1 * { x 4 z -6 y 10.5 s 1 21 1 } 5 * { z 2 } box
{ y 10.5 s 7 21 9 } box
1 * { y -3 s 9 1 9 } 8 * { y 3 } box
{ y 22 s 8 1 8 } box
}

rule building {
1 * { x -4 z -6 y 11 s 1 22 1 } 5 * { z 2 } box
1 * { x 4 z -6 y 11 s 1 22 1 } 5 * { z 2 } box
{ y 10.5 s 7 22 9 } box
1 * { y -2 s 9 1 9 } 12 * { y 2 } box
{ y 23 s 8 2 8 } box
{ y 24 s 6 1 6 } box
{ x 2 z 2 y 25 s 2 2 2 } box
}

rule building {
1 * { y -2 s 9 1 9 } 9 * { y 2 } box
1 * { x -5 z -5 y -1 } 8 * { y 2 } 9 * { x 1 } 9 * { z 1 } 1 * { s 0.95 } box
1 * { y 18 s 7 3 3 } box
}

rule building {
1 * { y -2 s 9 1 9 } 8 * { y 2 } box
1 * { x -5 z -5 y -1 } 7 * { y 2 } 9 * { x 1 } 9 * { z 1 } 1 * { s 0.95 } box
1 * { y 14 s 7 1 7 } 6 * { y 2 } box
1 * { x -4 z -4 y 13 } 6 * { y 2 } 7 * { x 1 } 7 * { z 1 } 1 * { s 0.95 } box
1 * { y 27 s 5 1 5 } box
}

rule building1x2 {
1 * { y -2 z -0.5 s 19 1 8 } 8 * { y 2 } box
1 * { x -10 z -5 y -1 } 7 * { y 2 } 19 * { x 1 } 8 * { z 1 } 1 * { s 0.95 } box
{ s 6 2 1 z 4 y 0.25 } box
}

rule streetlamp {
{ y 1 x 2.5 z 2.5 } sphere::light
{ y 1 x 2.5 z -2.5 } sphere::light
{ y 1 x -2.5 z 2.5 } sphere::light
{ y 1 x -2.5 z -2.5 } sphere::light
}

rule streetlampx {
{ y 1 x 5 z 2.5 } sphere::light
{ y 1 x 5 z -2.5 } sphere::light
{ y 1 x 2.5 z 2.5 } sphere::light
{ y 1 x 2.5 z -2.5 } sphere::light
{ y 1 x 0 z 2.5 } sphere::light
{ y 1 x 0 z -2.5 } sphere::light
{ y 1 x -2.5 z 2.5 } sphere::light
{ y 1 x -2.5 z -2.5 } sphere::light
{ y 1 x -5 z 2.5 } sphere::light
{ y 1 x -5 z -2.5 } sphere::light
}

rule streetlampz {
{ y 1 x 2.5 z 5 } sphere::light
{ y 1 x 2.5 z 2.5 } sphere::light
{ y 1 x 2.5 z 0 } sphere::light
{ y 1 x 2.5 z -2.5 } sphere::light
{ y 1 x 2.5 z -5 } sphere::light
{ y 1 x -2.5 z 5 } sphere::light
{ y 1 x -2.5 z 2.5 } sphere::light
{ y 1 x -2.5 z 0 } sphere::light
{ y 1 x -2.5 z -2.5 } sphere::light
{ y 1 x -2.5 z -5 } sphere::light
}

// 白色の地面
{ y -0.5 s 400 0.1 400 color white } box


Structure Synthでの出力画像


Sunflowでレンダリングする際、以下のテンプレートファイルを使用します。
以下のテンプレートではsphere::lightで指定した球を球形光源に置き換えます。


<template defaultExtension="Sunflow scene file (*.sc)" name="Sunflow" runAfter="%SUNFLOW%\sunflow.bat "$FILE" -o "$FILE.png"" >
<description>
night template.

Original template by Syntopia.
The Sunflow coloring was added by Tom Beddard ('subblue')
</description>
<primitive name="begin" ><![CDATA[
%photons {
% caustics 10000000 kd 64 0.5
%}

%% common settings
image {
resolution {width} {height}
aa 0 2
}

gi {
type ambocc
% bright { "sRGB nonlinear" 1 1 1 }
bright { "sRGB nonlinear" 0.5 0.6 0.9 }
dark { "sRGB nonlinear" 0 0 0 }
samples 64
maxdist 3.0
}

accel bih
filter mitchell
bucket 32 spiral

%% camera
camera {
type pinhole
eye {CamPosX} {CamPosY} {CamPosZ}
target {CamTargetX} {CamTargetY} {CamTargetZ}
up {CamUpX} {CamUpY} {CamUpZ}
fov {fov}
aspect {aspect}
}


%% scene background - comment out if not needed
background {
% color { "sRGB nonlinear" {BR} {BG} {BB} }
color { "sRGB nonlinear" 0.5 0.6 0.8 }
}


%% geometry
object {
shader none
transform col 0.001 0 0 0 0 0.001 0 0 0 0 0.001 0 0 0 0 1
type generic-mesh
name "Box"
points 8
1 1 1
1 0 1
0 0 1
0 1 1
0 1 0
0 0 0
1 0 0
1 1 0

triangles 12
0 3 2
0 2 1
2 3 4
2 4 5
3 0 7
3 7 4
0 1 6
0 6 7
1 2 5
1 5 6
5 4 7
5 7 6
normals none
uvs none
}
]]></primitive>
<primitive name="end" ><![CDATA[

]]></primitive>
<primitive name="box" ><![CDATA[
shader {
name "shader{uid}"
type diffuse
diff { "sRGB nonlinear" {r} {g} {b} }
}

instance {
name "{uid}"
geometry "Box"
transform col {matrix}
shader "shader{uid}"
}
]]></primitive>
<primitive name="sphere" ><![CDATA[
shader {
name "shader{uid}"
type diffuse
diff { "sRGB nonlinear" {r} {g} {b} }
}

object {
shader "shader{uid}"
type sphere
c {cx} {cy} {cz}
r {rad}
}
]]></primitive>
<primitive type="light" name="sphere" ><![CDATA[
light {
type spherical
color { "sRGB nonlinear" 0.900 0.900 0.700 }
radiance 4.0
center {cx} {cy} {cz}
radius {rad}
samples 16
}
]]></primitive>

</template>


Sunflowでの出力結果

JOGLで円弧を描画する

JOGLで円弧を描画するには、以下のコードを実行します。


import java.io.*;
import javax.media.opengl.*;
import javax.media.opengl.glu.*;
import com.sun.opengl.util.*;

public class JoglSample34
{
// 出力画像サイズ
private static int width = 300;
private static int height = 300;

public static void main(String args[])
throws IOException
{
GLDrawableFactory gldf =
GLDrawableFactory.getFactory();
GLCapabilities glc = new GLCapabilities();
glc.setDoubleBuffered(false);
GLPbuffer buf = gldf.createGLPbuffer(
glc, null, width, height, null);

buf.addGLEventListener(
new GLEventListener(){
// 初期化
public void init(GLAutoDrawable dr)
{
GL gl = dr.getGL();
// 背景色
gl.glClearColor(
(float)0xff/(float)0xff,
1f);
}

public void display(GLAutoDrawable dr)
{
GL gl = dr.getGL();
GLU glu = new GLU();
gl.glViewport(0, 0, width, height);

// 透視投影
gl.glMatrixMode(GL.GL_PROJECTION);
gl.glLoadIdentity();
float ratio = (float)height/(float)width;
gl.glFrustum(-1.0f, 1.0f, -ratio, ratio,
5.0f, 40.0f);

gl.glMatrixMode(GL.GL_MODELVIEW);
gl.glLoadIdentity();
gl.glTranslatef(0.0f, 0.0f, -7.0f);

gl.glClear(GL.GL_COLOR_BUFFER_BIT);
// ワイヤーフレームの色を設定
gl.glColor3f((float)0x77/(float)0xff,
(float)0x99/(float)0xff,
(float)0xff/(float)0xff);

gl.glPushMatrix();
// X軸回転
gl.glRotatef(45.0f, 1.0f, 0.0f, 0.0f);
// Y軸回転
gl.glRotatef(20.0f, 0.0f, 1.0f, 0.0f);
// 円弧を描画する
GLUquadric gluq = glu.gluNewQuadric();
glu.gluPartialDisk(gluq, 0.0, 1.0, 16, 4, -30, 90);
gl.glPopMatrix();
}

public void reshape(
GLAutoDrawable dr,
int x, int y,
int width, int height){}

public void displayChanged(
GLAutoDrawable dr,
boolean modeChanged,
boolean deviceChanged){}
}
);

GLContext context = buf.createContext(null);
context.makeCurrent();
buf.display();
Screenshot.writeToFile(
new File("sample1192a.png"), width, height, true);
context.release();
context.destroy();
}
}


出力画像(sample1192a.png)
JOGLで描画した円弧

動作環境
JDK6 Upadate13, JOGL 1.1.1

ImageMagickとPHPで看板を描画する

Imagickで看板を描画するには、以下のコードを実行します。


<!DOCTYPE html PUBLIC "-//W3C//DTD XHTML 1.0 Strict//EN"
"http://www.w3.org/TR/xhtml1/DTD/xhtml1-strict.dtd">
<html xmlns="http://www.w3.org/1999/xhtml" lang="ja"
xml:lang="ja" dir="ltr">
<head>
<title>sample1150(ImageMagick6.5.2)</title>
</head>
<body>
<?php
/* メッセージ(UTF-8でファイルを保存する) */
$msg = "ImageMagick";
/* 上下余白 */
$padtop = 10;
$padbottom = 40;
/* 看板余白 */
$padx = 5;
$pady = 10;
/* 棒の幅 */
$polew = 10;
/* 塗りつぶし色 */
$fc = "#7799ff";
/* 文字色 */
$tc = "white";

$im = new Imagick();
$idraw = new ImagickDraw();
/* フォント設定 */
//$idraw->setFont('C:\\Windows\\Fonts\\MSGOTHIC.TTC');
$idraw->setFont('Tahoma');
/* フォントサイズ設定 */
$idraw->setFontSize(30);
/* 文字列のサイズ取得 */
$metrics = $im->queryFontMetrics($idraw, $msg);
$tw = $metrics["textWidth"];
$th = $metrics["textHeight"];
$td = $metrics["descender"];

$im->newPseudoImage(
$tw+$padx*2,
$th+$pady*2+$padtop+$padbottom, "xc:none");
/* 看板 */
$idraw->setFillColor($fc);
$idraw->rectangle(0,$padtop,
$tw+$padx*2-1,
$padtop+$th+$pady*2-1);
$idraw->setStrokeColor($fc);
$idraw->setStrokeWidth($polew);
$idraw->rectangle(($tw+$padx*2)/2,0,
($tw+$padx*2)/2,
$padtop+$th+$pady*2+$padbottom);
$idraw->setFillColor($tc);
$idraw->setStrokeColor($tc);
$idraw->setStrokeWidth(0);
$idraw->annotation($padx, $padtop+$pady+$th+$td, $msg);
$im->drawImage($idraw);


$im->setImageVirtualPixelMethod(Imagick::VIRTUALPIXELMETHOD_TRANSPARENT);
$im->setImageMatte(true);
$args2 = array($im->getImageWidth()/2,
$im->getImageHeight(),1,rand(-3,3));
//$im->distortImage(Imagick::DISTORTION_SCALEROTATETRANSLATE,
// $args2, false);
// ScaleRotateTranslateDistortion in distort.h
$im->distortImage(3, $args2, true);

$im->writeImage('sample1150a.png');

$idraw->destroy();
$im->destroy();
?>
<img src="sample1150a.png" /><br />

</body>
</html>


出力画像(sample1150a.png)
Imagickで描画した看板

Tuesday, July 28, 2009

Structure SynthとSunflowで夕暮れ後のような色合いの画像をレンダリングする

Structure SynthとSunflowで夕暮れ後のような色合いの画像をレンダリングするには、以下のテンプレートのように、shaderをdiffuseに変更してgiの光の色を変更します。
テンプレートファイルは、Structure SynthのMiscディレクトリ以下に起きます。


<template defaultExtension="Sunflow scene file (*.sc)" name="Sunflow" runAfter="%SUNFLOW%\sunflow.bat "$FILE" -o "$FILE.png"" >
<description>
this template uses diffuse shader.

Original template by Syntopia.
The Sunflow coloring was added by Tom Beddard ('subblue')
</description>
<primitive name="begin" ><![CDATA[
%photons {
% caustics 10000000 kd 64 0.5
%}

%% common settings
image {
resolution {width} {height}
aa 0 2
}

gi {
type ambocc
% bright { "sRGB nonlinear" 1 1 1 }
bright { "sRGB nonlinear" 0.6 0.7 1 }
dark { "sRGB nonlinear" 0 0 0 }
samples 64
maxdist 3.0
}

accel bih
filter mitchell
bucket 32 spiral

%% camera
camera {
type pinhole
eye {CamPosX} {CamPosY} {CamPosZ}
target {CamTargetX} {CamTargetY} {CamTargetZ}
up {CamUpX} {CamUpY} {CamUpZ}
fov {fov}
aspect {aspect}
}


%% scene background - comment out if not needed
background {
% color { "sRGB nonlinear" {BR} {BG} {BB} }
color { "sRGB nonlinear" 0.5 0.6 0.8 }
}


%% geometry
object {
shader none
transform col 0.001 0 0 0 0 0.001 0 0 0 0 0.001 0 0 0 0 1
type generic-mesh
name "Box"
points 8
1 1 1
1 0 1
0 0 1
0 1 1
0 1 0
0 0 0
1 0 0
1 1 0

triangles 12
0 3 2
0 2 1
2 3 4
2 4 5
3 0 7
3 7 4
0 1 6
0 6 7
1 2 5
1 5 6
5 4 7
5 7 6
normals none
uvs none
}
]]></primitive>
<primitive name="end" ><![CDATA[

]]></primitive>
<primitive name="box" ><![CDATA[
shader {
name "shader{uid}"
type diffuse
diff { "sRGB nonlinear" {r} {g} {b} }
}

instance {
name "{uid}"
geometry "Box"
transform col {matrix}
shader "shader{uid}"
}
]]></primitive>
<primitive name="sphere" ><![CDATA[
shader {
name "shader{uid}"
type diffuse
diff { "sRGB nonlinear" {r} {g} {b} }
}

object {
shader "shader{uid}"
type sphere
c {cx} {cy} {cz}
r {rad}
}
]]></primitive>
</template>


Sunflowでの出力画像
Sunflowでレンダリングした夕暮れ後の町並み

JOGLでドーナツ型を描画する

JOGLでドーナツ型を描画するには、以下のコードを実行します。


import java.io.*;
import javax.media.opengl.*;
import com.sun.opengl.util.*;

public class JoglSample33
{
// 出力画像サイズ
private static int width = 300;
private static int height = 300;

public static void main(String args[])
throws IOException
{
GLDrawableFactory gldf =
GLDrawableFactory.getFactory();
GLCapabilities glc = new GLCapabilities();
glc.setDoubleBuffered(false);
GLPbuffer buf = gldf.createGLPbuffer(
glc, null, width, height, null);

buf.addGLEventListener(
new GLEventListener(){
// 初期化
public void init(GLAutoDrawable dr)
{
GL gl = dr.getGL();
// 背景色
gl.glClearColor(
(float)0xf0/(float)0xff,
1f);
}

public void display(GLAutoDrawable dr)
{
GL gl = dr.getGL();
GLUT glut = new GLUT();
gl.glViewport(0, 0, width, height);

// 透視投影
gl.glMatrixMode(GL.GL_PROJECTION);
gl.glLoadIdentity();
float ratio = (float)height/(float)width;
gl.glFrustum(-1.0f, 1.0f, -ratio, ratio,
5.0f, 40.0f);

gl.glMatrixMode(GL.GL_MODELVIEW);
gl.glLoadIdentity();
gl.glTranslatef(0.0f, 0.0f, -10.0f);

gl.glEnable(GL.GL_LIGHTING);
gl.glEnable(GL.GL_LIGHT0);
gl.glEnable(gl.GL_COLOR_MATERIAL);
gl.glEnable(GL.GL_NORMALIZE);
gl.glEnable(GL.GL_DEPTH_TEST);
gl.glEnable(GL.GL_CULL_FACE);
gl.glClear(GL.GL_COLOR_BUFFER_BIT |GL.GL_DEPTH_BUFFER_BIT );

gl.glPushMatrix();
// 面の色を設定
gl.glColor3f(
(float)0x77/(float)0xff,
(float)0x99/(float)0xff,
(float)0xff/(float)0xff
);
// X軸回転
gl.glRotatef(20.0f, 1.0f, 0.0f, 0.0f);
// Y軸回転
gl.glRotatef(45.0f, 0.0f, 1.0f, 0.0f);
// ドーナツを描画する
glut.glutSolidTorus(0.5f, 1f, 32, 16);
gl.glPopMatrix();
}

public void reshape(
GLAutoDrawable dr,
int x, int y,
int width, int height){}

public void displayChanged(
GLAutoDrawable dr,
boolean modeChanged,
boolean deviceChanged){}
}
);

GLContext context = buf.createContext(null);
context.makeCurrent();
buf.display();
Screenshot.writeToFile(
new File("sample1191a.png"), width, height, true);
context.release();
context.destroy();
}
}


出力画像(sample1191a.png)
JOGLで描画したドーナツ型

動作環境
JDK6 Upadate13, JOGL 1.1.1

関連項目
JOGLでワイヤーフレームのドーナツ型を描画する

RMagickで抽象的なセピア調画像に変換する

RMagickで抽象的なセピア調画像に変換するには、以下のコードを実行します。


require 'RMagick'
include Magick

images = ImageList.new("sf2.jpg")
images[0] = images.fx("0.4*p")
images.modulate(1.2,0.2,1).
median_filter(2).
sepiatone(95).
write("sample1158a.png")
exit


元画像(sf2.jpg)


出力画像(sample1158a.png)
RMagickで抽象的なセピア調に変換した画像

動作環境
ruby1.8.6, rmagick2.9.0

Monday, July 27, 2009

Sunflowで背景色を指定する

Sunflowで背景色を指定するには、シーンファイルのbackgroundセクションでcolorのパラメータを
RGBで指定します(1が最大)。

%% scene background - comment out if not needed
background {
color { "sRGB nonlinear" 0.2 0.3 0.7 }
}

背景色を指定した例


関連項目
Structure SynthとSunflowのインストールと連携
Structure Synthで町並みを描画する

JOGLで円盤を描画する

JOGLで円盤を描画するには、以下のコードを実行します。


import java.io.*;
import javax.media.opengl.*;
import javax.media.opengl.glu.*;
import com.sun.opengl.util.*;

public class JoglSample32
{
// 出力画像サイズ
private static int width = 300;
private static int height = 300;

public static void main(String args[])
throws IOException
{
GLDrawableFactory gldf =
GLDrawableFactory.getFactory();
GLCapabilities glc = new GLCapabilities();
glc.setDoubleBuffered(false);
GLPbuffer buf = gldf.createGLPbuffer(
glc, null, width, height, null);

buf.addGLEventListener(
new GLEventListener(){
// 初期化
public void init(GLAutoDrawable dr)
{
GL gl = dr.getGL();
// 背景色
gl.glClearColor(
(float)0xff/(float)0xff,
1f);
}

public void display(GLAutoDrawable dr)
{
GL gl = dr.getGL();
GLU glu = new GLU();
gl.glViewport(0, 0, width, height);

// 透視投影
gl.glMatrixMode(GL.GL_PROJECTION);
gl.glLoadIdentity();
float ratio = (float)height/(float)width;
gl.glFrustum(-1.0f, 1.0f, -ratio, ratio,
5.0f, 40.0f);

gl.glMatrixMode(GL.GL_MODELVIEW);
gl.glLoadIdentity();
gl.glTranslatef(0.0f, 0.0f, -10.0f);

gl.glClear(GL.GL_COLOR_BUFFER_BIT);
// ワイヤーフレームの色を設定
gl.glColor3f((float)0x77/(float)0xff,
(float)0x99/(float)0xff,
(float)0xff/(float)0xff);

gl.glPushMatrix();
// X軸回転
gl.glRotatef(45.0f, 1.0f, 0.0f, 0.0f);
// Y軸回転
gl.glRotatef(20.0f, 0.0f, 1.0f, 0.0f);
// 円盤を描画する
GLUquadric gluq = glu.gluNewQuadric();
glu.gluDisk(gluq, 0.0, 1.0, 16, 4);
gl.glPopMatrix();
}

public void reshape(
GLAutoDrawable dr,
int x, int y,
int width, int height){}

public void displayChanged(
GLAutoDrawable dr,
boolean modeChanged,
boolean deviceChanged){}
}
);

GLContext context = buf.createContext(null);
context.makeCurrent();
buf.display();
Screenshot.writeToFile(
new File("sample1170a.png"), width, height, true);
context.release();
context.destroy();
}
}


出力画像(sample1170a.png)
JOGLで描画した円盤

動作環境
JDK6 Upadate13, JOGL 1.1.1

ImageMagickとPHPでグラデーションのかかったストライプを描画する

Imagickでグラデーションのかかったストライプを描画するには、以下のコードを実行します。


<!DOCTYPE html PUBLIC "-//W3C//DTD XHTML 1.0 Strict//EN"
"http://www.w3.org/TR/xhtml1/DTD/xhtml1-strict.dtd">
<html xmlns="http://www.w3.org/1999/xhtml" lang="ja"
xml:lang="ja" dir="ltr">
<head>
<title>sample1139(ImageMagick6.5.2)</title>
</head>
<body>
<?php
/* 画像サイズ */
$sx=200;
$sy=200;
/* ストライプ数 */
$rays=16;
$sr=360/$rays;
/* 背景色 */
$bc="#f0f0f0";
/* ストライプ色 */
$sc1="#99bbff";
$sc2="orange";

$cx=$sx/2;
$cy=$sy/2;

$im = new Imagick();
$im->newImage($sx, $sy, "none");
//$im->setImageMatte(true);
$idraw = new ImagickDraw();
$idraw->setFillColor("white");
for($lc=0;$lc<$rays;$lc++){
$points[] = array(
'x' => $cx, 'y' => $cy);
$points[] = array(
'x' => $cx+cos(pi()*$sr*$lc/180)*$sx,
'y' => $cy+sin(pi()*$sr*$lc/180)*$sy);
$points[] = array(
'x' => $cx+cos(pi()*($sr*$lc+$sr/2)/180)*$sx,
'y' => $cy+sin(pi()*($sr*$lc+$sr/2)/180)*$sy);
$idraw->polygon($points);
}
$im->drawImage($idraw);
$im2 = new Imagick();
$im2->newPseudoImage($sx, $sy,
"radial-gradient:" . $sc1 . "-" . $sc2);
$im2->setImageMatte(true);

$im2->compositeImage($im, Imagick::COMPOSITE_DSTIN,
0, 0, Imagick::CHANNEL_ALL);

$im3 = new Imagick();
$im3->newImage($sx, $sy, $bc);
$im3->compositeImage($im2, Imagick::COMPOSITE_OVER,
0, 0, Imagick::CHANNEL_ALL);


$im3->writeImage('sample1139a.png');
$idraw->destroy();
$im3->destroy();
$im2->destroy();
$im->destroy();
?>
<img src="sample1139a.png" /><br />

</body>
</html>


出力画像(sample1139a.png)
Imagickで描画したグラデーションのかかったストライプ

Sunday, July 26, 2009

Sunflowでシーンファイルの出力画像サイズを変更する

Sunflowでシーンファイルの出力画像サイズを指定するには、シーンファイル内のimageセクションのresolutionに幅と高さをピクセルで指定します。

シーンファイルでの
%% common settings
image {
resolution 400 400
aa 0 2
}

シーンファイルの出力サイズを変更した例


関連項目
Structure SynthとSunflowのインストールと連携
Structure Synthで町並みを描画する

JOGLで樽の形を描画する

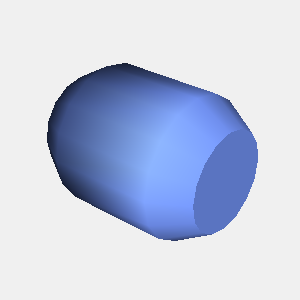
JOGLで樽の形を描画するには、以下のコードを実行します。


import java.io.*;
import javax.media.opengl.*;
import com.sun.opengl.util.*;
import com.sun.opengl.util.texture.*;

public class JoglSample31
{
// 出力画像サイズ
private static int width = 300;
private static int height = 300;

public static void main(String args[])
throws IOException
{
GLDrawableFactory gldf =
GLDrawableFactory.getFactory();
GLCapabilities glc = new GLCapabilities();
glc.setDoubleBuffered(false);
GLPbuffer buf = gldf.createGLPbuffer(
glc, null, width, height, null);

buf.addGLEventListener(
new GLEventListener(){
// 初期化
public void init(GLAutoDrawable dr)
{
GL gl = dr.getGL();
// 背景色
gl.glClearColor(
(float)0xf0/(float)0xff,
1f);

try
{
Texture texture = TextureIO.newTexture(
new File("sf.jpg"), true);
texture.enable();
texture.bind();
}
catch(IOException ioex){}

}

public void display(GLAutoDrawable dr)
{
GL gl = dr.getGL();
GLUT glut = new GLUT();
gl.glViewport(0, 0, width, height);

// 透視投影
gl.glMatrixMode(GL.GL_PROJECTION);
gl.glLoadIdentity();
float ratio = (float)height/(float)width;
gl.glFrustum(-1.0f, 1.0f, -ratio, ratio,
5.0f, 40.0f);

gl.glMatrixMode(GL.GL_MODELVIEW);
gl.glLoadIdentity();
gl.glTranslatef(0.0f, 0.0f, -10.0f);

gl.glEnable(GL.GL_LIGHTING);
gl.glEnable(GL.GL_LIGHT0);
gl.glEnable(gl.GL_COLOR_MATERIAL);
gl.glEnable(GL.GL_NORMALIZE);
gl.glEnable(GL.GL_DEPTH_TEST);
// gl.glEnable(GL.GL_CULL_FACE);
gl.glClear(GL.GL_COLOR_BUFFER_BIT |GL.GL_DEPTH_BUFFER_BIT );

gl.glPushMatrix();
// 面の色を設定
gl.glColor3f(
(float)0x77/(float)0xff,
(float)0x99/(float)0xff,
(float)0xff/(float)0xff
);
// X軸回転
gl.glRotatef(30.0f, 1.0f, 0.0f, 0.0f);
// Y軸回転
gl.glRotatef(50.0f, 0.0f, 1.0f, 0.0f);
//
double minr = 0.7f;
double maxr = 1.0f;
int slices = 16;
double lr=2*Math.PI/slices;
double dh = 0.5;
double th = 2.5;

double cx[] = new double[slices];
double cy[] = new double[slices];

for(int li=0;li<slices;li++){
double x1 = minr*Math.cos(lr*(li+1));
double y1 = minr*Math.sin(lr*(li+1));
double x2 = maxr*Math.cos(lr*(li+1));
double y2 = maxr*Math.sin(lr*(li+1));
double x3 = maxr*Math.cos(lr*li);
double y3 = maxr*Math.sin(lr*li);
double x4 = minr*Math.cos(lr*li);
double y4 = minr*Math.sin(lr*li);
cx[li] = x4;
cy[li] = y4;
drawQuads(gl,
x4, y4, -th/2,
x3, y3, -th/2+dh,
x2, y2, -th/2+dh,
x1, y1, -th/2);

drawQuads(gl,
x2, y2, -th/2+dh,
x3, y3, -th/2+dh,
x3, y3, th/2-dh,
x2, y2, th/2-dh);

drawQuads(gl,
x1, y1, th/2,
x2, y2, th/2-dh,
x3, y3, th/2-dh,
x4, y4, th/2);
}

gl.glBegin(GL.GL_POLYGON);
gl.glNormal3d(0,0,-1);
for(int li=0;li<slices;li++){
gl.glVertex3d(cx[li], cy[li], -th/2);
}
gl.glEnd();

gl.glBegin(GL.GL_POLYGON);
gl.glNormal3d(0,0,1);
for(int li=0;li<slices;li++){
gl.glVertex3d(cx[li], cy[li], th/2);
}
gl.glEnd();

gl.glPopMatrix();
}

public void reshape(
GLAutoDrawable dr,
int x, int y,
int width, int height){}

public void displayChanged(
GLAutoDrawable dr,
boolean modeChanged,
boolean deviceChanged){}

private void drawQuads(GL gl,
double p1x, double p1y, double p1z,
double p2x, double p2y, double p2z,
double p3x, double p3y, double p3z,
double p4x, double p4y, double p4z)
{
gl.glBegin(GL.GL_QUADS);

gl.glNormal3d(p1x, p1y, p1z);
gl.glVertex3d(p1x, p1y, p1z);
gl.glNormal3d(p2x, p2y, p2z);
gl.glVertex3d(p2x, p2y, p2z);
gl.glNormal3d(p3x, p3y, p3z);
gl.glVertex3d(p3x, p3y, p3z);
gl.glNormal3d(p4x, p4y, p4z);
gl.glVertex3d(p4x, p4y, p4z);

gl.glEnd();
}
}
);

GLContext context = buf.createContext(null);
context.makeCurrent();
buf.display();
Screenshot.writeToFile(
new File("sample1189a.png"), width, height, true);
context.release();
context.destroy();
}
}


出力画像(sample1189a.png)


動作環境
JDK6 Upadate13, JOGL 1.1.1

ImageMagickとPHPでランダムな草の影絵を描画する

Imagickでランダムな草の影絵を描画するには、以下のコードを実行します。


<!DOCTYPE html PUBLIC "-//W3C//DTD XHTML 1.0 Strict//EN"
"http://www.w3.org/TR/xhtml1/DTD/xhtml1-strict.dtd">
<html xmlns="http://www.w3.org/1999/xhtml" lang="ja"
xml:lang="ja" dir="ltr">
<head>
<title>sample1145(ImageMagick6.5.2)</title>
</head>
<body>
<?php
/* 画像サイズ */
$sx=200;
$sy=200;

/* 茎の幅 */
$rw = 20+rand(-2,2);

/* 根の位置 */
$rx = 100;
$ry = 200;

/* 繰り返し回数 */
$rt = 3;

/* 初期角度 */
$ia = 15;

/* 差分角度 */
$da = 26;

/* 描画色 */
$dc = "black";

/* 葉の長さ */
$ll = 90;

/* 葉の長さの差分 */
$dl = 10;


$im = new Imagick();
$im->newImage($sx, $sy, "none");
$im->setImageMatte(true);

$ca = $ia;


for($lc=0;$lc<$rt;$lc++){

$idraw = new ImagickDraw();
$idraw->setFillColor($dc);
$idraw->pathStart();
$idraw->pathMoveToAbsolute($rx-$rw/2, $ry);
$idraw->pathCurveToQuadraticBezierAbsolute(
$rx -$rw/2 + $ll/2*cos(pi()*($ca+40)/180),
$ry + $ll/2*sin(pi()*($ca+40)/180)*-1,
$rx -$rw/2 + $ll*cos(pi()*($ca)/180)+rand(0,10),
$ry + $ll*sin(pi()*($ca)/180)*-1+rand(0,10)
);
$idraw->pathCurveToQuadraticBezierAbsolute(
$rx +$rw/2 + $ll/2*cos(pi()*($ca+30)/180),
$ry + $ll/2*sin(pi()*($ca+30)/180)*-1,
$rx+$rw/2,
$ry
);
$idraw->pathClose();
$im->drawImage($idraw);
$idraw->destroy();


$idraw = new ImagickDraw();
$idraw->setFillColor($dc);
$idraw->pathStart();
$idraw->pathMoveToAbsolute($rx+$rw/2, $ry);
$idraw->pathCurveToQuadraticBezierAbsolute(
$rx +$rw/2 + $ll/2*cos(pi()*($ca+40)/180)*-1,
$ry + $ll/2*sin(pi()*($ca+40)/180)*-1,
$rx +$rw/2 + $ll*cos(pi()*($ca)/180)*-1+rand(0,10),
$ry + $ll*sin(pi()*($ca)/180)*-1+rand(0,10)
);
$idraw->pathCurveToQuadraticBezierAbsolute(
$rx -$rw/2 + $ll/2*cos(pi()*($ca+30)/180)*-1,
$ry + $ll/2*sin(pi()*($ca+30)/180)*-1,
$rx-$rw/2,
$ry
);
$idraw->pathClose();
$im->drawImage($idraw);
$idraw->destroy();


$rw -= 4;
$ca += $da+rand(-4,4);
$ll -= $dl;

}


$im->writeImage('sample1145a.png');
$idraw->destroy();
$im->destroy();
?>
<img src="sample1145a.png" /><br />

</body>
</html>


出力画像(sample1145a.png)
Imagickで描画した草の影絵