Saturday, February 21, 2009

RMagickで任意の2色グラデーションのプラズマフラクタル画像を生成する

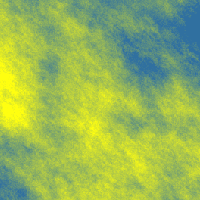
RMagickで任意の2色グラデーションのプラズマフラクタル画像を生成するには、以下のコードを実行します。

require 'RMagick'
include Magick

# 任意の2色グラデーションのプラズマフラクタル画像を生成する
images1 = ImageList.new
images1 << Image.read("plasma:fractal"){
self.size = "200x200"
}.first
images1[0] = images1.fx("intensity", AllChannels).normalize()
images2 = ImageList.new
images2 << Image.new(1,1){
self.background_color = "#3070A0FF"
}
images2 << Image.new(1,1){
self.background_color = "#FFFF10FF"
}
images1 << images2.append(true)
img = images1.fx("v.p{0,p}", AllChannels)

img.write("sample779a.png")

exit

出力画像(sample779a.png)

動作環境
ruby1.8.6, rmagick2.7.1

関連項目
ImageMagickで画像を任意の2色グラデーションの画像に変換する (convertコマンドによる同様の処理)
groovyでクロマキー処理をする

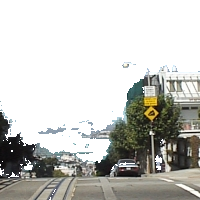
groovyでクロマキー処理をして青い色を透明にするには、以下のコードを実行します。


import groovy.swing.j2d.*

def gr = new GraphicsRenderer()
gr.renderToFile("sample880a.png", 200, 200){
antialias("on")
rect( x: 0, y: 0, width: 200, height: 200,
borderColor: no){
texturePaint(x: 0, y: 0, file: 'sf.jpg' )
filters {
chromaKey(color: color("blue"), hTolerance:0.15, sTolerance:0.8, bTolerance:1)
}
}
}


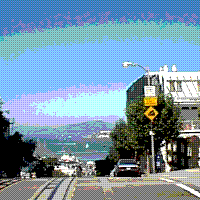
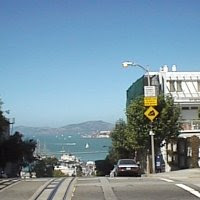
元画像(sf.jpg)


出力画像(sample880a.png)
groovyでクロマキー処理した画像

動作環境
Groovy1.6.0 Beta2, JDK1.6 Update11

関連項目
groovyで画像にディザをかける

Friday, February 20, 2009

groovyで画像にディザをかける

groovyで画像にディザをかけるには、以下のコードを実行します。


import groovy.swing.j2d.*

def gr = new GraphicsRenderer()
gr.renderToFile("sample878a.png", 200, 200){
antialias("on")
rect( x: 0, y: 0, width: 200, height: 200,
borderColor: no){
texturePaint(x: 0, y: 0, file: 'sf.jpg' )
filters {
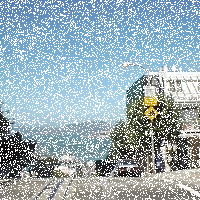
dither(matrix:dither90Halftone6x6Matrix)
}
}
}
gr.renderToFile("sample878b.png", 200, 200){
antialias("on")
rect( x: 0, y: 0, width: 200, height: 200,
borderColor: no){
texturePaint(x: 0, y: 0, file: 'sf.jpg' )
filters {
dither(matrix:ditherMagic2x2Matrix)
}
}
}


元画像(sf.jpg)


出力画像1(sample878a.png)


出力画像2(sample878a.png)
groovyでディザをかけた画像

動作環境
Groovy1.6.0 Beta2, JDK1.6 Update11

関連項目
groovyで画像がきえる感じの効果をつける

groovyで図形を虹色グラデーションで塗りつぶす

groovyで図形を虹色グラデーションで塗りつぶすには、以下のコードを実行します。


import groovy.swing.j2d.*

def gr = new GraphicsRenderer()
gr.renderToFile("sample815a.png", 200, 200){
antialias("on")
butterflyShape( x: 0, y: 0, width: 200, height: 200,
borderColor: color("#103080"),
borderWidth: 2
){
linearGradient( x1: 0, y1: 0, x2: 0, y2: 200){
stop(offset: 0, color: "blue")
stop(offset: 0.25, color: "green")
stop(offset: 0.5, color: "yellow")
stop(offset: 0.75, color: "orange")
stop(offset: 1, color: "red")
}
}
}


出力画像(sample815a.png)
groovyで描画した蝶


動作環境
Groovy1.6.0 Beta2, JDK1.6 Update11

関連項目
groovyでストロークにグラデーションをかける
groovyで図形をグラデーションで塗りつぶす

Thursday, February 19, 2009

RMagickで画像を2値化で切り取って、白背景でぼかす

RMagickで画像を2値化で切り取って、白背景でぼかすには、以下のコードを実行します。

require 'RMagick'
include Magick

# 画像を2値化して切り取って白背景と合成してからぼかす
images1 = ImageList.new("sample5r.jpg")
images1[0] = images1.threshold(MaxRGB*0.85).negate(true)
images1.alpha = ActivateAlphaChannel
images1[0] = images1.fx("p.r==1?1:0", AlphaChannel)
images2 = ImageList.new("sample5r.jpg")
img = images1.composite(images2, 0, 0, SrcInCompositeOp);
img2 = Image.new(img.columns, img.rows){
self.background_color = "white"
}
img3 = img2.composite(img, CenterGravity, 0, 0, OverCompositeOp);
img4 = img3.blur_channel(0, 2, ChannelType::AllChannels)

img4.write("sample778a.png")

exit
元画像(sample5r.jpg)


出力画像(sample778a.png)


動作環境
ruby1.8.6, rmagick2.7.1

関連項目
ImageMagickで、2値化して画像を切り取って白背景でぼかす (convertコマンドでの同様の処理)

groovyで画像がきえる感じの効果をつける

groovyで画像がきえる感じの効果をつけるには、以下のコードを実行します。


import groovy.swing.j2d.*

def gr = new GraphicsRenderer()
gr.renderToFile("sample879a.png", 200, 200){
antialias("on")
rect( x: 0, y: 0, width: 200, height: 200,
borderColor: no){
texturePaint(x: 0, y: 0, file: 'sf.jpg' )
filters {
dissolve(density:0.7, softness:0.2)
}
}
}


元画像(sf.jpg)


出力画像(sample879a.png)
groovyでディゾルブフィルタをかけた画像

動作環境
Groovy1.6.0 Beta2, JDK1.6 Update11

関連項目
groovyで炎のような画像を生成する

im4javaで画像のサイズを取得する

im4javaで画像のサイズを取得するには、以下のコードを実行します。


import java.util.*;
import org.im4java.core.*;
import org.im4java.process.*;

// im4java-0.96.0-bin.tar.bz2を解凍してim4java-0.96.0.jarはclasspathに通す
public class Im4java2
{
public static void main(String args[])
throws Exception
{
try
{
IMOperation op = new IMOperation();
op.verbose();
op.addImage("sf.jpg");

IdentifyCmd identify = new IdentifyCmd();
ArrayListOutputConsumer output = new ArrayListOutputConsumer();
identify.setOutputConsumer(output);
identify.run(op);
ArrayList lines = output.getOutput();

for(String line:lines){
if( line.startsWith(" Geometry: ") ){
if( line.indexOf("+") != -1 ){
String sz[] = line.substring(
" Geometry: ".length(),
line.indexOf("+")
).split("x");
System.out.println("width:" + sz[0]);
System.out.println("height:" + sz[1]);
}
}
}
}
catch(CommandException cex)
{
System.out.println(cex.getErrorText());
cex.printStackTrace();
}
}

}


関連情報
im4javaのまとめ

Wednesday, February 18, 2009

ImageMagickとPHPで立体的な角丸四角の枠をつける

ImageMagickとPHPで立体的な角丸四角の枠をつけるには、以下のコードを実行します。


<!DOCTYPE html PUBLIC "-//W3C//DTD XHTML 1.0 Strict//EN"
"http://www.w3.org/TR/xhtml1/DTD/xhtml1-strict.dtd">
<html xmlns="http://www.w3.org/1999/xhtml" lang="ja" xml:lang="ja"
dir="ltr">
<head>
<title>sample887(ImageMagick6.4.8)</title>
</head>
<body>
<?php
/* 立体的な角丸四角の枠をつける */
/* 余白 */
$padx = 10;
$pady = 10;
/* 角丸 */
$rx = 20;
$ry = 20;
/* 線の太さ */
$sw = 8;

$im = new Imagick("sf.jpg");
/* 枠部分を作成 */
$im2 = new Imagick();
$im2->newPseudoImage(
$im->getImageWidth(), $im->getImageHeight(), "xc:none");

$idraw = new ImagickDraw();
$idraw->setFillColor("none");
$idraw->setStrokeColor("white");
$idraw->setStrokeWidth($sw);
$idraw->roundrectangle($padx,$pady,
$im->getImageWidth()-$padx-1, $im->getImageHeight()-$pady-1,
$rx, $ry);
$im2->drawImage($idraw);

$im3 = $im2->clone();
$im3->blurImage(0,3,Imagick::CHANNEL_RED + Imagick::CHANNEL_GREEN
+ Imagick::CHANNEL_BLUE);
$im3->shadeImage(false, 135, 23);
$im2->compositeImage($im3, Imagick::COMPOSITE_HARDLIGHT, 0, 0);

/* 角丸四角で切り取り */
$im4 = new Imagick();
$im4->newPseudoImage(
$im->getImageWidth(), $im->getImageHeight(), "xc:none");
$idraw2 = new ImagickDraw();
$idraw2->setFillColor("white");
$idraw2->setStrokeColor("white");
$idraw2->setStrokeWidth($sw);
$idraw2->roundrectangle($padx,$pady,
$im->getImageWidth()-$padx-1, $im->getImageHeight()-$pady-1,
$rx, $ry);
$im4->drawImage($idraw2);
$im4->compositeImage($im, Imagick::COMPOSITE_IN, 0, 0,
Imagick::CHANNEL_ALL);

$im4->compositeImage($im2, Imagick::COMPOSITE_DEFAULT,
0, 0, Imagick::CHANNEL_ALL);

$im4->writeImage('sample887a.png');
$idraw2->destroy();
$idraw->destroy();
$im4->destroy();
$im3->destroy();
$im2->destroy();
$im->destroy();
?>
<img src="sample887a.png" /><br />

</body>
</html>


元画像(sf.jpg)


出力画像(sample887a.png)


関連項目
ImageMagickで画像に立体的な角丸四角の枠をつける

groovyでストロークにグラデーションをかける

groovyでストロークにグラデーションをかけるには、以下のコードを実行します。


import groovy.swing.j2d.*

def gr = new GraphicsRenderer()
gr.renderToFile("sample814a.png", 200, 200){
antialias("on")
rect( x:10, y:10, width:180, height:180,
arcWidth: 20, arcHeight:20,
fill: color("#fffff0"),
borderWidth: 6
){
borderPaint(){
gradientPaint( x1: 0, y1: 0, x2: 0, y2: 200,
color1: "#ffffe0", color2: "#f0d090")
}
}
}


出力画像(sample814a.png)
groovyでストロークにグラデーションをかけた画像

動作環境
Groovy1.6.0 Beta2, JDK1.6 Update11

関連項目
groovyで図形をグラデーションで塗りつぶす
SVGRendererでストロークにグラデーションをかける (SVGRendererでの同様の処理)

groovyで画像を上下反転・左右反転させる

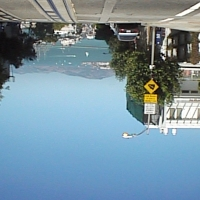
groovyで画像を上下反転・左右反転させるには、以下のコードを実行します。


import groovy.swing.j2d.*

def gr = new GraphicsRenderer()
gr.renderToFile("sample877a.png", 200, 200){
antialias("on")
rect( x: 0, y: 0, width: 200, height: 200,
borderColor: no){
texturePaint(x: 0, y: 0, file: 'sf.jpg' )
filters {
flip(operation:flipV)
}
}
}
gr.renderToFile("sample877b.png", 200, 200){
antialias("on")
rect( x: 0, y: 0, width: 200, height: 200,
borderColor: no){
texturePaint(x: 0, y: 0, file: 'sf.jpg' )
filters {
flip(operation:flipH)
}
}
}


元画像(sf.jpg)


出力画像1(sample877a.png)
GraphicsBuilderで上下反転させた画像

出力画像2(sample877b.png)
GraphicsBuilderで左右反転させた画像

動作環境
Groovy1.6.0 Beta2, JDK1.6 Update11

関連項目
groovyで炎のような画像を生成する

Tuesday, February 17, 2009

RMagickでイメージをずらしてタイル配置した背景画像を作成する

RMagickでイメージをずらしてタイル配置した背景画像を作成するには、以下のコードを実行します。

require 'RMagick'
include Magick

# イメージをずらして配置したイメージを作成
images1 = ImageList.new("flower1.png")
images1 << images1.roll(0, images1.rows/2);
img1 = images1.append(false);
# 作成した画像をテクスチャとして塗りつぶし
img2 = Image.new(200, 200, TextureFill.new(img1))
img2.write("sample777a.png")

exit


元画像(flower1.png)


出力画像(sample777a.png)


動作環境
ruby1.8.6, rmagick2.7.1

関連項目
RMagickで2つのイメージを交互に配置した画像を作成する

groovyで図形をグラデーションで塗りつぶす

groovyで図形をグラデーションで塗りつぶすには、以下のコードを実行します。


import groovy.swing.j2d.*

def gr = new GraphicsRenderer()
gr.renderToFile("sample813a.png", 200, 200){
antialias("on")
star( cx:100, cy:100, count:5, ir:40, or:90,
borderColor: color("#d0b070"),
borderWidth: 2
){
gradientPaint( x1: 0, y1: 0, x2: 0, y2: 200,
color1: "#ffffe0", color2: "#f0d090")
}
}


出力画像(sample813a.png)
groovyでスターをグラデーションで塗りつぶした画像

関連項目
groovyで図形を虹色グラデーションで塗りつぶす
groovyで図形を放射グラデーションで塗りつぶす

Monday, February 16, 2009

groovyで炎のような画像を生成する

groovyで炎のような画像を生成するには、以下のコードを実行します。


import groovy.swing.j2d.*
import com.jhlabs.image.*;

def gr = new GraphicsRenderer()
gr.renderToFile("sample876a.png", 200, 200){
antialias("on")
rect( x: 0, y: 0, width: 200, height: 200,
borderColor: no){
filters {
ac = new ArrayColormap()
ac.setColorRange(0, 100, 0x000000, (int)0xffff8040)
ac.setColorRange(101, 200, (int)0xffff8040, (int)0xffffff60)
ac.setColorRange(201, 255, (int)0xffffff60, (int)0xffffffe0)

fractalBrownianMotion(amount:1.0,
operation:basisNoise, scale:32, strecth:1.0,
angle:10, colormap: ac)
}
}
}


出力画像(sample876a.png)
groovyで生成した炎の画像

動作環境
Groovy1.6.0 Beta2, JDK1.6 Update11

関連項目
Java2DとJava Image Filters(pixels)を使用して炎のような画像を生成する (Java2Dによる同様の処理)
groovyで画像を2色グラデーションの画像に変換する (LinearColormapの使用例)
groovyで画像をぼかす

ImageMagickでグレースケール画像と反転したグレースケール画像が交互に配置された画像を生成する

ImageMagickでグレースケール画像と反転したグレースケール画像が交互に配置された画像を生成するには、以下のバッチファイルを実行します。


rem 環境によって変えてね
set im=C:\Progra~1\ImageMagick-6.4.4-Q16

%im%\convert.exe sample3b.jpg -colorspace gray ( sample3b.jpg -colorspace gray -negate ) -append sample772a.png
%im%\convert.exe sample3b.jpg -colorspace gray -negate ( sample3b.jpg -colorspace gray ) -append sample772b.png
%im%\convert.exe sample772a.png sample772b.png +append sample772c.png


出力画像(sample3b.jpg)


出力画像(sample772c.png)


Sunday, February 15, 2009

RMagickで濃淡模様が渦巻状に吸い込まれるような画像を作成する

RMagickで濃淡模様が渦巻状に吸い込まれるような画像を作成するには、以下のコードを実行します。


require 'RMagick'
include Magick

images1 = ImageList.new
images1 << size = "400x400" images2 =" ImageList.new" background_color = "#3070A0FF" background_color = "#403010FF" img =" images1.fx(" img2 =" img.implode(1).swirl(120).crop(100,100,200,200)">


出力画像(sample776a.png)
RMagickで生成した濃淡模様が渦巻状に吸い込まれる画像

動作環境
ruby1.8.6, rmagick2.7.1

関連項目
ImageMagickで、濃淡模様が渦巻状に吸い込まれるような画像を生成する (convertコマンドでの同様の処理)
RMagickで濃淡模様が中央に吸い込まれるような画像を作成する

groovyで日本語を描画する

groovy(GraphicsBuilder)で日本語を描画するには、以下のコードを実行します。


import groovy.swing.j2d.*

def gr = new GraphicsRenderer()
gr.renderToFile("sample812a.png", 200, 200){
antialias("on")
font(new java.awt.Font('MS 明朝', java.awt.Font.BOLD, 60))
text( x:0, y:70,
text: "日本語",
fill: color("#bbddff"),
borderColor: color("#103080"),
borderWidth: 1
)
}


出力画像(sample812a.png)
groovyで描画した日本語文字列

動作環境
Groovy1.6.0 Beta2, JDK1.6 Update11

関連項目
groovyで透明な文字列を描画する
groovyでバッジ画像を描画する