<!DOCTYPE html PUBLIC "-//W3C//DTD XHTML 1.0 Strict//EN"
 "http://www.w3.org/TR/xhtml1/DTD/xhtml1-strict.dtd">
<html xmlns="http://www.w3.org/1999/xhtml" lang="ja" xml:lang="ja"
 dir="ltr">
<head>
<title>sample889(ImageMagick6.4.8)</title>
</head>
<body>
<?php
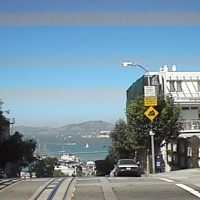
/* 画像を彩度の異なるボーダー画像にする */
$im = new Imagick("sf.jpg");
/* 最小ボーダー高さ */
$minh = 5;
/* 最大ボーダー高さ */
$maxh = 20;
/* 最小彩度 */
$minsat = 30;
/* 細大彩度 */
$maxsat = 130;

$ly = 0;
while($ly<$im->getImageHeight()){
 $height = rand($minh,$maxh);
 if( ($height+$ly) > $im->getImageHeight() ){
   $height = $im->getImageHeight() - $ly;
 }
 /* イメージを切り取り */
 $imt = $im->getImageRegion($im->getImageWidth(),
   $height,
   0, $ly);
 $imt->modulateImage(100, rand($minsat, $maxsat), 100);
 $im->compositeImage($imt,
   Imagick::COMPOSITE_DEFAULT, 0, $ly, Imagick::CHANNEL_ALL);
 $ly += $height;
 $imt->destroy();
}
$im->writeImage('sample889a.png');
$im->destroy();
?>
<img src="sample889a.png" /><br />

</body>
</html>
元画像(sf.jpg)

出力画像(sample889a.png)

関連項目
ImageMagickとPHPで青色っぽい部分とそれ以外の部分を色付けする
No comments:
Post a Comment