rem 環境によって変えてね
set im=C:\Progra~1\ImageMagick-6.3.9-Q16
rem 半透明の縁取りを透過PNGに追加
%im%\convert.exe sample2.png -matte -channel RGBA -blur 0x1 -fx "p==0?0:#bbddffa0" sample2.png -composite sample350a.png
rem 重ねあわせ例
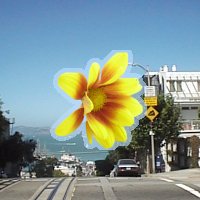
%im%\convert.exe sf.jpg sample350a.png -geometry +50+50 -composite sample350b.png
上記バッチファイルでは、元画像をぼかして、ピクセル値が0以上を指定の色に置き換え、
元画像と重ね合わせています。
元画像(sample2.png)

出力画像(sample350a.png)

重ね合わせ例(sample350b.png)

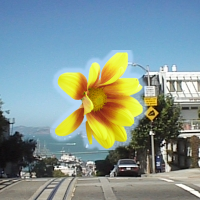
半透明の縁取りをぼかすには、以下のバッチファイルのように半透明の縁取りを作成してから
さらに-blurでぼかしをかけます(2番目の-blur 0x1オプション)。
rem 環境によって変えてね
set im=C:\Progra~1\ImageMagick-6.3.9-Q16
rem ぼかした半透明の縁取りを透過PNGに追加
%im%\convert.exe sample2.png -matte -channel RGBA -blur 0x1 -fx "p==0?0:#bbddffa0" -blur 0x1 sample2.png -composite sample350c.png
rem 重ねあわせ例
%im%\convert.exe sf.jpg sample350c.png -geometry +50+50 -composite sample350d.png
出力画像(sample350c.png)

重ね合わせ例(sample350d.png)

関連項目
ImageMagickで画像を縁取りする
ImageMagickで、透過PNGの切り抜き画像からシールっぽい画像を生成する
No comments:
Post a Comment