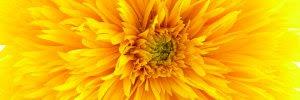
生成するには、以下のバッチファイルを実行します。
rem 環境によって変えてね
set im=C:\Progra~1\ImageMagick-6.3.7-Q16
%im%\convert.exe sample10.jpg -matte -channel A -fx
"sqrt(pow(150-i,2)+pow(50-j,2))<50?1:1-(sqrt(pow(150-i,2)+
pow(50-j,2))-50)/50" -channel rgba ( sample10.jpg
-modulate 100,100,60 ) +swap -composite sample258a.jpg
上記バッチファイルでは、座標(150,50)を中心に半径50ピクセルは
元画像そのままで、半径50ピクセルより大きい部分は徐々に
透明になっていくようにして、色調を変更した画像と重ね合わせています。
元画像(sample10.jpg)

出力画像(sample258a.jpg)

関連項目
ImageMagickでだんだんと白黒画像になっていくグラデーションを作成する
No comments:
Post a Comment