以下のバッチファイルを実行します。
rem 環境によって変えてね
set im=C:\Progra~1\ImageMagick-6.3.5-Q16
rem 青空をぼかす
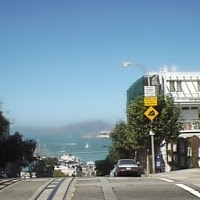
%im%\convert.exe sf.jpg -channel a -fx "(hue>0.47&&hue<0.69&&luminosity>0.6)?1:0" -channel rgba -blur 0x2 sf.jpg +swap -composite sample190a.jpg
rem 青空以外をぼかす
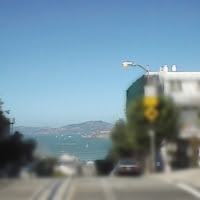
%im%\convert.exe sf.jpg -channel a -fx "(hue>0.47&&hue<0.69&&luminosity>0.6)?0:1" -channel rgba -blur 0x2 sf.jpg +swap -composite sample190b.jpg
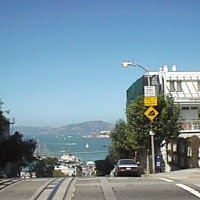
元画像(sf.jpg)

出力画像(sample190a.jpg)

出力画像(sample190b.jpg)

2008/01/04追記
ver6.3.7では、-matteオプションを追加します。
2008/07/13追記
ver6.4.0あたりからluminosityからlightnessに変わったので、以下のバッチを実行します。
rem 環境によって変えてね
set im=C:\Progra~1\ImageMagick-6.4.2-Q16
%im%\convert.exe sf.jpg -matte -channel a -fx "(hue>0.47&&hue<0.69&&lightness>0.6)?1:0" -channel rgba -blur 0x2 sf.jpg +swap -composite sample190a.jpg
%im%\convert.exe sf.jpg -matte -channel a -fx "(hue>0.47&&hue<0.69&&lightness>0.6)?0:1" -channel rgba -blur 0x2 sf.jpg +swap -composite sample190b.jpg
関連項目
ImageMagickで青っぽい部分以外が上下に揺れたような加工をする
No comments:
Post a Comment