以下のバッチファイルを実行します。
rem 環境によって変えてね
set im=C:\Progra~1\ImageMagick-6.3.4-Q16
rem 右にぼかしていく場合
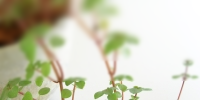
%im%\convert.exe sample8.jpg -blur 0x4 ( sample8.jpg -channel RGBA -fx "i<w*8/10?p:0" -blur 0x3 ) ( sample8.jpg -channel RGBA -fx "i<w*6/10?p:0" -blur 0x2 ) ( sample8.jpg -channel RGBA -fx "i<w*4/10?p:0" -blur 0x1 ) ( sample8.jpg -channel RGBA -fx "i<w*2/10?p:0" ) -flatten sample164a.png
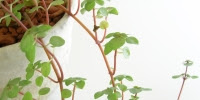
元画像(sample8.jpg)

出力画像(sample164a.png)
rem 左にぼかしていく場合
%im%\convert.exe sample8.jpg -blur 0x4 ( sample8.jpg -channel RGBA -fx "i>w*2/10?p:0" -blur 0x3 ) ( sample8.jpg -channel RGBA -fx "i>w*4/10?p:0" -blur 0x2 ) ( sample8.jpg -channel RGBA -fx "i>w*6/10?p:0" -blur 0x1 ) ( sample8.jpg -channel RGBA -fx "i>w*8/10?p:0" ) -flatten sample164b.png
出力画像(sample164b.png)
rem 下にぼかしていく場合
%im%\convert.exe sample8.jpg -blur 0x4 ( sample8.jpg -channel RGBA -fx "j<h*8/10?p:0" -blur 0x3 ) ( sample8.jpg -channel RGBA -fx "j<h*6/10?p:0" -blur 0x2 ) ( sample8.jpg -channel RGBA -fx "j<h*4/10?p:0" -blur 0x1 ) ( sample8.jpg -channel RGBA -fx "j<h*2/10?p:0" ) -flatten sample164c.png
出力画像(sample164c.png)
出力画像(sample164c.png)
rem 上にぼかしていく場合
%im%\convert.exe sample8.jpg -blur 0x4 ( sample8.jpg -channel RGBA -fx "j>h*2/10?p:0" -blur 0x3 ) ( sample8.jpg -channel RGBA -fx "j>h*4/10?p:0" -blur 0x2 ) ( sample8.jpg -channel RGBA -fx "j>h*6/10?p:0" -blur 0x1 ) ( sample8.jpg -channel RGBA -fx "j>h*8/10?p:0" ) -flatten sample164d.png
出力画像(sample164d.png)
出力画像(sample164d.png)

2008/01/04追記
ver6.3.7では、以下のバッチファイルを実行します。 -channel RGBAの前に-matteを追加しています。
rem 環境によって変えてね
set im=C:\Progra~1\ImageMagick-6.3.7-Q16
rem 右にぼかしていく場合
%im%\convert.exe sample8.jpg -blur 0x4 ( sample8.jpg -matte -channel RGBA
-fx "i<w*8/10?p:0" -blur 0x3 ) ( sample8.jpg -matte -channel RGBA
-fx "i<w*6/10?p:0" -blur 0x2 ) ( sample8.jpg -matte -channel RGBA
-fx "i<w*4/10?p:0" -blur 0x1 ) ( sample8.jpg -matte -channel RGBA
-fx "i<w*2/10?p:0" ) -flatten sample164a.png
rem 左にぼかしていく場合
%im%\convert.exe sample8.jpg -blur 0x4 ( sample8.jpg -matte -channel RGBA
-fx "i>w*2/10?p:0" -blur 0x3 ) ( sample8.jpg -matte -channel RGBA
-fx "i>w*4/10?p:0" -blur 0x2 ) ( sample8.jpg -matte -channel RGBA
-fx "i>w*6/10?p:0" -blur 0x1 ) ( sample8.jpg -matte -channel RGBA
-fx "i>w*8/10?p:0" ) -flatten sample164b.png
rem 下にぼかしていく場合
%im%\convert.exe sample8.jpg -blur 0x4 ( sample8.jpg -matte -channel RGBA
-fx "j<h*8/10?p:0" -blur 0x3 ) ( sample8.jpg -matte -channel RGBA
-fx "j<h*6/10?p:0" -blur 0x2 ) ( sample8.jpg -matte -channel RGBA
-fx "j<h*4/10?p:0" -blur 0x1 ) ( sample8.jpg -matte -channel RGBA
-fx "j<h*2/10?p:0" ) -flatten sample164c.png
rem 上にぼかしていく場合
%im%\convert.exe sample8.jpg -blur 0x4 ( sample8.jpg -matte -channel RGBA
-fx "j>h*2/10?p:0" -blur 0x3 ) ( sample8.jpg -matte -channel RGBA
-fx "j>h*4/10?p:0" -blur 0x2 ) ( sample8.jpg -matte -channel RGBA
-fx "j>h*6/10?p:0" -blur 0x1 ) ( sample8.jpg -matte -channel RGBA
-fx "j>h*8/10?p:0" ) -flatten sample164d.png


No comments:
Post a Comment