以下のバッチファイルを実行します。
rem 環境によって変えてね
set im=C:\Progra~1\ImageMagick-6.3.4-Q16
%im%\convert.exe sample3b.jpg -channel A -fx "abs(sin(pi*j/h))" sample157a.png
%im%\convert.exe -size 150x150 pattern:checkerboard -gravity center sample157a.png -composite sample157b.jpg
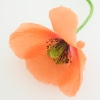
元画像(sample3b.jpg)

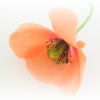
出力画像(sample157a.png)

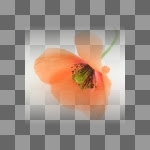
重ねあわせ例(sample157b.jpg)

2008/01/04追記
ver6.3.7では、以下のバッチファイルのように-channelの前に-matteを追加します。
rem 環境によって変えてね
set im=C:\Progra~1\ImageMagick-6.3.7-Q16
%im%\convert.exe sample3b.jpg -matte -channel A -fx "abs(sin(pi*j/h))" sample157a.png
%im%\convert.exe -size 150x150 pattern:checkerboard -gravity center sample157a.png -composite sample157b.jpg
関連項目
ImageMagickで上下・左右に半透明グラデーションをかける
No comments:
Post a Comment