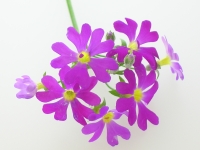
元画像(sample1.jpg)
以下のようにマスクを作成して、切り抜くことができます。
set im=C:\Progra~1\ImageMagick-6.3.0-Q16
rem マスクを作って。。。
%im%\convert.exe -size 200x150 -matte -channel RGBA xc:none -background none -fill white -stroke white -draw "roundrectangle 0,0 199,149 20,20" -negate mask.png
rem 画像を切り抜く。
%im%\convert.exe -size 200x150 sample1.jpg -matte mask.png -compose screen -composite sample1a.jpg
切り抜き後(sample1a.jpg)

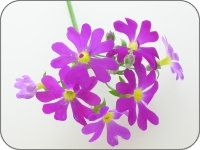
ちょっと白背景だと判りづらいので、枠線をつけてみる。
set im=C:\Progra~1\ImageMagick-6.3.0-Q16
rem マスクを作って。。。
%im%\convert.exe -size 200x150 -matte -channel RGBA xc:none -background none -fill white -stroke white -draw "roundrectangle 0,0 199,149 20,20" -negate mask.png
rem 画像を切り抜く+枠線描画。
%im%\convert.exe -size 200x150 sample1.jpg -matte mask.png -compose screen -composite -fill none -stroke #808080 -draw "roundrectangle 0,0 199,149 20,20" sample1b.jpg
切り抜き後(sample1b.jpg)

切り抜いた部分を透過GIFにしたい場合は。。。
rem 環境によって変えてね
set im=C:\Progra~1\ImageMagick-6.3.0-Q16
rem マスクを作って。。。
%im%\convert.exe -size 200x150 -matte -channel RGBA xc:none -background none -fill white -stroke white -draw "roundrectangle 0,0 199,149 20,20" mask2.png
rem 画像を切り抜く+枠線描画。
%im%\convert.exe -size 200x150 sample1.jpg -matte mask2.png -compose dst_in -composite -fill none -stroke #808080 -draw "roundrectangle 0,0 199,149 20,20" sample1c.gif
切り抜き後(sample1c.gif)
No comments:
Post a Comment