Monday, April 16, 2007

ImageMagickで画像をトリムする

ImageMagickを-trimと-fuzzオプションを使用して
以下のように画像をトリムすることができます。

rem 環境によって変えてね
set im=C:\Progra~1\ImageMagick-6.3.3-Q16
%im%\convert.exe sample11.jpg -fuzz 8%% -trim sample137a.jpg
%im%\convert.exe sample11.jpg -fuzz 15%% -trim sample137b.jpg

元画像(sample11.jpg)


出力画像(sample137a.jpg) -fuzz=8%


出力画像(sample137b.jpg) -fuzz=15%

Sunday, April 15, 2007

ImageMagickで左上と右下が角丸の四角を描画する

ImageMagickで左上と右下が角丸の四角を描画するには、
以下のバッチファイルを実行します。

rem 環境によって変えてね
set im=C:\Progra~1\ImageMagick-6.3.3-Q16
rem M moveto(x, y)
rem L lineto(x, y)
rem A elliptical arc(rx ry x-axis-rotation large-arc-flag sweep-flag x y)+
rem 単色
%im%\convert.exe -size 100x100 xc:none -fill #BBDDFF -draw "path 'M 0,10 A 10,10 0 0,1 10,0 L 99,0 L99,90 A 10,10 0 0,1 90,99 L 0,99 Z" sample140a.png

出力画像(sample140a.png)


rem グラデーション
%im%\convert.exe -size 100x100 xc:none -tile gradient:#BBDDFF-#E0F0FF -draw "path 'M 0,10 A 10,10 0 0,1 10,0 L 99,0 L99,90 A 10,10 0 0,1 90,99 L 0,99 Z" sample140b.png

出力画像(sample140b.png)


rem 切り取り
%im%\convert.exe -size 100x100 xc:none -channel RGBA -fill #ffffffff -draw "path 'M 0,10 A 10,10 0 0,1 10,0 L 99,0 L99,90 A 10,10 0 0,1 90,99 L 0,99 Z" sample2bg.jpg -compose src_in -composite sample140c.png

元画像(sample2bg.jpg)


出力画像(sample140c.png)

Wednesday, April 11, 2007

ImageMagickで画像を立体的な角丸四角に加工する

ImageMagickで画像を立体的な角丸四角に加工するには、
以下のバッチファイルを実行します。

rem 環境によって変えてね
set im=C:\Progra~1\ImageMagick-6.3.3-Q16
rem 角丸四角で切り抜いて
%im%\convert.exe -size 100x100 xc:none -channel RGBA -fill white -draw "roundrectangle 5,5 94,94 10,10" sample2bg.jpg -compose src_in -composite sample139a.png
rem 立体化
%im%\convert.exe -size 100x100 xc:none -fill white -draw "roundrectangle 5,5 94,94 10,10" -shade 135x23 -blur 0x2 -normalize sample139a.png -compose overlay -composite sample139b.png

元画像(sample2bg.jpg)


出力画像(sample139b.png)

Monday, April 09, 2007

ImageMagickで画像を光沢のある角丸四角にする

ImageMagickで画像を光沢のある角丸四角にするには、
以下のバッチファイルを実行します。

rem 環境によって変えてね
set im=C:\Progra~1\ImageMagick-6.3.3-Q16
rem M moveto(x, y)
rem L lineto(x, y)
rem A elliptical arc(rx ry x-axis-rotation large-arc-flag sweep-flag x y)
%im%\convert.exe sample2bg.jpg ( -size 100x30 xc:none -tile gradient:#D0D0D070-#FFFFFFD0 -draw "path 'M 99,0 L 0,0 L0,30 A 99,19 0 0,1 99,10 Z" ) -composite sample138.jpg
%im%\convert.exe -size 100x100 xc:none -channel RGBA -fill white -draw "roundrectangle 0,0 99,99 10,10" sample138.jpg -compose src_in -composite sample138.png

元画像(sample2bg.jpg)


出力画像(sample138/png)

Sunday, April 08, 2007

ImageMagickで円形に広がるアニメーションGIFを作成する

ImageMagickで円形に広がるアニメーションGIFを作成するには、
以下のバッチファイルを実行します。

rem 環境によって変えてね
set im=C:\Progra~1\ImageMagick-6.3.3-Q16

%im%\convert.exe -size 100x100 sample4.jpg ( xc:none -channel RGBA -fill #ffffffff -background none -draw "circle 60,60 50,50" -negate ) -background #ffffdd -compose screen -composite f1.png
%im%\convert.exe -size 100x100 sample4.jpg ( xc:none -channel RGBA -fill #ffffffff -background none -draw "circle 60,60 45,44" -negate ) -background #ffffdd -compose screen -composite f2.png
%im%\convert.exe -size 100x100 sample4.jpg ( xc:none -channel RGBA -fill #ffffffff -background none -draw "circle 60,60 40,40" -negate ) -background #ffffdd -compose screen -composite f3.png
%im%\convert.exe -size 100x100 sample4.jpg ( xc:none -channel RGBA -fill #ffffffff -background none -draw "circle 60,60 35,35" -negate ) -background #ffffdd -compose screen -composite f4.png
%im%\convert.exe -size 100x100 sample4.jpg ( xc:none -channel RGBA -fill #ffffffff -background none -draw "circle 60,60 30,30" -negate ) -background #ffffdd -compose screen -composite f5.png
%im%\convert.exe -size 100x100 sample4.jpg ( xc:none -channel RGBA -fill #ffffffff -background none -draw "circle 60,60 25,25" -negate ) -background #ffffdd -compose screen -composite f6.png
%im%\convert.exe -size 100x100 sample4.jpg ( xc:none -channel RGBA -fill #ffffffff -background none -draw "circle 60,60 20,20" -negate ) -background #ffffdd -compose screen -composite f7.png
%im%\convert.exe -size 100x100 sample4.jpg ( xc:none -channel RGBA -fill #ffffffff -background none -draw "circle 60,60 15,15" -negate ) -background #ffffdd -compose screen -composite f8.png
%im%\convert.exe -size 100x100 sample4.jpg ( xc:none -channel RGBA -fill #ffffffff -background none -draw "circle 60,60 10,10" -negate ) -background #ffffdd -compose screen -composite f9.png
%im%\convert.exe f1.png f2.png f3.png f4.png f5.png f6.png f7.png f8.png f9.png sample4.jpg -set delay 20 -loop 0 sample62.gif

元画像(sample4.jpg)
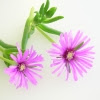

出力画像(sample62.gif)

Friday, April 06, 2007

ImageMagickとVBで画像の幅・高さを取得する

ImageMagickとVBで画像の幅・高さを取得するには、
以下のスクリプトを実行します。

Set im = CreateObject("ImageMagickObject.MagickImage.1")
width = im.identify("-format", "%w", "sample7.jpg")
WScript.StdOut.WriteLine "width:" & width
height = im.identify("-format", "%h", "sample7.jpg")
WScript.StdOut.WriteLine "height:" & height
Set im = Nothing

入力画像(sample7.jpg)

実行結果:
Microsoft (R) Windows Script Host Version 5.6
Copyright (C) Microsoft Corporation 1996-2001. All rights reserved.
width:150

Thursday, April 05, 2007

ImageMagickで任意の範囲の色相の色を残す

ImageMagickで任意の範囲の色相の色を残して、他は白黒化するには
以下のバッチファイルを実行します。

rem 環境によって変えてね
set im=C:\Progra~1\ImageMagick-6.3.3-Q16%im%\convert.exe sample8.jpg -fx "(hue>0.19&&hue<0.47)?p:(r+g+b)/3" sample135a.jpg

元画像(sample8.jpg)


出力画像では緑っぽい色が残り、その他は白黒になります。
出力画像(sample135a.jpg)


関連項目
ImageMagickで、青っぽい所以外を白黒にする
RMagickで緑っぽいところ以外をグレースケールにする (RMagickでの同様の処理)

Tuesday, April 03, 2007

ImageMagickで斜線グラデーションの背景画像を生成する

ImageMagickで斜線グラデーションの背景画像を生成するには、
以下のバッチファイルを実行します。

rem 環境によって変えてね
set im=C:\Progra~1\ImageMagick-6.3.1-Q16
%im%\convert.exe -size 300x20 xc:black -fx "(i+j)%%5==0?0:(sin(pi*i/w))*0.6" sample122a.jpg

出力画像(sample122a.jpg)


以下のように色をつけることもできます。
%im%\convert.exe -size 300x20 xc:black -fx "(i+j)%%5==0?0:(sin(pi*i/w))*0.6" -fill #ccddff -colorize 50% sample122b.jpg


出力画像(sample122b.jpg)


ImageMagickで半透明プレートを重ねたようなラベルを描画する

ImageMagickで半透明プレートを重ねたようなラベルを描画するには、
以下のバッチファイルを実行します。

rem 環境によって変えてね
set im=C:\Progra~1\ImageMagick-6.3.1-Q16
%im%\convert.exe -size 100x20 xc:white -fill #bbddff -stroke #ffffff -draw "opacity 0.5 roundrectangle 0,0 99,19 8,8" -background white -rotate 5 -fill #bbddff -stroke #ffffff -draw "opacity 0.5 roundrectangle 0,0 99,19 8,8" -background white -rotate 5 -draw "opacity 0.5 roundrectangle 0,0 99,19 8,8 fill #1060c0 text 20,15 'Information' " -rotate -4 sample121.png

出力画像(sample121.png)

Sunday, April 01, 2007

ImageMagickで段差のある領域に切り抜く

ImageMagickで段差のある領域に切り抜くには、以下のバッチを
実行します。

rem 環境によって変えてね
set im=C:\Progra~1\ImageMagick-6.3.1-Q16
rem マスクを作って
%im%\convert.exe -size 200x100 xc:none -channel RGBA ( -size 200x100 xc:black -fill white -draw "roundrectangle -10,-10 100,99 10,10 rectangle 100,0 199,99" -fill black -draw "roundrectangle 100,40 210,110 10,10" ) -fx "v.p.r==1?1:0" mask.png
rem 切り抜き
%im%\convert.exe mask.png sample8.jpg -compose src_in -composite sample120a.png

元画像(sample8.jpg)


出力画像(sample120a.png)

ImageMagickで画像に半透明ガラス枠をつける

ImageMagickで画像に半透明ガラス枠をつけるには、
以下のバッチファイルを実行します。

rem 環境によって変えてね
set im=C:\Progra~1\ImageMagick-6.3.1-Q16
%im%\convert.exe sample8.jpg -resize 220x120! -modulate 80 -bordercolor #000000 -border 10x10 -fill #ffffff -draw "rectangle 20,20 219,109" -blur 0x1 -gravity northwest -chop 10x10 -gravity southeast -chop 10x10 -gravity northwest sample8.jpg -geometry +10+10 -composite sample119a.jpg

元画像(sample8.jpg)


出力画像(sample119a.jpg)

Friday, March 30, 2007

ImageMagickで左上が明るいボタンを作成する

ImageMagickで左上が明るいボタンを作成するには、
以下のバッチファイルを実行します。

rem 環境によって変えてね
set im=C:\Progra~1\ImageMagick-6.3.1-Q16
rem ボタン画像1
%im%\convert.exe -size 100x20 xc:none -fill #fad759 -stroke #ffffff -draw "roundrectangle 0,0 99,19 8,8" ( -size 100x20 xc:#f8f8ffff -channel A -fx "((w-i)/w)*((h-j)/h)*0.6+0.3" ) -composite -stroke none -fill #a0a0a0 -draw "font-size 12 text 32,15 'Search'" ( +clone -background #000000 -shadow 40x2+3+3 ) +swap -background white -mosaic sample117a.gif
rem ボタン画像2
%im%\convert.exe -size 100x20 xc:none -fill #c0c0c0 -stroke #ffffff -draw "roundrectangle 0,0 99,19 8,8" ( -size 100x20 xc:#f8f8ffff -channel A -fx "((w-i)/w)*((h-j)/h)*0.6+0.3" ) -composite -stroke none -fill #707070 -draw "font-size 12 text 32,15 'Search'" ( +clone -background #000000 -shadow 40x2+3+3 ) +swap -background white -mosaic sample117b.gif
rem 2つのボタン画像を連結
%im%\convert.exe sample117a.gif sample117b.gif +append button.gif

出力画像(button.gif)

ImageMagickで鏡面映り込みを作成する - その3

ImageMagickで映りこんだ部分に斜線がはいった
鏡面映り込み画像を作成するには以下のバッチを実行します。

rem 環境によって変えてね
set im=C:\Progra~1\ImageMagick-6.3.1-Q16
rem 反転&半透明グラデーションをかけて
%im%\convert.exe sample4.jpg -bordercolor #c0c0c0 -border 1x1 -channel A -fx "u!=0?(j/h)*0.6:0" -fx "(i+j)%%5==0?0:p" -flip sample4t.png
rem 縦に連結+傾け
%im%\convert.exe sample4.jpg -bordercolor #c0c0c0 -border 1x1 sample4t.png -append -background none -shear 0x5 -gravity center -extent 220x220 sample115a.png
rem jpgで出力
%im%\convert.exe -size 220x220 xc:black sample115a.png -composite sample115b.jpg

元画像(sample4.jpg)


出力画像(sample115b.jpg)

ImageMagickで、重ねあわせ画像の形に合わせてグラデーションを描画する

重ねあわせ画像の形に合わせて、
2色のグラデーションを描画するには以下のバッチを実行します。
(以下の例では黄色と緑のグラデーションになっています)

rem 環境によって変えてね
set im=C:\Progra~1\ImageMagick-6.3.1-Q16
%im%\convert.exe -size 150x150 xc:#20c332 ( -size 150x150 xc:none -channel RGBA sample2.png -geometry +10+10 +composite -fx "p!=0?#FFFF10:0" -blur 0x15 ) -composite sample2.png -geometry +10+10 -composite sample113a.jpg

元画像(sample2.png)


出力画像(sample113a.jpg)


2008/01/04追記
Ver6.3.7では、以下のバッチファイルを実行します。
rem 環境によって変えてね
set im=C:\Progra~1\ImageMagick-6.3.7-Q16
%im%\convert.exe -size 150x150 xc:#20c332 ( -size 150x150 xc:none -matte -channel RGBA sample2.png -geometry +10+10 +composite -fx "p!=0?#FFFF10FF:0" -blur 0x15 ) -composite sample2.png -geometry +10+10 -composite sample113a.jpg


Saturday, March 24, 2007

ImageMagickで影を回転させる

ImageMagickで-rotateオプションで影を回転させて立体感を
出すこともできます。

rem 環境によって変えてね
set im=C:\Progra~1\ImageMagick-6.3.1-Q16
%im%\convert.exe -size 80x30 xc:none -fill #ffffff -draw "roundrectangle 5,5 79,29 4,4"
( +clone -background #000000 -shadow 30x2-3+1 -background none -rotate 5 )
+swap -background #bbddff -mosaic sample112.jpg

出力画像(sample112.jpg)


関連項目
ImageMagickで影の方向を変える

ImageMagickでラベルの付いた角丸四角画像を作成する

ImageMagickでラベルの付いた角丸四角画像を作成するには、
以下のバッチファイルを実行します。

rem 環境によって変えてね
set im=C:\Progra~1\ImageMagick-6.3.1-Q16
rem 左下だけ角丸の四角形
im%\convert.exe -size 60x24 xc:none -fill #000000 -draw "roundrectangle 0,0 59,23 4,4" -gravity northeast -chop 4x4 lbl.gif
rem 画像と重ねあわせを行い文字列を描画
%im%\convert.exe sample7.jpg -gravity northeast lbl.gif -composite +gravity -pointsize 16 -font "c:/winnt/fonts/msmincho.ttc" -fill #ffffff -draw @title.txt sample111a.png
rem 角丸四角に切り抜き
%im%\convert.exe -size 150x100 xc:none -channel RGBA -fill white -draw "roundrectangle 0,0 149,99 10,10" sample111a.png -compose src_in -composite sample111b.gif

文字列描画用ファイル(title.txt)UTF-8にて保存します。
text 100,16 'お花'

元画像(sample7.jpg)


出力画像(sample111.gif)

Friday, March 23, 2007

ImageMagickで光沢のあるタブ画像を生成する

ImageMagickで光沢のあるタブ画像を生成するには、
以下のバッチファイルを実行します。

rem 環境によって変えてね
set im=C:\Progra~1\ImageMagick-6.3.2-Q16
rem タブ画像1 - 非選択
%im%\convert.exe -size 100x30 xc:none -fill #c0c0c0 -stroke #ffffff -draw "roundrectangle 0,0 99,29 8,8" ( -size 94x10 xc:none -tile gradient:#c0c0c0-#f2f2f2 -stroke none -draw "roundrectangle 0,0 93,9 3,3" ) -geometry +3+3 -composite -stroke none -fill #909090 -draw "font-size 12 text 32,17 'Home'" ( +clone -background #000000 -shadow 40x2+3+3 ) +swap -background white -mosaic +tile -gravity south -chop 0x18 sample133a.gif
rem タブ画像1 - 選択
%im%\convert.exe -size 100x30 xc:none -fill #bbddff -stroke #ffffff -draw "roundrectangle 0,0 99,29 8,8" ( -size 94x10 xc:none -tile gradient:#bbddff-#f0f5ff -stroke none -draw "roundrectangle 0,0 93,9 3,3" ) -geometry +3+3 -composite -stroke none -fill #3070a0 -draw "font-size 12 text 32,17 'Home'" ( +clone -background #000000 -shadow 40x2+3+3 ) +swap -background white -mosaic +tile -gravity south -chop 0x18 sample133b.gif
rem タブ画像1 - hover
%im%\convert.exe -size 100x30 xc:none -fill #aaccf0 -stroke #ffffff -draw "roundrectangle 0,0 99,29 8,8" ( -size 94x10 xc:none -tile gradient:#aaccf0-#e0e5ff -stroke none -draw "roundrectangle 0,0 93,9 3,3" ) -geometry +3+3 -composite -stroke none -fill #3070a0 -draw "font-size 12 text 32,17 'Home'" ( +clone -background #000000 -shadow 40x2+3+3 ) +swap -background white -mosaic +tile -gravity south -chop 0x18 sample133c.gif
rem 3つのボタン画像を連結
%im%\convert.exe sample133a.gif sample133b.gif sample133c.gif +append tab1.gif

出力画像(tab1.gif)

Thursday, March 22, 2007

ImageMagickで端がグラデーションの半透明角丸四角形を描画する

ImageMagickで端がグラデーションの半透明角丸四角形を描画するには
以下のバッチファイルを実行します。

rem 環境によって変えてね
set im=C:\Progra~1\ImageMagick-6.3.1-Q16

%im%\convert.exe -size 120x120 xc:#ffffffff -channel RGBA -fill #000000FF -draw "roundrectangle 10,10 110,110 10,10" -blur 0x7 -crop 100x100+10+10 +repage -channel A -fx 0.3 sample109a.png
%im%\convert.exe -size 100x100 xc:none -channel RGBA -fill white -draw "roundrectangle 0,0 99,99 10,10" sample109a.png -compose src_in -composite sample109b.png
%im%\convert.exe sample1.jpg sample109b.png -geometry +10+10 -composite sample109c.jpg

出力画像(sample109b.png)


元画像(sample1.jpg)


出力画像(sample109c.jpg)

Monday, March 19, 2007

ImageMagickで消えていく影を描画する

Webページなどで見かける消えていく影を描画するには、
以下のコマンドを実行します。

rem 環境によって変えてね
set im=C:\Progra~1\ImageMagick-6.3.1-Q16
%im%\convert.exe -size 100x100 xc:none -fill white -draw "rectangle 0,0 49,99" -channel RGBA sample110a.png
%im%\convert.exe -size 100x100 xc:white -fill #fad759 -draw "rectangle 50,25 99,74" sample110a.png ( +clone -background #000000 -shadow 40x3+2+2 -crop 100x100 -fx "1-sin(pi*j/h)" ) +swap -mosaic sample110b.jpg

出力画像(sample110b.jpg)

ImageMagickで左上が明るい半透明グラデーションを描画する

ImageMagickで左上が明るい半透明グラデーションを描画するには、
以下のバッチファイルを実行します。

rem 環境によって変えてね
set im=C:\Progra~1\ImageMagick-6.3.1-Q16

%im%\convert.exe -size 80x40 xc:#f8f8ffff -channel A -fx "((w-i)/w)*((h-j)/h)*0.6+0.3" grad.png
rem 重ね合わせ
%im%\convert.exe sample2bg.jpg grad.png -geometry +10+10 -composite -fill #204070 -draw "font-size 14 text 16,26 'Flower'" sample107a.jpg

元画像(sample2bg.jpg)


出力画像(sample107a.jpg)

Sunday, March 18, 2007

ImageMagickで横線の入ったボタンを生成する

ImageMagickで横線の入ったボタンを生成するには、以下のバッチファイルを
実行します。

rem 環境によって変えてね
set im=C:\Progra~1\ImageMagick-6.3.2-Q16

rem ボタン画像1
%im%\convert.exe -size 100x20 xc:none -tile gradient:#c0c0c0-#f2f2f2 -stroke #ffffff -draw "roundrectangle 0,0 99,19 8,8" -fx "j%%2==0?p:p*0.8" +tile -stroke none -fill #a0a0a0 -draw "font-size 12 text 32,15 'Search'" ( +clone -background #000000 -shadow 40x2+3+3 ) +swap -background white -mosaic sample130a.gif

rem ボタン画像2
%im%\convert.exe -size 100x20 xc:none -tile gradient:#bbddff-#f0f5ff -stroke #ffffff -draw "roundrectangle 0,0 99,19 8,8" -fx "j%%2==0?p:p*0.8" +tile -stroke none -fill #3070a0 -draw "font-size 12 text 32,15 'Search'" ( +clone -background #000000 -shadow 40x2+3+3 ) +swap -background white -mosaic sample130b.gif

rem 2つのボタン画像を連結
%im%\convert.exe sample130a.gif sample130b.gif +append button.gif

出力画像(button.gif)

Friday, March 16, 2007

ImageMagickで消えていく角丸を描画する

ImageMagickで消えていく角丸を描画するには、
以下のコマンドを実行します。

rem 環境によって変えてね
set im=C:\Progra~1\ImageMagick-6.3.1-Q16

%im%\convert.exe -size 100x100 xc:none -channel RGBA -fill #ffffff -draw "roundrectangle 10,10 89,89 10,10" ( +clone -background #000000 -shadow 90x2+0+0 -channel A -fx "p*((w-20-i)/w)*((h-20-j)/h)" ) +swap -background white -flatten -gravity southeast -chop 20x20 +repage sample114a.jpg

出力画像(sample114a.jpg)

Thursday, March 15, 2007

ImageMagickで円をぼかした背景画像を描画する

ImageMagickで円をぼかした背景画像を描画するには、
以下のコマンドを実行します。

rem 環境によって変えてね
set im=C:\Progra~1\ImageMagick-6.3.1-Q16
%im%\convert.exe -size 150x100 xc:#bbddff -fill white -draw "ellipse 50,50 40,40 0,360" -blur 0x20 -fx "j%%3==0?p*1.1:p" sample104.jpg

出力画像(sample104.jpg)

Wednesday, March 14, 2007

ImageMagickで端がグラデーションの半透明四角形を描画する

ImageMagickで端がグラデーションの半透明四角形を描画するには、
以下のバッチファイルを実行します。

rem 環境によって変えてね
set im=C:\Progra~1\ImageMagick-6.3.1-Q16
%im%\convert.exe -size 120x120 xc:#ffffffff -channel RGBA -fill #000000FF -draw "rectangle 10,10 110,110" -blur 0x7 -crop 100x100+10+10 +repage -channel A -fx 0.3 sample108a.png

出力画像(sample108a.png)


重ねあわせ例1:
%im%\convert.exe sample1.jpg sample108a.png -geometry +10+10 -composite sample108b.jpg

出力画像(sample108b.jpg)


%im%\convert.exe -size 120x120 xc:#ffffffff -channel RGBA -fill #000080FF -draw "rectangle 10,10 110,110" -blur 0x7 -crop 100x100+10+10 +repage -channel A -fx 0.6 sample108c.png

出力画像(sample108c.png)


重ねあわせ例2:
%im%\convert.exe sample1.jpg sample108c.png -geometry +10+10 -composite sample108d.jpg

出力画像(sample108d.jpg)

Tuesday, March 13, 2007

ImageMagickで角丸四角画像の端をグラデーションで塗る

ImageMagickで角丸四角画像の端を
グラデーションで塗るには、以下のバッチファイルを実行します。

rem 環境によって変えてね
set im=C:\Progra~1\ImageMagick-6.3.1-Q16
%im%\convert.exe sample2bg.jpg -border 10x10 ( -size 120x120 xc:none -channel RGBA -fill white -draw "roundrectangle 10,10 110,110 10,10" -negate -fx "p!=1?0:#F0F0F0" -blur 0x3 ) -composite -crop 100x100+10+10 +repage -channel RGBA sample102a.png
%im%\convert.exe -size 150x100 xc:none -channel RGBA -fill white -draw "roundrectangle 0,0 149,99 10,10" sample102b.png -compose src_in -composite sample102b.gif

元画像(sample7.jpg)


出力画像(sample102b.gif)


2008/01/04追記
ver6.3.7では、以下のバッチファイルを実行します。
rem 環境によって変えてね
set im=C:\Progra~1\ImageMagick-6.3.7-Q16
%im%\convert.exe sample7.jpg -border 10x10 ( -size 170x120 xc:none -matte -channel RGBA -fill white -draw "roundrectangle 10,10 160,110 10,10" -negate -fx "p!=1?0:#404040FF" -blur 0x5 ) -composite -crop 150x100+10+10 -channel RGBA sample102b.png
%im%\convert.exe -size 150x100 xc:none -fill white -draw "roundrectangle 0,0 149,99 10,10" sample102b.png -compose src_in -composite sample102b.gif

関連項目
ImageMagickで画像の上下・左右をグラデーションで塗る


Monday, March 12, 2007

ImageMagickで画像の端をグラデーションで塗る

ImageMagickで画像の端をグラデーションで塗るには、
以下のバッチファイルを実行します。

rem 環境によって変えてね
set im=C:\Progra~1\ImageMagick-6.3.1-Q16
%im%\convert.exe sample2bg.jpg -border 10x10 ( -size 120x120 xc:none -channel RGBA -fill white -draw "rectangle 10,10 110,110" -negate -fx "p!=1?0:#F0F0F0" -blur 0x10 ) -composite -crop 100x100+10+10 sample101a.gif

元画像(sample2bg.jpg)


出力画像(sample101a.gif)

画像の端を暗くする場合は、以下のバッチファイルを実行します。
%im%\convert.exe sample7.jpg -border 10x10 ( -size 170x120 xc:none -channel RGBA -fill white -draw "rectangle 10,10 160,110" -negate -fx "p!=1?0:#404040" -blur 0x5 ) -composite -crop 150x100+10+10 sample101b.gif

元画像(sample7.jpg)


出力画像(sample101b.gif)


2008/01/04追記
Ver6.3.7では、以下のバッチファイルを実行します。
rem 環境によって変えてね
set im=C:\Progra~1\ImageMagick-6.3.7-Q16
%im%\convert.exe sample2bg.jpg -border 10x10 ( -size 120x120 xc:none -matte -channel RGBA -fill white -draw "rectangle 10,10 110,110" -negate -fx "p!=1?0:#F0F0F0FF" -blur 0x10 ) -composite -crop 100x100+10+10 +repage sample101a.gif
%im%\convert.exe sample7.jpg -border 10x10 ( -size 170x120 xc:none -matte -channel RGBA -fill white -draw "rectangle 10,10 160,110" -negate -fx "p!=1?0:#404040FF" -blur 0x5 ) -composite -crop 150x100+10+10 +repage sample101b.gif

関連項目
ImageMagickで画像の上下・左右をグラデーションで塗る