rem 環境によって変えてね
set im=C:\Progra~1\ImageMagick-6.3.8-Q16
rem 内側の影を生成
%im%\convert.exe -size 40x40 xc:#808080 -matte -channel rgba ( -size 40x40 xc:none -fill white +antialias -draw "ellipse 20,20,14,14,0,360" -negate -background #00000000 -transparent #000000ff ) ( +clone -shadow 80x4+1+1 ) +swap -mosaic -crop 40x40+0+0 +repage ( -size 40x40 xc:none -draw "ellipse 20,20,14,14,0,360" ) -compose dst_in -composite -matte -channel a -fx "p.r!=0?0.6:0" sample329a.png
rem 半透明グラデーションを傾けて、内側の合成、ハイライトの点を描画
%im%\convert.exe -size 30x30 xc:none -matte -channel rgba -fill gradient:#00000810-#FFFFFF80 -draw "ellipse 15,15,14,14,0,360" -virtual-pixel background -background none -rotate -30 -gravity center -crop 30x30+0+0 +repage sample329a.png -compose overlay -composite -normalize ( -size 30x30 xc:none -fill #FFFFFF -draw "ellipse 10,10,2,2,0,360" -blur 0x1 ) -composite sample329b.png
rem 水滴の外側の影を追加
%im%\convert.exe -size 40x40 xc:white -matte -channel rgba -fill black -draw "ellipse 20,20,14,14,0,360" -blur 0x2 -channel a -fx "p.r" -channel rgba -negate sample329b.png -gravity center -geometry -1-1 -composite sample329c.png
rem 画像と合成
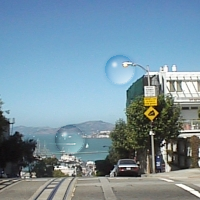
%im%\convert.exe sf.jpg sample329c.png -compose overlay -geometry +100+50 -composite sample329c.png -geometry +50+120 -composite sample329d.png
中間画像1(sample329a.png)内側の影を作成。

中間画像2(sample329b.png)半透明グラデーションを傾けて、内側の合成、ハイライトの点を描画。

中間画像3(Sample329c.png)水滴の外側の影を追加。

出力画像(sample329d.png)

No comments:
Post a Comment