フリーで配布されている大量のアイコン画像などの色を
変更したい場合は、ImageMagickで一括変換すると便利です。
今回のデータは、以下のサイトからダウンロードしました。
http://2pt3.com/news/twotone-icons-for-free/
元画像(cart.psd, cart.gif)
配布データがPhotoshopのデータ(*.psd)だった場合は、レイヤーごとにページが
作られるので必要ないレイヤーは削除したのち白色を任意の色に変更します。
(ちなみに、このデータの場合、カートのビットマップが書かれているレイヤーの
サイズが12x12なので16x16に変更しています。)
rem 環境によって変えてねset im=C:\Progra~1\ImageMagick-6.3.2-Q16
%im%\convert.exe cart.psd -delete 0 -delete 0 -background none -gravity center -extent 16x16 +repage -fx "p==#FFFFFFFF?#FAD759FF:#00000000" -background white cart.png
出力画像(cart.png)
psdのアイコン画像の白色をグラデーションで塗り替える場合は、以下のコマンドを実行します。
%im%\convert.exe cart.psd -delete 0 -delete 0 -background none -gravity center -extent 16x16 +repage ( -size 16x16 gradient:#80ffff-#e0ff80 ) -compose src_in -background white -composite cart2.png
出力画像(cart2.png)
元データが透過gifの場合は、透明色をいったん別の色で塗り替え後、
白色を任意の色で塗りつぶし、それ以外を透明色とします。
%im%\convert.exe cart.gif -channel RGBA -fx "p.a==0?#0000EEFF:p" -channel RGBA -fx "(p.r==1 && p.g==1 && p.b==1)?#FAD759FF:#00000000" cart3.png
出力画像(cart3.png)
gifアイコン画像の白色をグラデーションで塗りつぶす場合は、いかのコマンドを実行します。
%im%\convert.exe cart.gif -channel RGBA -fx "p.a==0?#0000EEFF:p" -channel RGBA -fx "(p.r==1 && p.g==1 && p.b==1)?#FFFFFFFF:#00000000" ( -size 16x16 gradient:#80ffff-#e0ff80 ) -compose src_in -composite cart4.png
出力画像(cart4.png)
Saturday, March 03, 2007
ImageMagickで画像を山折り・谷折りしたように処理する
ImageMagickで画像を山折り・谷折りしたように処理するには、
以下のバッチのようにnピクセル毎に(以下の例だと10ピクセル)、
明るさ変更+位置ずらしを行います。
rem 環境によって変えてね
set im=C:\Progra~1\ImageMagick-6.3.1-Q16
%im%\convert.exe sample7.jpg -fx "j%%20>9?p:p*0.8" -mattecolor black -frame 20x10 -fx "j%%20>9?p{i+j%%10-5,j}:p{i-j%%10+5,j}" sample92.gif
元画像(sample7.jpg)
出力画像(sample92.gif)
以下のバッチのようにnピクセル毎に(以下の例だと10ピクセル)、
明るさ変更+位置ずらしを行います。
rem 環境によって変えてね
set im=C:\Progra~1\ImageMagick-6.3.1-Q16
%im%\convert.exe sample7.jpg -fx "j%%20>9?p:p*0.8" -mattecolor black -frame 20x10 -fx "j%%20>9?p{i+j%%10-5,j}:p{i-j%%10+5,j}" sample92.gif
元画像(sample7.jpg)
出力画像(sample92.gif)
ImageMagickとVB Scriptを使用して複数画像を処理する
ImageMagickとVB Script(WSH)を使用して複数画像を処理することもできます。
以下のスクリプト(cv.vbs)では、指定されたディレクトリ内のすべての画像に
ロゴ画像を右下に重ね合わせます。
使用方法はコマンドプロンプトから以下のコマンドを実行します。
cscript cv.vbs <入力ディレクトリへのフルパス> <出力ディレクトリへのフルパス>
サンプル入力画像
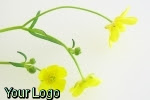
重ねあわせ画像(yourlogo.png)
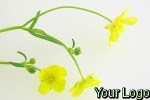
サンプル出力画像
関連項目
ImageMagickとWSHで、バッジ画像を生成する
以下のスクリプト(cv.vbs)では、指定されたディレクトリ内のすべての画像に
ロゴ画像を右下に重ね合わせます。
使用方法はコマンドプロンプトから以下のコマンドを実行します。
cscript cv.vbs <入力ディレクトリへのフルパス> <出力ディレクトリへのフルパス>
cv.vbsオプション用の変数(opts)を変更することで、他の画像処理を一度に実行することができます。
--------------------------------------------------------------------------
WScript.StdOut.WriteLine "source directory:" + WScript.Arguments(0)
WScript.StdOut.WriteLine "output directory:" + WScript.Arguments(1)
im = "C:\Progra~1\ImageMagick-6.3.2-Q16\convert.exe"
opts = "yourlogo.png -gravity southeast -composite"
Set objShell = WScript.CreateObject("WScript.Shell")
Set objFSO = WScript.CreateObject("Scripting.FileSystemObject")
Set objFolder = objFSO.GetFolder(WScript.Arguments(0))
for each objFile In objFolder.Files
WScript.StdOut.WriteLine "found:" & objFile
cs = im &amp; " " & objFile.path & " " & opts & " " & WScript.Arguments(1) & "\" & objFile.name
WScript.StdOut.WriteLine "processing an image..."
Set objExec = objShell.Exec(cs)
Do While objExec.Status = 0
WScript.Sleep 100
Loop
WScript.StdOut.WriteLine "result:" & objExec.ExitCode
next
--------------------------------------------------------------------------
サンプル入力画像
重ねあわせ画像(yourlogo.png)
サンプル出力画像
関連項目
ImageMagickとWSHで、バッジ画像を生成する
Friday, March 02, 2007
ImageMagickで旗がなびくようなGIFアニメーションを作成する
ImageMagickで旗がなびくようなGIFアニメーションを作成するには、
以下のバッチファイルを実行します。
rem 環境によって変えてね
set im=C:\Progra~1\ImageMagick-6.3.1-Q16
%im%\convert.exe sample7.jpg -fx (1+cos(pi*i/20)*0.2)*p -mattecolor black -frame 10x10 -fx p{i,j+cos(pi*i/20)*5} f1.gif
%im%\convert.exe sample7.jpg -fx (1+cos(pi*(i/20+0.4))*0.2)*p -mattecolor black -frame 10x10 -fx p{i,j+cos(pi*(i/20+0.4))*5} f2.gif
%im%\convert.exe sample7.jpg -fx (1+cos(pi*(i/20+0.8))*0.2)*p -mattecolor black -frame 10x10 -fx p{i,j+cos(pi*(i/20+0.8))*5} f3.gif
%im%\convert.exe sample7.jpg -fx (1+cos(pi*(i/20+1.2))*0.2)*p -mattecolor black -frame 10x10 -fx p{i,j+cos(pi*(i/20+1.2))*5} f4.gif
%im%\convert.exe sample7.jpg -fx (1+cos(pi*(i/20+1.6))*0.2)*p -mattecolor black -frame 10x10 -fx p{i,j+cos(pi*(i/20+1.6))*5} f5.gif
%im%\convert.exe sample7.jpg -fx (1+cos(pi*(i/20+2.0))*0.2)*p -mattecolor black -frame 10x10 -fx p{i,j+cos(pi*(i/20+2.0))*5} f6.gif
%im%\convert.exe sample7.jpg -fx (1+cos(pi*(i/20+2.4))*0.2)*p -mattecolor black -frame 10x10 -fx p{i,j+cos((pi*i/20+2.4))*5} f7.gif
%im%\convert.exe sample7.jpg -fx (1+cos(pi*(i/20+2.8))*0.2)*p -mattecolor black -frame 10x10 -fx p{i,j+cos(pi*(i/20+2.8))*5} f8.gif
%im%\convert.exe sample7.jpg -fx (1+cos(pi*(i/20+3.2))*0.2)*p -mattecolor black -frame 10x10 -fx p{i,j+cos(pi*(i/20+3.2))*5} f9.gif
%im%\convert.exe sample7.jpg -fx (1+cos(pi*(i/20+3.6))*0.2)*p -mattecolor black -frame 10x10 -fx p{i,j+cos(pi*(i/20+3.6))*5} f10.gif
%im%\convert.exe f1.gif f2.gif f3.gif f4.gif f5.gif f6.gif f7.gif f8.gif f9.gif f10.gif -set delay 15 -loop 0 sample91.gif
元画像(sample7.jpg)
出力画像(sample91.gif)
Thursday, March 01, 2007
ImageMagickで2色の波模様を描画する
ImageMagickで2色の波模様を描画するには、
以下のバッチファイルを実行します。
rem 環境によって変えてね
set im=C:\Progra~1\ImageMagick-6.3.1-Q16
%im%\convert.exe -size 100x100 xc:white ( xc:#ffffcc xc:#bbddff +append -resize 2x1 ) -fx v.p{1+cos(pi*i/15),0} sample90a.jpg
%im%\convert.exe -size 100x100 xc:white ( xc:#bb400c xc:#fee6e6 +append -resize 2x1 ) -fx v.p{1+cos(pi*i/15),0} sample90b.jpg
出力画像(sample90a.jpg)
出力画像(sample90b.jpg)
Wednesday, February 28, 2007
ImageMagickで吹き出しを作成する - その4
ImageMagickで影の部分だけ半透明の吹き出しPNG画像を
生成するには、以下のバッチファイルを実行します。
rem 環境によって変えてね
set im=C:\Progra~1\ImageMagick-6.3.1-Q16
%im%\convert.exe -size 200x150 xc:none -fill #fce769 -stroke #f6b739 -strokewidth 4 -draw "roundrectangle 5,5 194,99 20,20" -stroke #fce769 -draw "polygon 70,99 50,149 80,99" -stroke #f6b739 -draw "polyline 60,99 70,99 50,149 80,99 89,99" ( +clone -affine 1,0,0,0.5,0,75 -transform -shear 30x0 -channel RGBA -fx "p!=0?#D0D0D080:0" -blur 0x1 ) +swap -mosaic sample124a.png
出力画像(sample124a.jpg)
以下のコマンドで吹き出し画像を重ね合わせることができます。
%im%\convert.exe sample9.jpg sample124a.png -geometry +30+20 -composite sample124b.jpg
元画像(sample9.jpg)
出力画像(sample124b.jpg)
関連項目
ImageMagickで、半透明グラデーションの吹き出しを描画する
ImageMagickで、明度を変えた吹き出しを描画する
ImageMagickで画像に波模様をつける
ImageMagickで半透明のぼかし四角形と文字列を重ね合わせる
ImageMagickで半透明のぼかし四角形と文字列を重ね合わせるには、
以下のバッチファイルを実行します。
rem 環境によって変えてね
set im=C:\Progra~1\ImageMagick-6.3.1-Q16
%im%\convert.exe sample7.jpg ( -size 150x100 xc:none -fill #bbddff80 -channel RGBA -draw "rectangle 50,25 100,75" -blur 0x3 ) -composite -gravity center -fill white -annotate 0 "Sample" sample88.jpg
元画像(sample7.jpg)
出力画像(sample88.jpg)
Monday, February 26, 2007
ImageMagickで重ね合わせの位置を指定する
-gravityオプションを用いて、重ね合わせの位置を
指定することもできます(座標指定の場合は-geometryを使用します)。
元画像(sample7.jpg)
元画像2(yourlogo2.png)
指定することもできます(座標指定の場合は-geometryを使用します)。
元画像(sample7.jpg)
元画像2(yourlogo2.png)
rem 環境によって変えてね
set im=C:\Progra~1\ImageMagick-6.3.1-Q16
rem 左上に配置
%im%\convert.exe sample7.jpg yourlogo.png -gravity northwest -composite sample87a.jpg
左上に重ね合わせた画像(sample87a.jpg)
%im%\convert.exe sample7.jpg yourlogo.png -gravity north -composite sample87b.jpg
中央上に重ね合わせた画像(sample87b.jpg)
rem 右上に配置
%im%\convert.exe sample7.jpg yourlogo.png -gravity northeast -composite sample87c.jpg
右上に重ね合わせた画像(sample87c.jpg)
rem 中央左に配置
%im%\convert.exe sample7.jpg yourlogo.png -gravity west -composite sample87d.jpg
中央左に重ね合わせた画像(sample87d.jpg)
%im%\convert.exe sample7.jpg yourlogo.png -gravity center -composite sample87e.jpg
中央に重ね合わせた画像(sample87e.jpg)
rem 中央右に配置
中央に重ね合わせた画像(sample87e.jpg)
rem 中央右に配置
%im%\convert.exe sample7.jpg yourlogo.png -gravity east -composite sample87f.jpg
中央右に重ね合わせた画像(sample87f.jpg)
rem 左下に配置
中央右に重ね合わせた画像(sample87f.jpg)
rem 左下に配置
%im%\convert.exe sample7.jpg yourlogo.png -gravity southwest -composite sample87g.jpg
左下に重ね合わせた画像(sample87g.jpg)
rem 中央下に配置
左下に重ね合わせた画像(sample87g.jpg)
rem 中央下に配置
%im%\convert.exe sample7.jpg yourlogo.png -gravity south -composite sample87h.jpg
中央下に重ね合わせた画像(sample87h.jpg)
%im%\convert.exe sample7.jpg yourlogo.png -gravity southeast -composite sample87i.jpg
右下に重ね合わせた画像(sample87i.jpg)
関連項目
ImageMagickで重ね合わせの位置を指定する - その2
ImageMagickで2つの画像を重ね合わせる
右下に重ね合わせた画像(sample87i.jpg)
関連項目
ImageMagickで重ね合わせの位置を指定する - その2
ImageMagickで2つの画像を重ね合わせる
Sunday, February 25, 2007
ImageMagickで画像の上下左右を切り落とす
ImageMagickで画像の上下左右を切り落とすには、
-chopオプションを使用します。-gravityオプションを
併用することにより、切り落とす方向を指定できます。
元画像(sample4.jpg)
rem 環境によって変えてねset im=C:\Progra~1\ImageMagick-6.3.1-Q16
rem 左を10ピクセル切り落とし
%im%\convert.exe sample4.jpg -chop 10x0 sample86a.jpg
出力画像(sample86a.jpg)
rem 左を10ピクセル、上を20ピクセル切り落とし
%im%\convert.exe sample4.jpg -chop 10x20 sample86b.jpg
出力画像(sample86b.jpg)