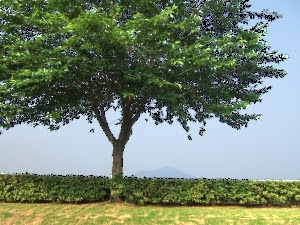
以下のバッチを実行します。
rem 環境によって変えてね
set im=C:\Progra~1\ImageMagick-6.3.5-Q16
%im%\convert.exe tree1.jpg -channel a -fx "(hue>0.47&&hue<0.69&&luminosity>0.5)?0:1" -channel rgb -fx "(hue>0.47&&hue<0.69&&luminosity>0.3)?0:p*2" tree1.jpg +swap -composite sample198a.jpg
上記のバッチでは、青色部分以外のところのピクセル値を2倍にしています。
元画像(tree1.jpg)

出力画像(sample198a.jpg)

2008/01/04追記
ver6.3.7では、以下のバッチのように-matteを追加します。
rem 環境によって変えてね
set im=C:\Progra~1\ImageMagick-6.3.7-Q16
%im%\convert.exe tree1.jpg -matte -channel a -fx "(hue>0.47&&hue<0.69&&luminosity>0.5)?0:1" -channel rgb -fx "(hue>0.47&&hue<0.69&&luminosity>0.3)?0:p*2" tree1.jpg +swap -composite sample198a.jpg
2008/07/13追記
ver6.4.0あたりからluminosityからlightnessに変わったので、以下のバッチを実行します。
rem 環境によって変えてね
set im=C:\Progra~1\ImageMagick-6.4.2-Q16
%im%\convert.exe tree1.jpg -matte -channel a -fx "(hue>0.47&&hue<0.69&&lightness>0.5)?0:1" -channel rgb -fx "(hue>0.47&&hue<0.69&&lightness>0.3)?0:p*2" tree1.jpg +swap -composite sample198a.jpg
関連項目
ImageMagickで逆光で暗くなった部分(青色部分以外)を明るくする - その2
No comments:
Post a Comment