Saturday, March 21, 2009

groovyで画像を球面処理する

groovyで画像を球面処理するには、以下のコードを実行します。


import groovy.swing.j2d.*

def gr = new GraphicsRenderer()
gr.renderToFile("sample840a.png", 300, 225){
antialias("on")
rect( x: 0, y: 0, width: 300, height: 225,
borderColor: no){
texturePaint(x: 0, y: 0, file: 'sf2.jpg' )
filters {
sphereDistort(refractionIndex: 1.9,
radius:80, centreX:0.6, centreY:0.6)
}
}
}


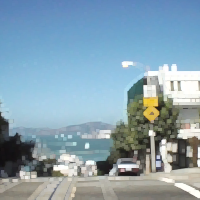
元画像(sf2.jpg)


出力画像(sample840a.png)
groovyで球面処理した画像

動作環境
Groovy1.6.0 Beta2, JDK1.6 Update11

関連項目
Java2DとJava Image Filters(pixels)を使用して球面処理をおこなう

Friday, March 20, 2009

ImageMagickで透明な文字列を描画する - その2

ImageMagickでantialiasを効かせて透明な文字列を描画するには、以下のバッチファイルを実行します。

rem 環境によって変えてね
set im=C:\Progra~1\ImageMagick-6.4.8-Q16

%im%\convert.exe sf.jpg ( -size 150x150 xc:white -matte -fill black -font Tahoma -pointsize 120 -gravity center -draw "text 0,0 'SF'" -channel a -fx "r" -channel rgb -fx "#BBDDFF" ) -composite sample904a.png

%im%\convert.exe sf.jpg ( -size 150x150 xc:white -matte -fill black -font Tahoma -pointsize 120 -gravity center -draw "text 0,0 'SF'" -channel a -fx "r*0.5" -channel rgb -fx "#000000" ) -composite sample904b.png

出力画像1(sample904a.png)


出力画像2(sample904b.png)


関連項目
ImageMagickで透明な文字列を描画する

groovyで画像の上に影付き文字列を描画する

groovyで画像の上に影付き文字列を描画するには、以下のコードを実行します。


import groovy.swing.j2d.*

def gr = new GraphicsRenderer()
gr.renderToFile("sample829a.png", 200, 200){
antialias("on")
image(file: "sf.jpg")
font(new java.awt.Font('Tahoma', java.awt.Font.BOLD, 26))
text( x:10, y:80,
text: "San Francisco",
fill: color("#ffffff"),
borderColor: no
){
filters {
dropShadow()
}
}
}


元画像(sf.jpg)


出力画像(sample829a.png)
groovyで描画した影付き文字列


動作環境
Groovy1.6.0 Beta2, JDK1.6 Update11

関連項目
groovyで透明な文字列を描画する
groovyで文字列をガラスのように描画する
groovyで立体的な文字列を描画する
groovyで画像の上に半透明の文字列を描画する
groovyで光の放射を描画する
SVGRendererで文字列にドロップシャドウをつける (SVGRendererでの同様の処理)

Thursday, March 19, 2009

groovyで光の放射を描画する

groovyで光の放射を描画するには、以下のコードを実行します。


import groovy.swing.j2d.*

def gr = new GraphicsRenderer()
gr.renderToFile("sample841a.png", 200, 200){
antialias("on")
rect( x: 0, y: 0, width: 200, height: 200,
borderColor: no){
texturePaint(x: 0, y: 0, file: 'sf.jpg' )
filters {
sparkle(rays:25, amount:55, randomness:50,
color: color("#ffffff"))
}
}
}


元画像(sf.jpg)


出力画像(sample841a.png)
groovyで描画した光の放射

動作環境
Groovy1.6.0 Beta2, JDK1.6 Update11

関連項目
Java2DとJava Image Filters(pixels)を使用して光の放射を描画する

ImageMagickとPHPで画像の端をグラデーションで着色する

ImageMagickとPHPで画像の端をグラデーションで着色するには、以下のコードを実行します。

<!DOCTYPE html PUBLIC "-//W3C//DTD XHTML 1.0 Strict//EN" "http://www.w3.org/TR/xhtml1/DTD/xhtml1-strict.dtd">
<html xmlns="http://www.w3.org/1999/xhtml" lang="ja" xml:lang="ja" dir="ltr">
<head>
<title>sample909(ImageMagick6.4.8)</title>
</head>
<body>
<?php
/* 画像の端をグラデーションで着色する */
/* 余白 */
$padx = 10;
$pady = 10;

$im = new Imagick("sf.jpg");
$w = $im->getImageWidth();
$h = $im->getImageHeight();

$im2 = new Imagick();
$im2->newPseudoImage($w, $h, "xc:none");
/* 余白を残して円描画 */
$idraw = new ImagickDraw();
$idraw->ellipse($w/2, $h/2, $w/2-$padx,
$h/2-$pady, 0, 360);
$im2->drawImage($idraw);
$im2->blurImage(0,30);
$im2->compositeImage($im, Imagick::COMPOSITE_IN, 0, 0,
Imagick::CHANNEL_ALL);

/* 着色 */
$im->tintImage(new ImagickPixel("#ddee33"),
new ImagickPixel("#f0f0f0"));

/* 重ね合わせ */
$im->compositeImage($im2, Imagick::COMPOSITE_OVER, 0, 0,
Imagick::CHANNEL_ALL);

$im->writeImage('sample909a.png');
$im2->destroy();
$im->destroy();
?>
<img src="sample909a.png" /><br />

</body>
</html>

元画像(sf.jpg)
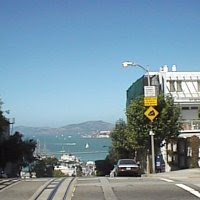

出力画像(sample909a.png)
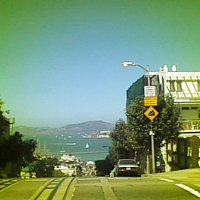

関連項目
ImageMagickで画像の端をグラデーションで着色する

Wednesday, March 18, 2009

groovyで画像にマキシマムフィルタを適用する

groovyで画像にマキシマムフィルタを適用するには、以下のコードを実行します。


import groovy.swing.j2d.*

def gr = new GraphicsRenderer()
gr.renderToFile("sample828a.png", 200, 200){
antialias("on")
rect( x: 0, y: 0, width: 200, height: 200,
borderColor: no){
texturePaint(x: 0, y: 0, file: 'sf.jpg' )
filters {
maximum()
}
}
}


元画像(sf.jpg)


出力画像(sample828a.png)
groovyでマキシマムフィルタを適用した画像

動作環境
Groovy1.6.0 Beta2, JDK1.6 Update11

関連項目
groovyで画像にミニマムフィルタをかける
groovyで画像にメディアンフィルタをかける
groovyで画像にマーブルフィルタをかける

Tuesday, March 17, 2009

im4javaで画像を連結する

im4javaで画像を連結するには、以下のコードを実行します。


import java.util.*;
import org.im4java.core.*;
import org.im4java.process.*;

// im4java-0.97.0-bin.tar.bz2を解凍してim4java-0.97.0.jarはclasspathに通す
public class Im4java7
{
public static void main(String args[])
throws Exception
{
try
{
// ConvertCmd convert = new ConvertCmd();
ImageCommand convert = new WindowsConvertCmd();

// 上下に連結
IMOperation op = new IMOperation();
op.addImage("sample3b.jpg");
op.addImage("sample6.jpg");
op.append();
op.addImage("sample944a.png");
convert.run(op);

// 左右に連結
IMOperation op2 = new IMOperation();
op2.addImage("sample3b.jpg");
op2.addImage("sample6.jpg");
op2.p_append();
op2.addImage("sample944b.png");
convert.run(op2);
}
catch(CommandException cex)
{
System.out.println(cex.getErrorText());
cex.printStackTrace();
}
}

// im4java 0.97
static class WindowsConvertCmd extends ImageCommand
{
public WindowsConvertCmd()
{
setCommand("cmd");
setCommand("/c");
setCommand("convert");
/* another way
setCommand("C:\\Program Files\\ImageMagick-6.4.9-Q16\\convert");
*/
}
}

}


元画像1(sample3b.jpg)


元画像2(sample6.jpg)


出力画像1(sample944a.png)
im4javaで縦に連結した画像

出力画像2(sample944b.png)
im4javaで横に連結した画像

関連情報
im4javaのまとめ

im4javaで画像を円形に切り取る

im4javaのホームページ
im4java

groovyで画像を油絵調に変換する

groovyで画像を油絵調に変換するには、以下のコードを実行します。


import groovy.swing.j2d.*

def gr = new GraphicsRenderer()
gr.renderToFile("sample842a.png", 300, 225){
antialias("on")
rect( x: 0, y: 0, width: 300, height: 225,
borderColor: no){
texturePaint(x: 0, y: 0, file: 'sf2.jpg' )
filters {
oil(range: 2, levels:8)
}
}
}


元画像(sf2.jpg)


出力画像(sample842a.png)
groovyで油絵調に変換した画像

動作環境
Groovy1.6.0 Beta2, JDK1.6 Update11

関連項目
groovyで万華鏡のような画像を生成する

Monday, March 16, 2009

ImageMagickで画像を磨りガラスのように切り取る

ImageMagickで画像を磨りガラスのようにざらざらとした質感で円形に切り取るには、以下のバッチファイルを実行します。

rem 環境によって変えてね
set im=C:\Progra~1\ImageMagick-6.4.8-Q16
%im%\convert.exe sf.jpg ( -size 200x200 xc:none -matte -channel rgba -fill white -draw "ellipse 100,100 85,85 0,360" -negate -blur 0x10 -spread 3 ) -composite sample899a.png

元画像(sf.jpg)


出力画像(sample899a.png)


関連項目
RMagickで画像を円形に切り取って周囲を磨りガラスのようにする (RMagickでの同様の処理)

groovyで万華鏡のような画像を生成する

groovyで万華鏡のような画像を生成するには、以下のコードを実行します。


import groovy.swing.j2d.*

def gr = new GraphicsRenderer()
gr.renderToFile("sample827a.png", 300, 225){
antialias("on")
rect( x: 0, y: 0, width: 300, height: 225,
borderColor: no){
texturePaint(x: 0, y: 0, file: 'sf2.jpg' )
filters {
kaleidoscope(sides:6, angle:20, angle2:50,
centreX:0.5, centreY:0.5, radius:100)
}
}
}


元画像(sf2.jpg)


出力画像(sample827a.png)
groovyで生成した万華鏡のような画像

動作環境
Groovy1.6.0 Beta2, JDK1.6 Update11

関連項目
Java2DとJava Image Filters(pixels)を使用して万華鏡のような画像を生成する

Sunday, March 15, 2009

im4javaで画像を円形に切り取る

im4javaで画像を円形に切り取るには、以下のコードを実行します。


import java.util.*;
import org.im4java.core.*;
import org.im4java.process.*;

// im4java-0.96.0-bin.tar.bz2を解凍してim4java-0.96.0.jarはclasspathに通す
public class Im4java6
{
public static void main(String args[])
throws Exception
{
try
{
IMOperation op = new IMOperation();
op.verbose();
op.addImage("sf.jpg");

IdentifyCmd identify = new IdentifyCmd();
ArrayListOutputConsumer output =
new ArrayListOutputConsumer();
identify.setOutputConsumer(output);
identify.run(op);
ArrayList<String> lines = output.getOutput();

int width = 0;
int height = 0;
for(String line:lines){
if( line.startsWith(" Geometry: ") ){
if( line.indexOf("+") != -1 ){
String sz[] = line.substring(
" Geometry: ".length(),
line.indexOf("+")
).split("x");
width = new Integer(sz[0]);
height = new Integer(sz[1]);
}
}
}

// 画像サイズと同じ大きさの円で切り取り
IMOperation op2 = new IMOperation();
op2.size(new Integer(width), new Integer(height));
op2.addImage("xc:none");
op2.alpha("activate").channel("rgba");
op2.fill("white");
op2.draw("ellipse " + (width/2) +
"," + (height/2) + "," + (width/2-1) +
"," + (height/2-1) + ",0,360");
op2.addImage("sf.jpg");
op2.compose("src_in").composite();
op2.addImage("sample923a.png");

// ConvertCmd convert = new ConvertCmd();
ImageCommand convert = new WindowsConvertCmd();
convert.run(op2);


}
catch(CommandException cex)
{
System.out.println(cex.getErrorText());
cex.printStackTrace();
}
}

// im4java 0.96
static class WindowsConvertCmd extends ImageCommand
{
public WindowsConvertCmd()
{
setCommand("cmd");
setCommand("/c");
setCommand("convert");
/* another way
setCommand("C:\\Program Files\\ImageMagick-6.4.9-Q16\\convert");
*/
}
}

}


元画像(sf.jpg)


出力画像(sample923a.png)


関連情報
im4javaのまとめ

im4javaで画像を角丸四角に切り取る

im4javaのホームページ
im4java

ImageMagickとPHPで画像をタイル配置した角丸四角で切り取る

Imagickで画像をタイル配置した角丸四角で切り取るには、以下のコードを実行します。


<!DOCTYPE html PUBLIC "-//W3C//DTD XHTML 1.0 Strict//EN"
"http://www.w3.org/TR/xhtml1/DTD/xhtml1-strict.dtd">
<html xmlns="http://www.w3.org/1999/xhtml" lang="ja" xml:lang="ja"
dir="ltr">
<head>
<title>sample908(ImageMagick6.4.8)</title>
</head>
<body>
<?php
/* 画像をタイル配置した角丸四角で切り取る */
/* 角丸四角サイズ */
$rw = 30;
$rh = 20;
/* 余白 */
$padx = 1;
$pady = 1;
/* 角丸サイズ */
$rx = 5;
$ry = 5;

/* 角丸四角イメージ作成 */
$idraw = new ImagickDraw();
$idraw->pushPattern('tile', 0, 0, $rw, $rh);
$idraw->roundrectangle($padx,$pady,
$rw-$padx-1, $rh-$pady-1, $rx, $ry);
$idraw->popPattern();

$im = new Imagick("sf.jpg");
/* タイルパターンにして配置 */
$idraw->setFillPatternURL('#tile');
$im2 = new Imagick();
$im2->newPseudoImage($im->getImageWidth(),
$im->getImageHeight(), "xc:none");
$idraw->rectangle(0, 0, $im->getImageWidth(),
$im->getImageHeight());
$im2->drawImage($idraw);

$im2->compositeImage($im,
Imagick::COMPOSITE_IN, 0, 0, Imagick::CHANNEL_ALL);
$im2->writeImage('sample908a.png');
$im2->destroy();
$im->destroy();
?>
<img src="sample908a.png" /><br />

</body>
</html>


元画像(sf.jpg)


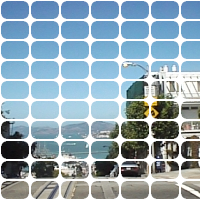
出力画像(sample908a.png)


関連項目
ImageMagickで画像を角丸四角タイルパターンで切り取る (convertコマンドでの同様の処理)
ImageMagickとPHPで画像をタイル配置する

groovyで画像を点状に変換する

groovyで画像を点状に変換するには、以下のコードを実行します。


import groovy.swing.j2d.*

def gr = new GraphicsRenderer()
gr.renderToFile("sample843a.png", 200, 200){
antialias("on")
rect( x: 0, y: 0, width: 200, height: 200,
borderColor: no){
texturePaint(x: 0, y: 0, file: 'sf.jpg' )
filters {
pointillize(fadeEdges: false,
fuzziness:0.2)
}
}
}


元画像(sf.jpg)


出力画像(sample843a.png)
groovyで点状に変換した画像

動作環境
Groovy1.6.0 Beta2, JDK1.6 Update11

関連項目
Java2DとJava Image Filters(pixels)を使用して画像を点状に変換する